Looking for a simple way to add rustic charm to your bedroom without spending a fortune? When Dean and I were searching for the perfect headboard, we wanted something that felt warm and inviting but didn’t come with a hefty price tag. That’s when we decided to make our own! For just $50 and a bit of DIY effort, you can create a beautiful rustic wood headboard using new wood (or pallet wood if that’s more your style). It’s the perfect solution for anyone who loves the character of weathered wood but needs an affordable, quick alternative.

When Dean and I tackled this project, we wanted the warmth and character of rustic wood without the hassle of sourcing real reclaimed materials. This headboard was the perfect solution! If you’re curious about the best way to stain wood for a rustic finish, check out my How to Make New Wood Look Old post for step-by-step tips and techniques.
Rustic Wood Headboard Tutorial
We loved this headboard so much that we not only created it in our wee bunglow – we also recreated it when we moved into our backsplit a few years later!
Materials:
- Wood: Twelve 1″x6″x8′ spruce boards cut to 5′ lengths (Home Depot can cut them for you)
- 2″ flat head screws
- Minwax Special Walnut Stain
- Lint-free rag
Tools:
- Palm sander
- Stud finder
- Pencil
- Level
- Drill
Instructions:
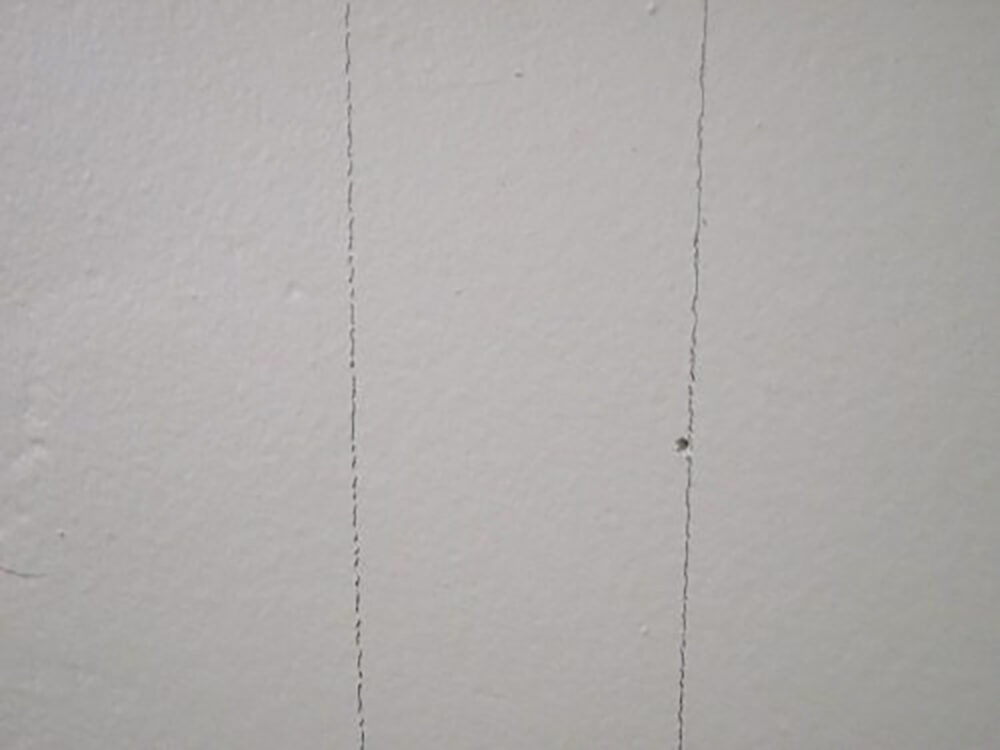
1. Find the Studs
Decide where to position your headboard. Use a stud finder to locate the studs and mark vertical lines with a pencil.
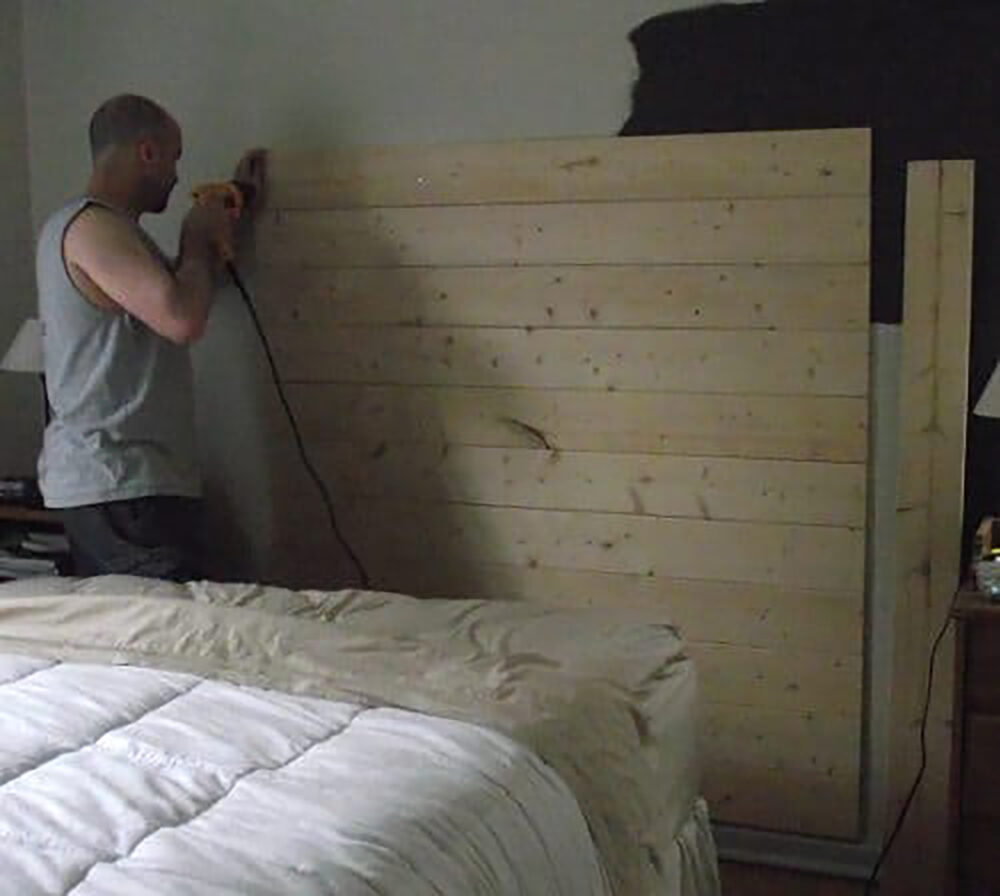
2. Prep the Wood
Sand the boards to remove splinters or rough spots, whether you’re using new wood or pallet wood. A smooth finish is key to making it look polished and professional.
3. Attach the Boards
Starting at the bottom (near the baseboard or floor), screw the first board to the wall along the stud marks. Stack and secure the remaining boards one by one, making sure they’re level as you go.
4. Stain the Wood
In a well-ventilated space, rub the stain into the wood using a lint-free rag. To avoid staining the wall, tape off the edges or place a barrier between the headboard and the wall. You can stain the boards before attaching them to the wall or after—they both work!
TIP: If I were to create this project again, I’d stain the board before attaching them to the wall! We had to sleep in the living room for a few nights after the original project because of the smell!

For detailed staining tips to achieve the perfect rustic finish, visit my How to Stain Wood tutorial.
Cost Breakdown for New Wood:
- Wood: $36 (12 boards at $2.97 each)
- Stain: ~$4.50 (half a small container, if you don’t already have it)
- Screws: $6
Total: $46.50 (plus tax)
FAQs About Making a Rustic Wood Headboard
Yes, pallet wood is a great option for adding authentic rustic character. Just be sure to clean and sand it thoroughly to remove any rough spots or contaminants.
For this design, yes. Mounting directly to the wall ensures stability. If you’d prefer a freestanding option, you’ll need to adjust the design to include a frame.
I love using Minwax Special Walnut for its warm, earthy tone, but any medium to dark stain will give you that cozy, rustic vibe.
Since it’s mounted to the wall, it’s not portable. However, the materials are inexpensive, so it’s easy to recreate in a new space if needed.
It’s optional! For a rustic look, I usually skip sealing, but you can add a clear coat for extra durability if desired.
More DIY Furniture
- DIY Industrial Wood and Metal Shelves
- DIY Brickmaker’s Coffee Table
- DIY Balustrade Coffee Table + Where to Get Balustrades!
- Ikea Hack: DIY Rustic Cube Shelves
- How to Make a Reclaimed Wood Headboard With New Wood For Less Than $50
- DIY Blanket Ladder Made with 2 x 4s
- DIY Faux Fireplace Mantel
- How to Build a Faux Mantel Shelf (DIY Mantel Shelf Tutorial)
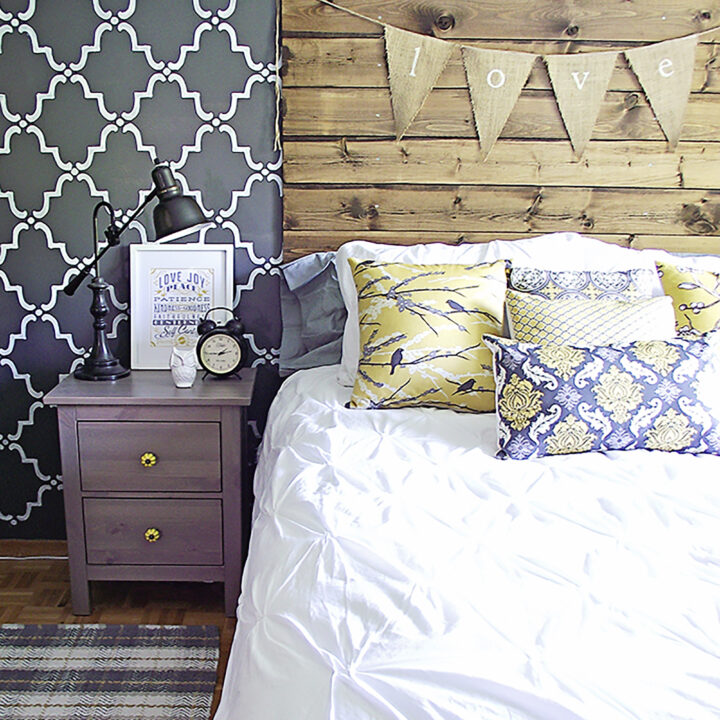
How to Make Your Own Rustic Wood Headboard
Learn how to make a rustic wood headboard for under $50. Easy DIY tutorial with supplies, instructions, and tips for a beautiful finish!
Materials
- Twelve 1″x6″x8′ spruce boards cut to 5′ lengths
- 2″ flat head screws
- Minwax Special Walnut Stain
- Lint-free rag
Tools
- Palm sander
- Stud finder
- Pencil
- Level
- Drill
Instructions
- Find the studs:
Use a stud finder to locate the wall studs where you’ll mount the headboard. Mark the stud positions with a pencil. - Prepare the wood:
Sand all boards to ensure a smooth, splinter-free surface - Attach the boards:
Starting at the baseboard or floor, screw the first board to the wall along the stud marks. Stack and secure the remaining boards one by one, ensuring they’re level - Stain the wood:
Apply the stain evenly with a lint-free rag. Protect the wall with tape or a barrier. Allow the stain to dry fully. For darker tones, apply additional coats.
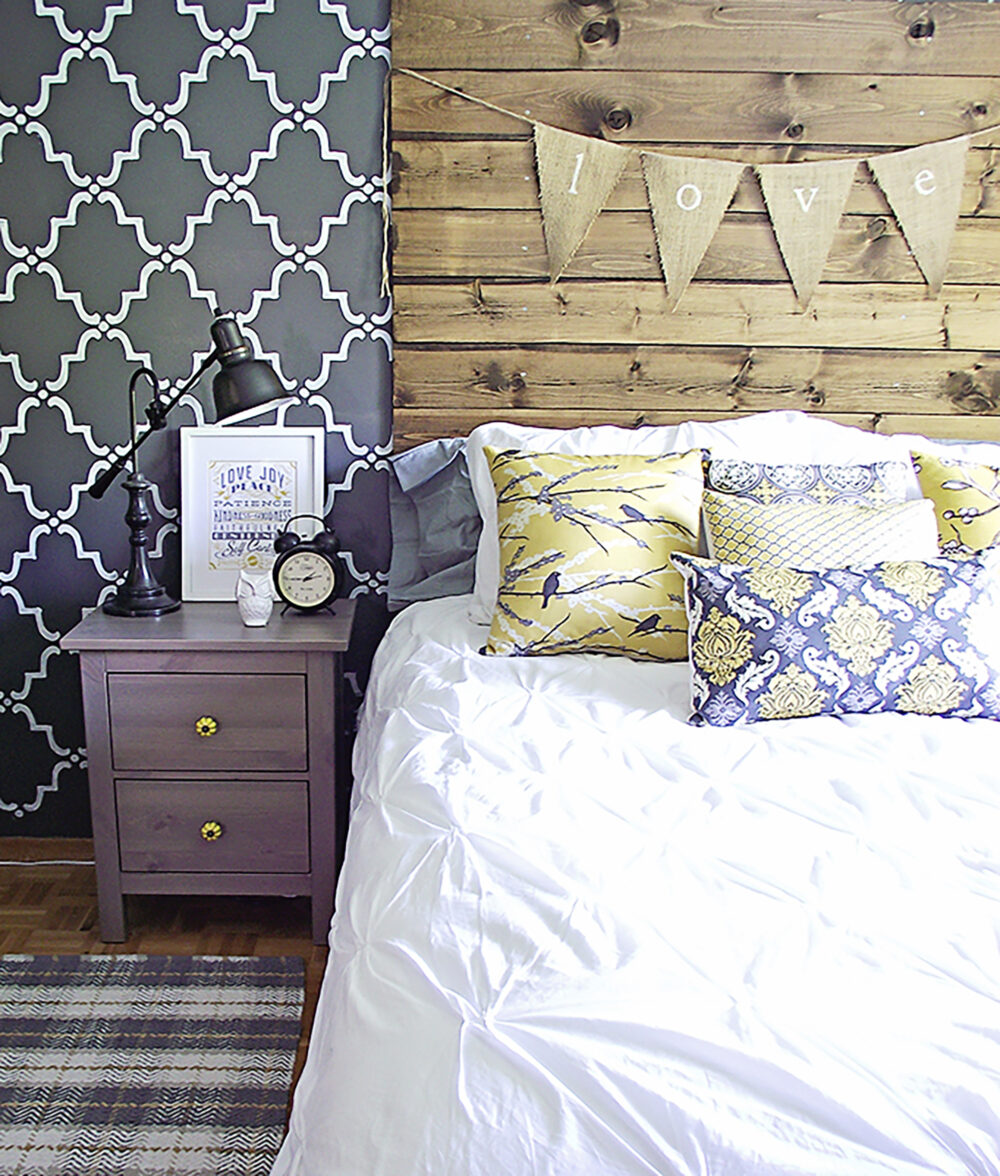
This DIY rustic wood headboard is one of my favorite projects for adding warmth and charm to a bedroom on a budget. It’s simple, affordable, and totally customizable to your style. If you give this a try, I’d love to see how yours turns out—share your results in the comments!

Want to see more content like this in your Google searches?
This button tells Google that Home Made Lovely is a source you like, so it can show you more of it.
I LOVE your headboard! I need a headboard so bad. I’m planning to DIY one…and I love how yours turned out! 🙂
Thank you Erin!!!
I LOVE that you did it with new wood! I was just having the conversation the other day that I want a reclaimed wood headboard… but we’re not in an awesome area like LA where scrap wood yards are turning over new materials on like a daily basis. I was nervous about the wood becoming rotted from spoiling in the rain… {yuck}
So! Figured I’d just buy new wood, and make it look old… fantttastic!
I love your simple idea of attaching it to the wall, rather than the bed.
Yup! Following your lead and keeping this in my mind while I do mind.
thanks so much!
Pamela @ pbjstories.blogspot.com
Thank you Pamela. It’s unreal how much difference the stain makes! S.
What an awesome idea!!! I love the impressiveness that it adds to your bed. Thanks for sharing the tutorial! Great job!!!!
xoxo laurie
Thank you Laurie. We lurve the space now too! S.
Love the cheat! Reclaimed wood may be the rage…but it’s just not always that easy to find! Thanks for sharing how to get the look!
Not always easy to find or easy on the wallet! Thank you for commenting! S.
Absolutely beautiful! I’m going to have to pass this idea along to a girlfriend who is looking for a headboard idea for her son. Thanks for the inspiration.
You are so welcome! Thank you for taking the time to comment Bethany. S. 🙂
I love this! I featured your headboard on my Friday 5! Thanks for sharing!
Thank you very much!!!
I am in love! My daughter needs a King headboard – thinking this would be an awesome design. Thanks for sharing!
It is such a relaxing headboard!!
Your headboard is amazing. I love the contrast with the pillows on your bed. Good job!
Thank you so much Jon’el!! S.
This is a great idea! You mentioned that the minwax was stinky. Does the finished headboard still smell like the minwax or does the smell go away once it’s dry?
Good question Krista! No, the stain no longer smells. Our unscientific explanation is that once the thinners in the stain dry, the smell goes away. Really it doesn’t smell at all after the stain is comepletely dry. 🙂
Hi I just made a headboard similar to your and I love it. I let it dry out side for a couple days and today I let it sit in direct sunlight all day. It feels dry to the touch but still smells a bit. Do u thinks its ok ? I have an 11 month old that sleeps in the room with us. I have the bathroom fan on and tge celing fan. It just stll smells kinda.
Hi Anthony,
That is going to have to be totally up to you and what you’re comfortable with. The smell does eventually totally go away – and I have a very sensitive nose. But with babe in room, be careful. Their lungs are littler than ours!
S.
This is beautiful! And that says it all 😉
Aw, thank you Korrie! S.
Wow! I’m loving this. I want to build my own coffee table and this is exactly what I want the top to look like! And now I know what kind of wood to get too! Thanks so much for sharing 🙂
Thank you Ashleigh! The stained spruce does make for a beautiful reclaimed wood look. Would love to see your coffee table when you finish it! S.
Absolutely love what you did I just purchased and old door for a headboard and love the idea!!!
Oh a door would be lovely too! We would love to see what you come up with. S.
Could you just put two 2 x 4’s vertically up the back and affix the boards to that instead of directly to the wall so it is easily removed? Just curious…
Might need to do this with my little boys big boy bed but it is a rental so I don’t to put in on the wall…
Thanks.
You totally could. Just be sure it’s going to be safe and not fall over if the bed gets scooched out from the wall (by playing, jumpin and other such things small children tend to do!). 🙂 Maybe secure with an ikea strap that’s made for securing bookshelves to the wall?
Love this project, your style is awesome. You had me at the LOVE banner! That’s what I can my husband. Im a follower now because just the few minutes looking around, we have similar thrifty ideas. Come on over and visit me too!
MJ
Lucky 7 Design
What color stain did you use, it’s very subtle. Hope to hear back.
I see your stain color listed now, thanks.
love your headboard! what a great way to keep consumption of new materials to a minimum when decorating.
Kelly
http://www.refreshdesigns.ca
LOVE this!!! Well done!
Oh my gosh, I can’t tell you have much i LOVE this idea!! I was googling for something similiar and love how yours turned out!! Thanks for sharing. Can’t wait to make mine.
Thank you Jennifer!! I’d love to see pics of yours when you’re finished. S. 🙂
Fabulous! I love the fact that the lumber is new. This just goes to prove what character new wood can have. Gorgeous photo!
Shared this on FJI Facebook for SNS 87. 🙂
Donna
Thank you Donna! I really appreciate that. 🙂 S.
What color is the minwax stain you used? LOVE IT!!!!
We used Special Walnut. 🙂
Love this! 🙂 I’ve featured this post on Craft Gossip here:
http://homeandgarden.craftgossip.com/rustic-headboard/
If you would like a “featured by” button, you can grab one here:
http://homeandgarden.craftgossip.com/grab-a-craft-gossip-button/
Thank you Amanda!!! I’ll come over in a bit and have a look.
Would it work if I stained the wood first and then nail it? I’m worried about getting it on the wall:)
Absolutely…in fact I would recommend staining it first. Truth be told we were just too lazy and wanted to get it up on the wall pronto!!! 😉
I absolutely love it! How do you think it would look if we did a white, shabby-chic look? Im just wondering if doing a wood colored headboard would go with my white furniture. Maybe I’ll give it a try! THanks for the inspriation!
I bet it would look gorgeous in shabby chic white!!!!! Maybe dry brush it?? Please show us pics when you’re done!
I actually just had a bed made and want to do the reclaimed look. My wood is cypress. Will the stain react differently to cypress? Do you have any suggestions for making new cypress look like old cypress? Thanks so much.
Stain will always react slightly different depending on the wood. I would test the stain on a scrap piece or somewhere not visible on your bed to see how you like it.
So simple yet so elegant and beautiful!
My sister just made a burlap light cover for her bedroom, I will have to show her this idea. Great job!
love this! great work!
This is what we need – an insight to make eoveryne think
YVi6vb ublukgeytfss
Did you use a finish over the stain? I just stained wood for a headboard like this and am wondering if it needs a finish like polyurethane or something…thanks! Love it!
Nope, nothing over the stain!
I am very ecietxd about your post. I found Annie Sloan Chalk Paint at a local antique mall! It was $38.50 per can. I don’t think that is a bad mark-up at all. It is much better than a large shipping fee. I urge everyone to check their local antique shops…you never know! Hugs, Jan
I’m totally using your idea to put a new top on my old coffee table. I just happen to already have a headboard that I love or I’d do this too!
Have fun with it!!!
I love this headboard so much!! What a great idea! The way you styled it with the burlap love banner and pillows is just right. Great work!
We adore our headboard too – it’s finally the perfect fit for our style!
Where did you get the great bedside lamps?
They are from Home Depot!
Im working on this right now and im excited to get it up,simple and unique .
Awesome! Have fun!
Love this! I will be making one for my guest room as soon as I can find the time!
I saw an even simpler version where someone just hung there’s on the wall with those 3M Command strips!!! No tools required!
Question- about how big are the burlap triangles? Thanks!!
Um, good question. I think they’re about 7″ from point to center of the top and maybe 5″ wide (at the top).
How did you stain the headboard? How dark did it turn out? Am I correct when I say that it looks on more of the lighter side than darker? I just had my hubby stain mine with the same color and it looks way darker:/ He only did one coat, but he used one of those foam brushes. Do you think that would make a difference? Thanks!
Did your hubby wipe off the excess stain with a lint-free rag after a few minutes? If he didn’t, that may account for how dark it is. And yes a foam brush will put a LOT of stain onto the wood!
I don’t think he did. I think we are going to try and sand it and restain it. How did you put your stain on? Did you use a rag to wipe it on and then another to wipe it off? Thank you for your help!!
Often I will use a foam brush to put it on and a rag to wipe it off. If you don’t like how dark the Dark Walnut is, you could try Special Walnut or Puritan Pine instead.
Hmm…. We did use Special Walnut. I think we are just going to start over;) Thanks for all your help!
Aw. Well I hope it turns out for you!
Hi, how do you make some parts lighter than others? do you just wipe it out unequally or it just comes out like that?
It just seems to come out like that! Differences in the wood, I imagine.
Hi. I know this post is a bit old to be commenting on, but I couldn’t help but fall in love with your headboard tutorial. I’ve linked to your post, on my site: In A Mini Skirt.
Well thank you, Jenny!
why not stain the boards before you put them up? seems like it would be a lot easier
In many cases, yes. And in fact we did paint the wood before-hand at our current house’s bedroom. But at the old house, there was no room to lay out all the boards and the weather was bad. So on the wall it was!
I love it, but I have a small bedroom, and unfortunately, in order to fit everything in our room, we have to butt the head of our bed against a window. So no place to nail a headboard to the wall.
I just discovered your blog from Ana White’s site and I am totally addicted! With six kids our bedroom is pretty far from a “master”, more like the dumping ground for all the stuff that has nowhere else to go. I have printed off several bed/headboard plans for my husband (hint, hint) and so far still nothing but an old metal frame. This, however, looks like a project I could do myself. It’s like a giant version of some wall décor that I have made using furring strips to hold the wood together. Our bed must be in front of a window, do you think I could attach the boards to vertical pieces of wood rather than to a wall? I absolutely love your headboard and you are just brilliant to have come up with a simple yet awesome headboard.
I know a few readers have used something like furring strips instead of mounting the headboard directly to the wall.
Thanks for answering! I am so excited…our 16th wedding anniversary is next month–to have an actual headboard after all this time, woo hoo!
Very exciting!
Can you stain and sand the wood before putting it in the wall? Would it work the same? I’m so doing this
Absolutely! We actually did that at our current house. There wasn’t room to at the old house. 🙂
I was wondering if it would work to mount the wood onto 2×4 and then hang on wall rather than drilling holes into the wall?
Yes, you could totally do that! We just had a really small room and didn’t want to lose even an inch of space.
Make inexpensively with pallet wood.
Love this and it was so easy. The only thing is I couldn’t imagine staining it while it was up. I stained it and left it outside for a couple days and it still left a stain odor in our room for awhile. Anyway thank you so much I love how it turned out. No I am searching for the right pillows and comforter. Monogrammed the headboard with our last name initial in the middle, mine on my side and his on his side. It is still in the chalk stage. Thank you, thank you, thank you!
I’m so glad you made one for yourself, Jen! We actually slept in another room the first night it was up. 🙂
Have you ever painted pallets I’m making a pallet headboard I’ve already sanded it just not know what kind of paint to paint it with anything you could help me with would be highly appreciated
Unfortunately no, I’ve only stained pallets and then given them a white or grey wash.
I know this is an older post but I’m hoping you might still respond! What grade sandpaper did you use with the palm sander?
Oh wow! I so don’t remember. I’m so sorry Stacy. If you need a guide you can check out my sandpaper guide here though: https://homemadelovely.com/sandpaper-grits-and-their-uses/