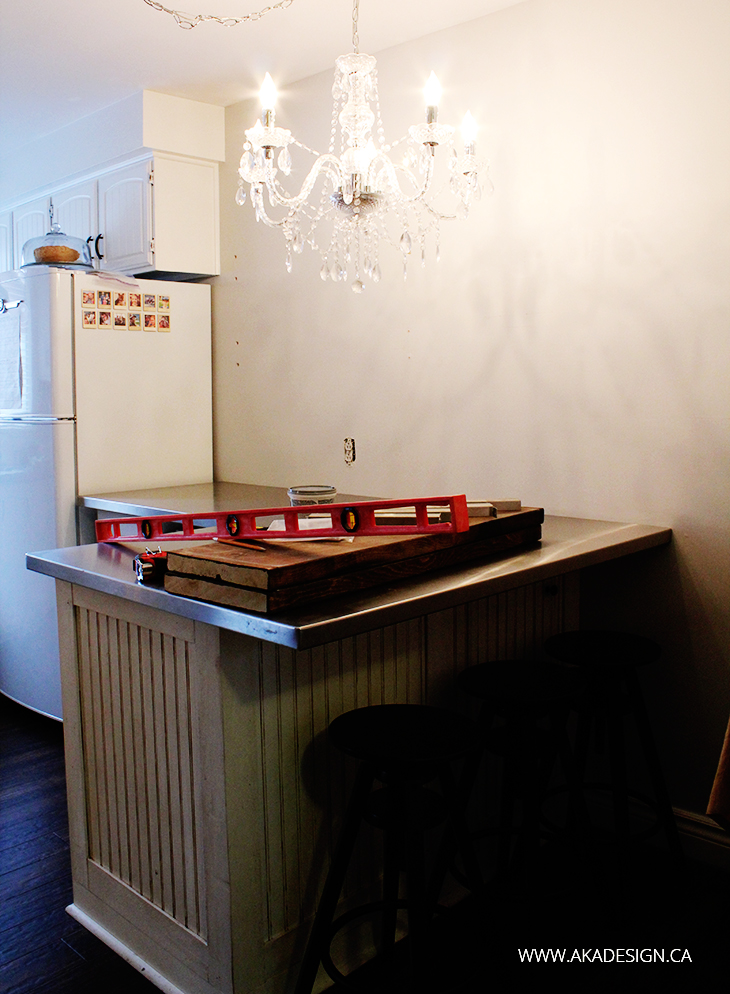
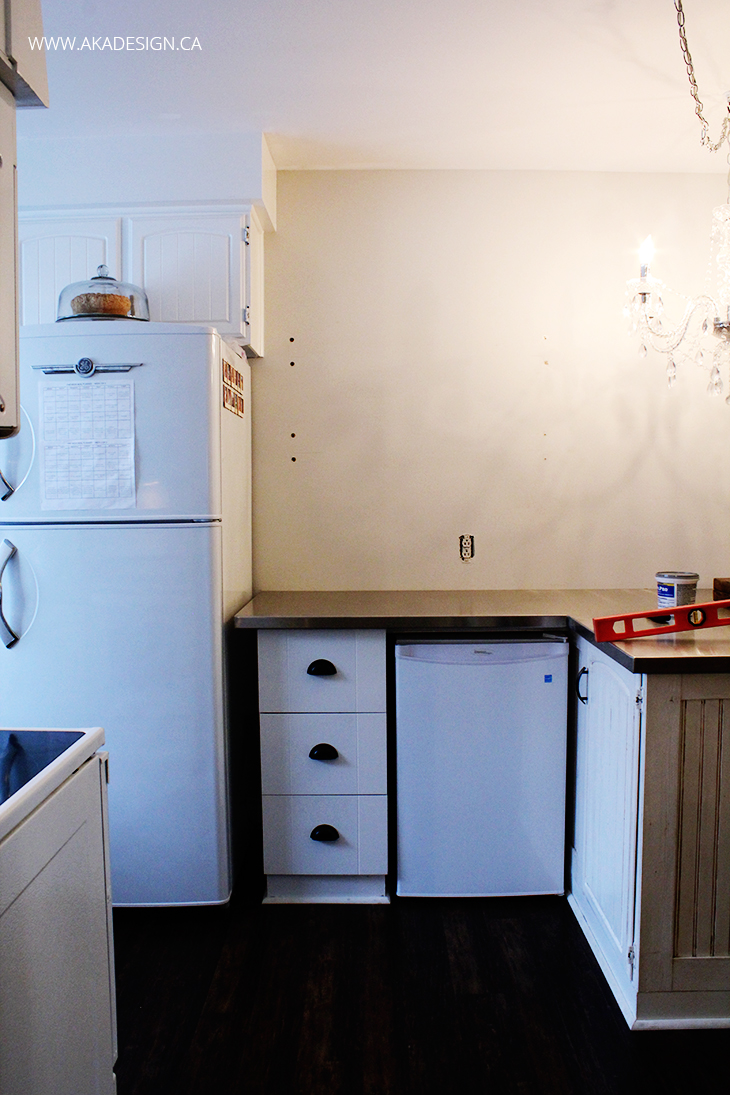
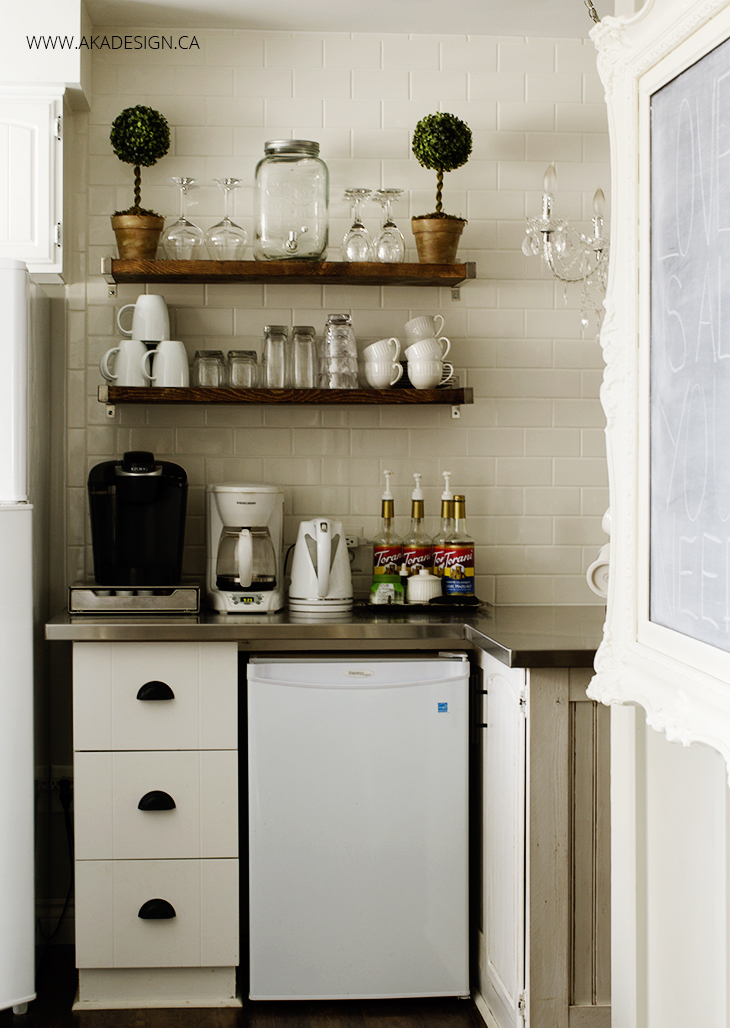
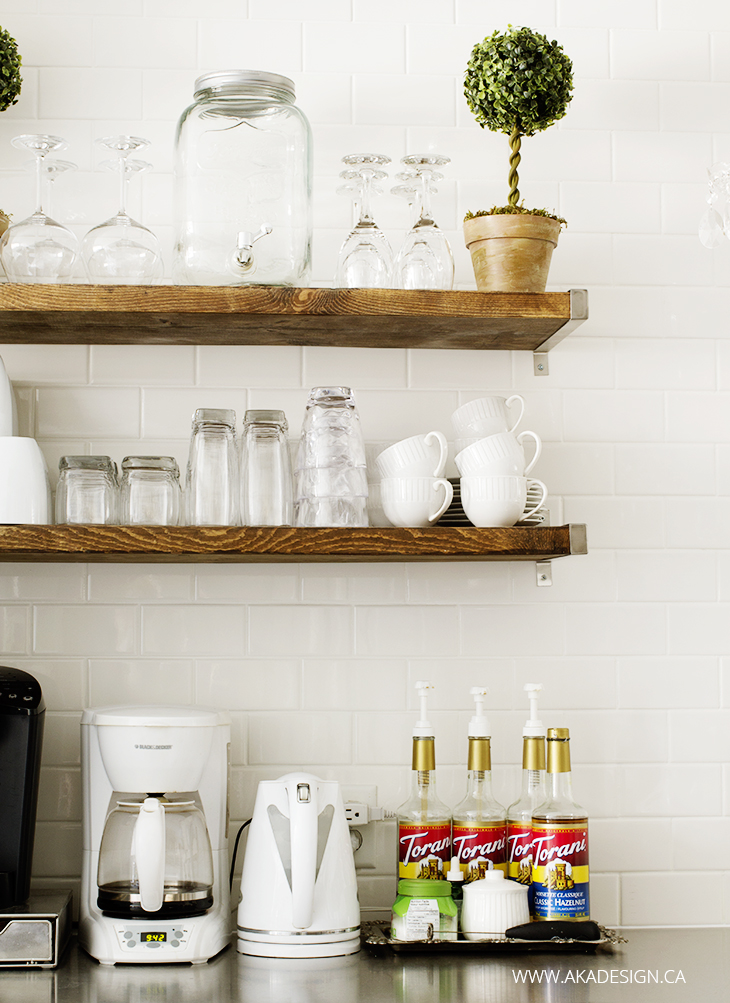
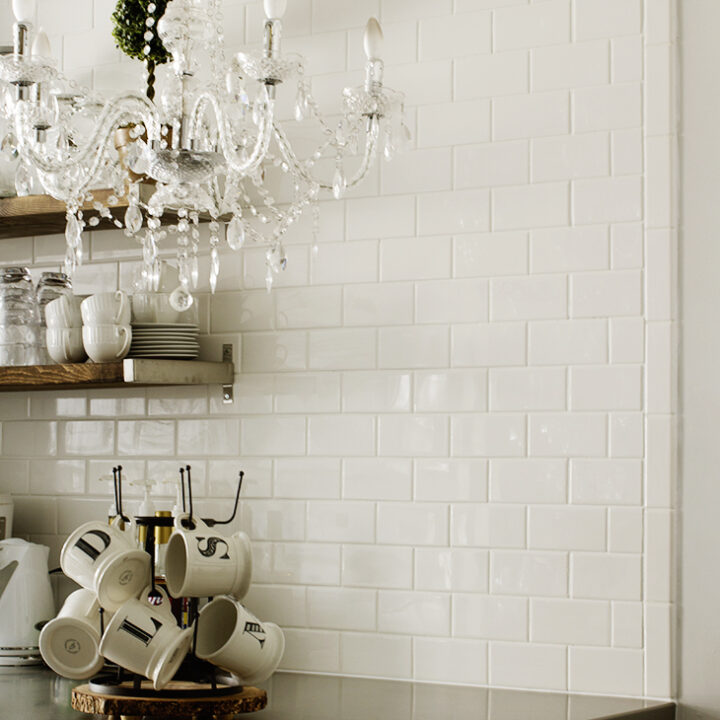
So we just finished tackling a project that’s been on my wish list forever: a full subway tile backsplash wall in the kitchen! When we first redid the kitchen (painting the cabinets, installing stainless steel counters, updating the backsplash in the original part of the kitchen, flooring, light fixtures, faucet, etc.), I really wanted to go all out with a subway tile wall, floor to ceiling, over at the coffee/breakfast bar. But time and budget got the better of us, and the project went on hold. Well, it’s finally finished! Today, I’m going to share exactly how we DIY’d our subway tile backsplash wall so you can create one, too.

This subway tile wall kick-started our love for DIY wall treatments! Since then, we’ve added shiplap to a kitchen backsplash, a full living room wall, and more. If you’re curious about giving shiplap a try, I’ve shared all my tips in How to DIY a Shiplap Wall the Cheap and Easy Way!—it’s a super simple and budget-friendly option that adds so much charm.
DIY Subway Tile Backsplash Wall Tutorial
Materials:
- Subway tiles
- Bullnose tiles (for the edges)
- Tile adhesive or mortar
- Grout
- Caulk (optional, for edges)
Tools:
- Tile spacers
- Notched trowel
- Tile cutter or wet saw
- Level
- Pencil or chalk line
- Grout float
- Damp sponge
- Diamond-tipped glass and tile drill bit (if drilling into tiles)
Instructions
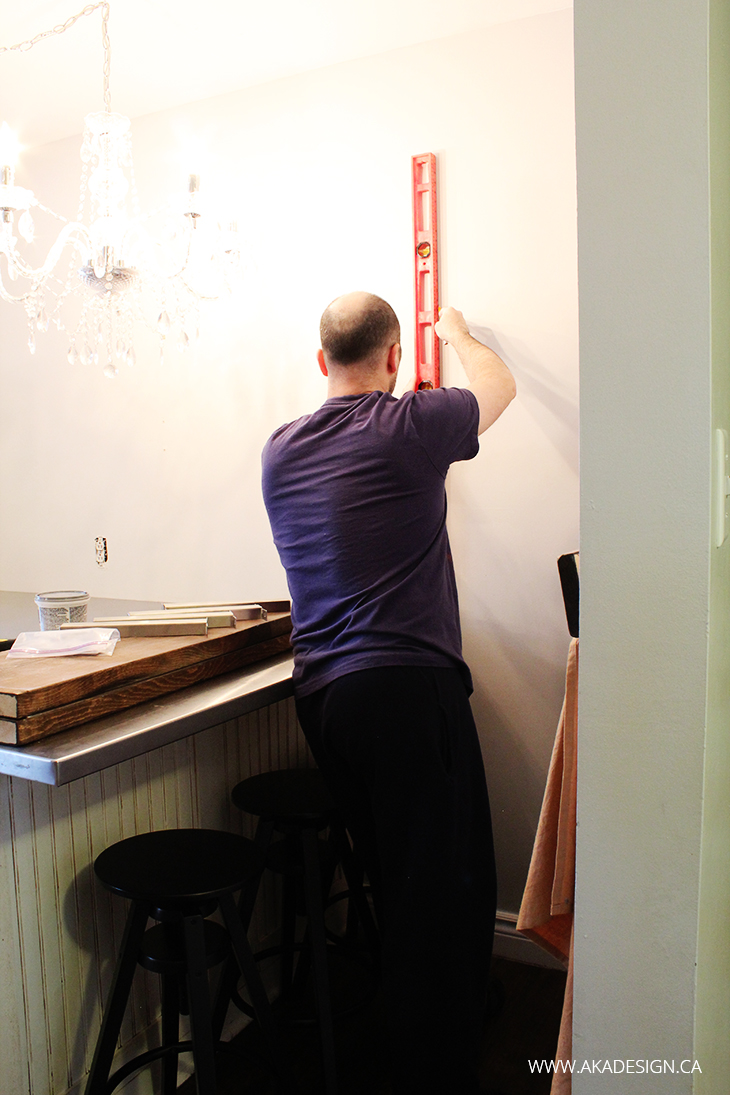
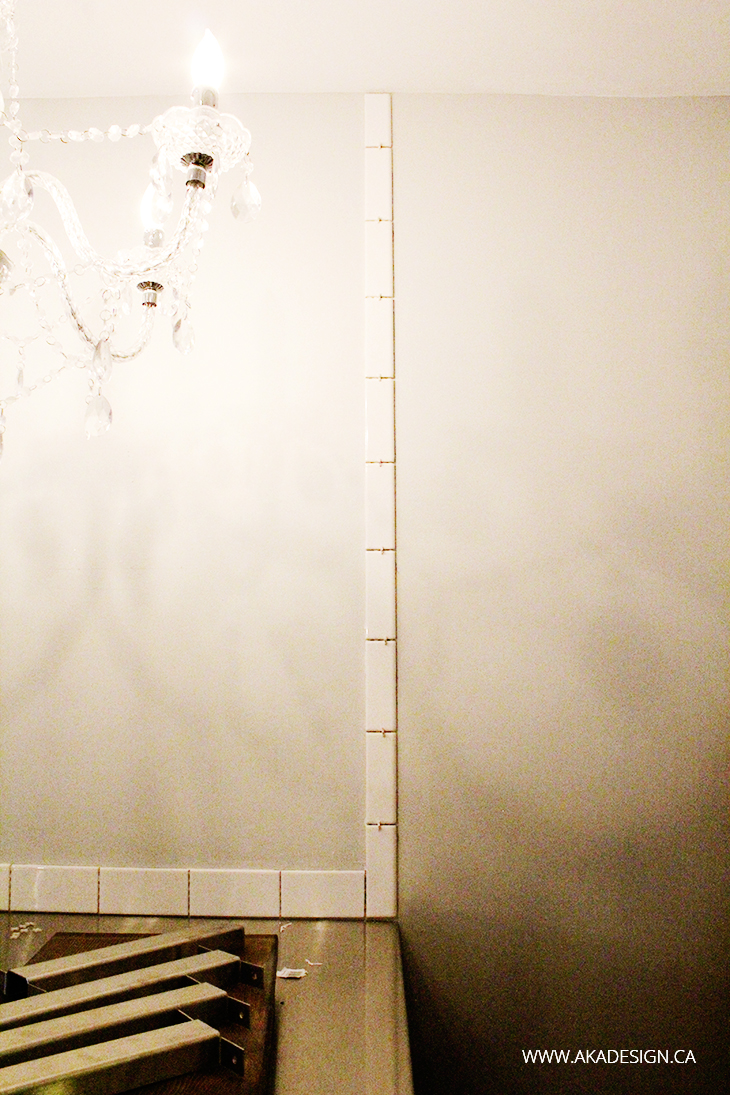
Step 1: Mark Your Guidelines
If you’re not tiling from wall to wall, start by drawing straight vertical lines where your bullnose tiles will end. These lines will act as a guide to keep your tile edges straight and clean. We aligned ours with the edges of the counters on both sides.
Step 2: Install the Vertical Bullnose Tiles
Begin tiling by setting your bullnose tiles vertically to create a clean border. This frames the area and sets clear boundaries for the subway tiles. Use your level frequently to ensure they’re straight.

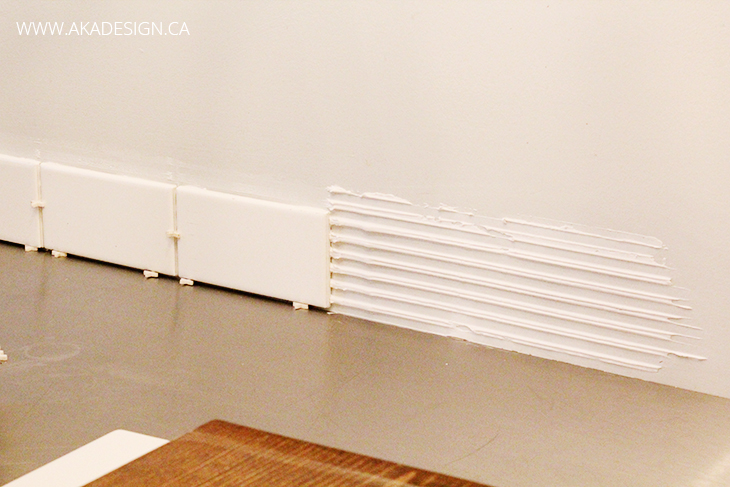
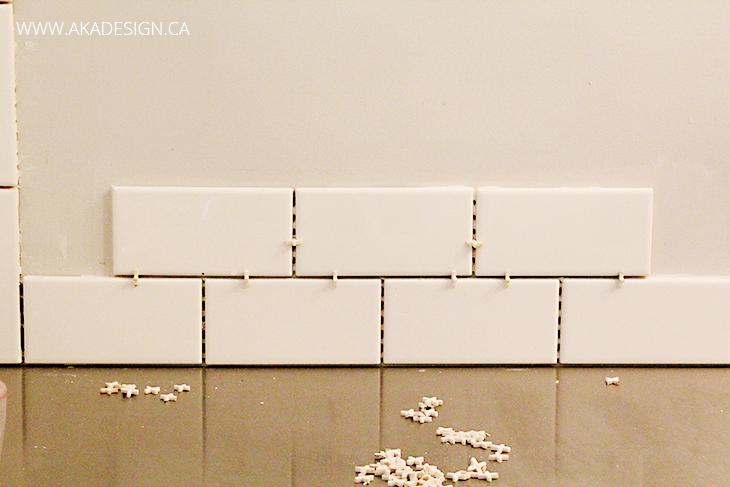
Step 3: Start Tiling at the Bottom
With the “box” created by the bullnose tiles, countertop, and ceiling, you can begin laying the subway tiles. Start at the bottom row (at the counter) and use spacers to leave a small gap between the countertop and the tile for grout and caulk.
Step 4: Build the Subway Tile Pattern
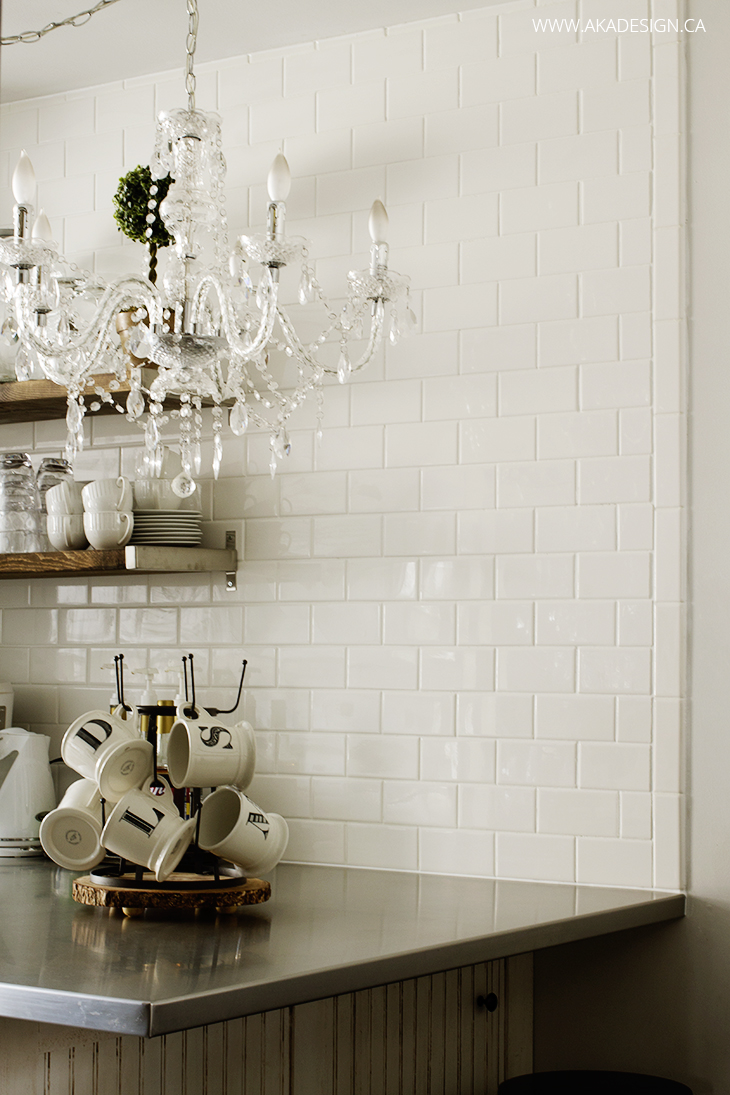
Work your way up from the bottom row, placing the tiles in a staggered, brick-like pattern. This classic arrangement gives the wall that timeless subway tile look. Use spacers between each tile to ensure consistent gaps for grout. Check your level often to keep everything straight.
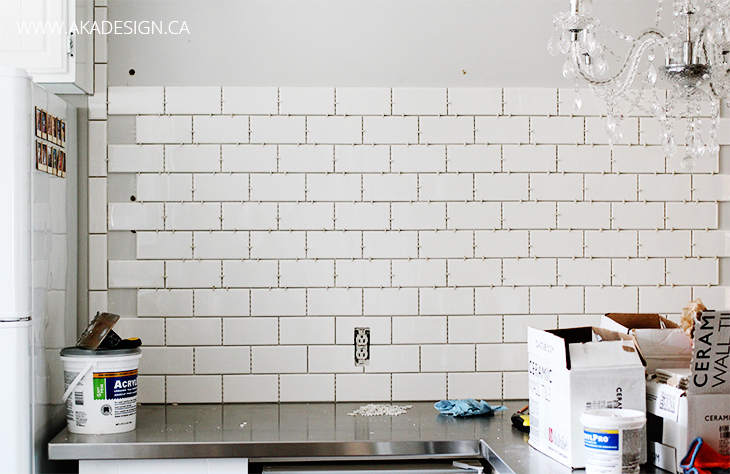
Step 5: Save Tile Cuts for Last
Leave tiles that need to be cut (e.g., around outlets, light switches, or the edges of the wall) for the final step. Using full tiles as much as possible helps the process move faster and reduces the chance of errors. A tile cutter or wet saw will make precise cuts.
Step 6: Grout the Tiles
Once all tiles are set and the adhesive has cured (check the manufacturer’s instructions for timing), remove the tile spacers and use a grout float to apply mixed grout into the gaps. Work diagonally across the tiles to avoid pulling grout out of the seams. Wipe away excess grout with a damp sponge and let it dry.
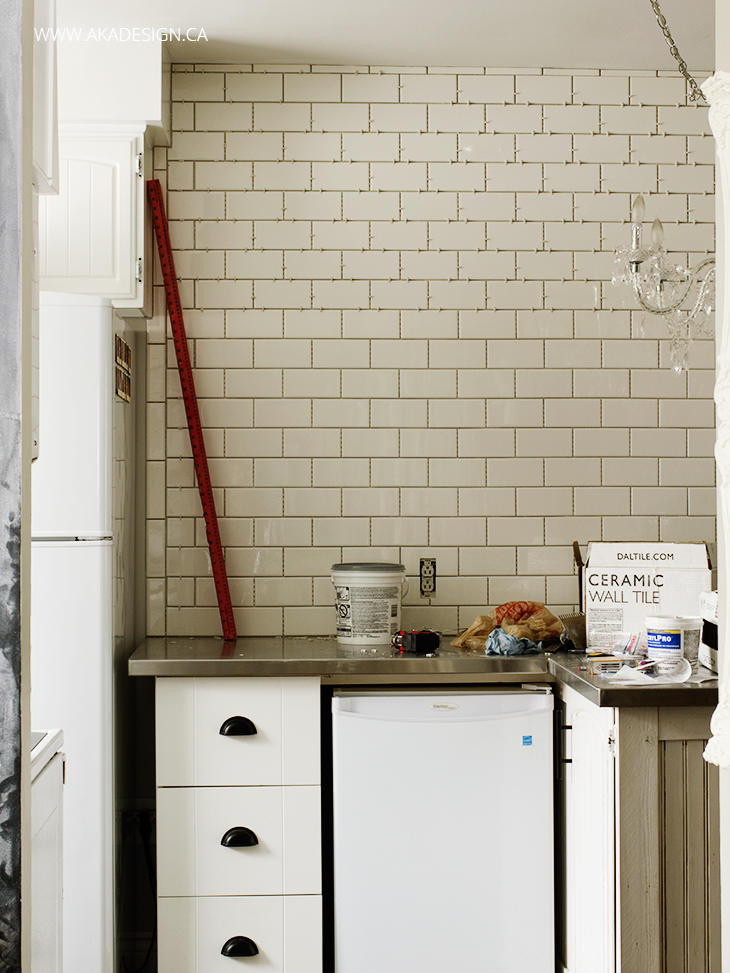
Step 7: Clean Off Grout Haze
After the grout has dried, you may notice a powdery haze on your tiles. Use a damp sponge or a microfiber cloth to gently wipe the surface clean. For stubborn spots, a grout haze remover or a vinegar-water solution can help. Be careful not to scrub too hard to avoid removing grout from the seams.
Step 8: Drill into Tiles (If Needed)
If you need to install hardware like floating shelves, invest in a diamond-tipped glass and tile drill bit. Dean used one to drill holes for our shelves, and it worked like a charm. Just go slowly to avoid cracking the tiles.

Step 9: Final Touches
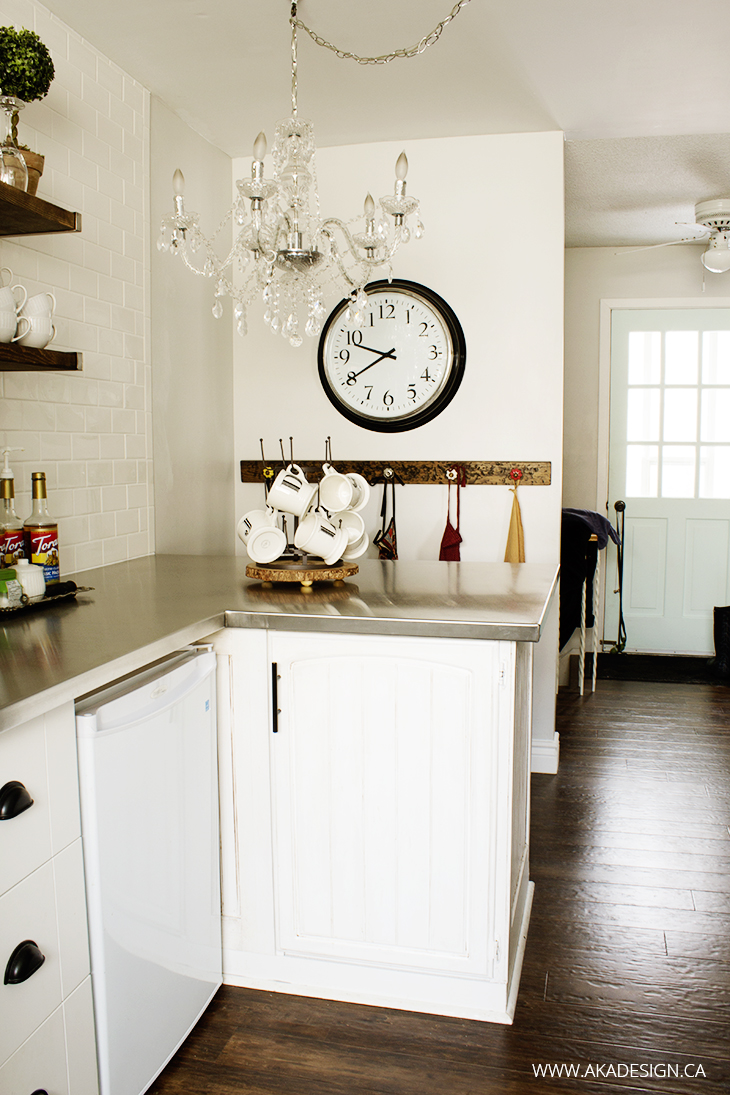
Caulk any edges, like where the tile meets the countertop, for a polished finish. Then step back and admire your beautiful new backsplash wall!
FAQs
Not necessarily. If you only have a few cuts, a manual tile cutter or tile nippers may work. For precise or angled cuts, a wet saw is ideal.
Unsanded grout works well for smaller gaps, while sanded grout is better for wider ones. Check your tile spacing to decide.
After the grout dries, use a damp sponge to wipe away haze. For stubborn spots, a grout haze remover can be helpful.
Tile spacers and painter’s tape can help hold tiles in place as the adhesive sets.
More Character-Adding DIY Projects
- DIY Board and Batten Tutorial
- How to DIY a Shiplap Wall the Cheap and Easy Way!
- How to DIY a Professional Looking Coffered Ceiling for Less than $500!
- How to Install Panel Moulding: Adding Character to Your Home
- How to Install Beadboard Paneling: A Step-by-Step DIY Guide
- How to Install a Cedar Plank Ceiling: Step-by-Step DIY Tutorial
- Shiplap and Barn Beam Fireplace Mantel Makeover
How to Subway Tile a Backsplash Wall
Learn how to DIY a stunning subway tile backsplash wall with this step-by-step tutorial. Perfect for transforming your kitchen space!
Materials
- Subway tiles
- Bullnose tiles (for the edges)
- Tile adhesive or mortar
- Grout
- Caulk (optional, for edges)
Tools
- Tile spacers
- Notched trowel
- Tile cutter or wet saw
- Level
- Pencil or chalk line
- Grout float
- Damp sponge
- Diamond-tipped glass and tile drill bit (if drilling into tiles)
Instructions
Step 1: Mark Your Guidelines
If you're not tiling from wall to wall, start by drawing straight vertical lines where your bullnose tiles will end. These lines will act as a guide to keep your tile edges straight and clean. We aligned ours with the edges of the counters on both sides.
Step 2: Install the Vertical Bullnose Tiles
Begin tiling by setting your bullnose tiles vertically to create a clean border. This frames the area and sets clear boundaries for the subway tiles. Use your level frequently to ensure they’re straight.
Step 3: Start Tiling at the Bottom
With the "box" created by the bullnose tiles, countertop, and ceiling, you can begin laying the subway tiles. Start at the bottom row and use spacers to leave a small gap between the countertop and the tile for grout and caulk.
Step 4: Build the Subway Tile Pattern
Work your way up from the bottom row, placing the tiles in a staggered, brick-like pattern. This classic arrangement gives the wall that timeless subway tile look. Use spacers between each tile to ensure consistent gaps for grout. Check your level often to keep everything straight.
Step 5: Save Tile Cuts for Last
Leave tiles that need to be cut (e.g., around outlets, light switches, or the edges of the wall) for the final step. Using full tiles as much as possible helps the process move faster and reduces the chance of errors. A tile cutter or wet saw will make precise cuts.
Step 6: Grout the Tiles
Once all tiles are set and the adhesive has cured (check the manufacturer’s instructions for timing), use a grout float to apply grout into the gaps. Work diagonally across the tiles to avoid pulling grout out of the seams. Wipe away excess grout with a damp sponge and let it dry.
Step 7: Clean Off Grout Haze
After the grout has dried, you may notice a powdery haze on your tiles. Use a damp sponge or a microfiber cloth to gently wipe the surface clean. For stubborn spots, a grout haze remover or a vinegar-water solution can help. Be careful not to scrub too hard to avoid removing grout from the seams.
Step 8: Drill into Tiles (If Needed)
If you need to install hardware like floating shelves, invest in a diamond-tipped glass and tile drill bit. Dean used one to drill holes for our shelves, and it worked like a charm. Just go slowly to avoid cracking the tiles.
Step 9: Final Touches
Caulk any edges, like where the tile meets the countertop, for a polished finish. Then step back and admire your beautiful new backsplash wall!
I can’t tell you how satisfying it is to finally see this subway tile wall finished. It’s a dream project that we worked on piece by piece, and it feels so rewarding to say, “We did this ourselves.” Plus, every time I grab my coffee in the morning, I smile at those beautiful tiles. If you’re dreaming about a project like this, I say go for it—it’s absolutely worth it!
Have you tackled a tiling project before, or do you have questions about this one? Let me know in the comments—I’d love to hear from you!
