There’s just something about shiplap that makes a room feel instantly charming and put-together, isn’t there? When we moved into this house, I didn’t immediately plan to add shiplap to the living room. But as time passed—and with the kitchen already rocking its own shiplap walls—it just made sense to extend that cozy, farmhouse vibe into the adjoining space. Plus, I had my heart set on completing it before the holidays rolled around!

If you’re considering a shiplap project too, you might enjoy my tutorial on creating a budget-friendly shiplap kitchen backsplash. It’s another easy way to add charm to your home without breaking the bank!
How to DIY a Shiplap Wall Step-By-Step
After looking at all the options – pre-primed & cut shiplap planks, tongue & groove (which we used on our old house bathroom walls) and good old plywood – this method seems to be the most cost-effective way to add shiplap. You know, if you’re not lucky enough to live in Texas and have true shiplap walls hiding behind your drywall!
Supplies You’ll Need
Materials
- 8′ x 4′ x 5/8″ sheets of plywood
- Construction adhesive
- Paintable caulking
- Paint
Tools
- Stud finder
- Pencil
- 3-foot level
- Caulking gun
- Nail gun and nails
- Small roller and brush
- HANDy Roller Cup and liners
Instructions
1. Source Cheap Shiplap
- Go to your local building store, find the thinnest plywood sheets you can find (ours are 5/8 inches thick). Have each 8’x4′ sheet cut into six equal pieces, along the longer direction while in the store. Each cut piece will be approximately 7 7/8 inches by 8 feet long. Having it cut in-store will make it easier to transport and save you time once you’re working on the project at home.
2. Prep the Wall
- Once at home again and ready to work, use a stud finder and a pencil to mark the studs on your wall. Mark across the wall at a few heights, so you know where the studs are as you work your way across and down the wall installing the shiplap.
- Before you start to install your shiplap, check if your wall is square. If it’s not, using a level, mark a level line for where the first piece of shiplap will be installed. Once the first piece is attached to the wall, you should be okay to continue installing the remaining pieces. But check from time to time throughout the installation to be sure you’re not installing your shiplap at an angle!
3. Install the Shiplap
- Apply construction adhesive to the backside of your first full length (8 foot by 7 7/8 inch) piece of plywood. How much adhesive you use is up to you. We originally planned to apply more, but realized we’d use up an awful lot of adhesive that away. So, instead Dean just applied dots of adhesive every foot or so along the length of each piece. The plywood is light, so the adhesive is really just an extra means in addition to the nails to attach it to the wall. (We didn’t use adhesive on the kitchen shiplap wall.)
- Starting at the top left corner of your wall, place the plywood with adhesive from the last step on the wall lined up tight to the ceiling or trim. Further affix to the wall with nails (using a nail gun) at the studs that you’ve previously marked. Again check for level/square before you nail it on, so you don’t end up with shiplap running on an angle. Even a slight angle will be noticeable because of the horizontal lines!
- Repeat steps 4 and 5, working your way across your wall from left to right, top to bottom, cutting the lengths of plywood to fit as you go.
- Continue to apply shiplap until your entire wall is done.


4. Caulk the Edges
- Caulk the side seams with paintable caulking where the ends of the shiplap meet the adjoining walls only. You don’t want or need to caulk the top where the shiplap meets the ceiling or the bottom where it meets the baseboard. Let dry.
5. Paint the Shiplap
- Use a brush to fill in gaps between planks, then roll on the paint color of your choice. For a dramatic modern look, I chose Sherwin Williams Black Magic, but white is always a classic option.
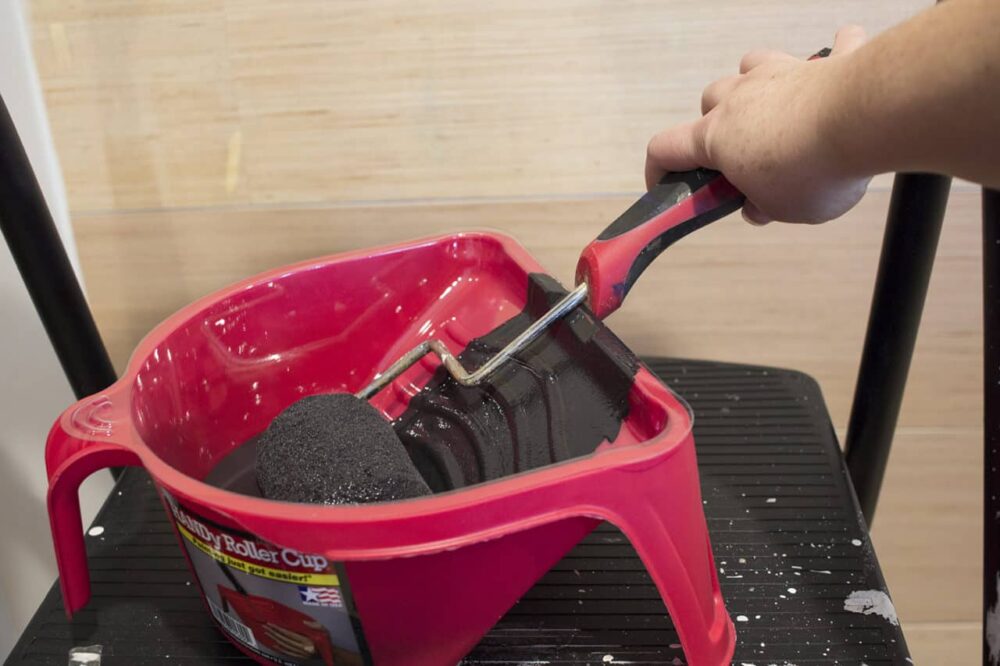


Tip: For painting the wall, I found the HANDy Roller Cup indispensable because it’s easy to hold in one hand while using the small roller to paint. It’s also easy to climb up and down a small ladder with and sit on the floor with to reach all angles. Plus the perfectly fitted liners make clean up a snap!
Dramatic Color Decisions!
Even though I knew I wanted shiplap, until we got into the project I was still undecided about whether to paint it white like the other walls on the main floor. Or if I wanted to paint it a dramatic black. If you follow us on Instagram, you may have seen the poll I did when I was trying to decide. And y’all were so torn too! I had so many people give their answer in the poll and then message me saying “No wait, I’ve changed my mind!”

Even after the poll, I was still undecided. The shiplap on the opposite wall in the kitchen is white. The island that is between the kitchen and living room is painted black. A lot of our other accents are black too. Sooo, I pulled the trigger and we went with black.


Now that it’s done, I love it! It’s so cozy and warm in person. And it looks especially lovely at night.
Even though I adore the black, if you know me at all, you know I tend to change my mind. I imagine that I’ll keep the wall black over the winter for the cozy factor…and then paint it white in the late winter or early spring. Lol. Who knows!
FAQs
Nails alone work if you’re attaching to studs, but adhesive adds extra security, especially for thinner plywood.
A simple nickel works perfectly! Place it between rows as a spacer while nailing each board.
Mark a straight level line before installing your first row. This ensures the rest of the planks align properly, even on uneven walls.
If the wall is already painted a darker color, you may need a primer to avoid shadows showing through the gaps. For lighter walls, you can skip priming.
Use a damp microfiber cloth to wipe down dust and dirt. Avoid abrasive cleaners that could damage the paint.
More Character-Adding DIY Projects
- DIY Board and Batten Tutorial
- How to DIY a Shiplap Wall the Cheap and Easy Way!
- How to DIY a Professional Looking Coffered Ceiling for Less than $500!
- How to Install Panel Moulding: Adding Character to Your Home
- How to Install Beadboard Paneling: A Step-by-Step DIY Guide
- How to Install a Cedar Plank Ceiling: Step-by-Step DIY Tutorial
- Shiplap and Barn Beam Fireplace Mantel Makeover

How to Shiplap a Wall with Plywood
Create a cozy, budget-friendly DIY shiplap wall with this easy tutorial! Affordable materials, step-by-step guide, and painting tips included.
Materials
- 8′ x 4′ x 5/8″ sheets of plywood
- Construction adhesive
- Paintable caulking
- Paint
Tools
- Stud finder
- Pencil
- 3-foot level
- Caulking gun
- Nail gun and nails
- Small roller and brush
- HANDy Roller Cup and liners
Instructions
1. Source Cheap Shiplap
- Head to your local hardware store and pick up the thinnest plywood sheets you can find. Have them cut into six equal pieces (about 7 7/8″ x 8′) to save time and make transport easier.
2. Prep the Wall
- Mark the wall studs with a pencil using a stud finder. Double-check for square walls, and mark a level line for the first piece of shiplap.
3. Install the Shiplap
- Apply dots of construction adhesive to the back of a plywood plank.
- Start at the top left, align with the ceiling or trim, and secure to the studs with a nail gun. Use a level to ensure rows are straight.
- Use a nickel to create consistent spacing between boards. Stagger seams for a natural look.
4. Caulk the Edges
- Apply paintable caulking only to the side seams where the shiplap meets adjoining walls. Let it dry completely.
5. Paint the Shiplap
- Use a brush to fill in gaps between planks, then roll on the paint color of your choice. For a dramatic modern look, I chose Sherwin Williams Black Magic, but white is always a classic option.
Adding a shiplap wall doesn’t have to be a pricey, complicated project. With a little effort and these budget-friendly tips, you can achieve that timeless charm you’ve been dreaming of. And let me tell you—there’s nothing better than stepping back and admiring the cozy, character-filled space you’ve created yourself.
Have you tried your hand at shiplap before? Let me know in the comments—I’d love to hear about your projects (or answer your questions)!

Love the scroll and that scripture! Did you DIY it, or can it be purchased somewhere?
Hi Kimberly. I attempted to DIY one once and got really bored! Ha! I’m not so good at repetitive tasks. This one is from Smallwoods.
I really like it black. Where did you get your wooden window blinds?
Thank you! Oh, and the window blinds came from Amazon! You can find them here (affiliate link) https://amzn.to/2Pj1t1U.
I love the black wall. It looks amazing!!
Thank you, Sharon! 🙂 It sure is fun as a Christmas decor backdrop!
I like your couch, where did you get that?
It’s the Ektorp from Ikea!
Beautiful! I looked at the 5/8″ and it seemed very thick and heavy. Is it possible 5/8″ was a typo?
Hi there. What nail gun do you use for your Shiplap?
Good question! I will ask Dean and let you know!
If you have a door or window on the wall you’re planning to shiplap, keep in mind that the thickness of most window and door trim is approximately 3/4 inch at the outside edge. So if using plywood to make your strips, I would suggest either 1/4″ or 3/8″ plywood.
Yes! That’s an excellent point. Thus far, we have only shiplapped walls with no existing trim (except baseboard) and a fireplace mantel. So the window or door trim hadn’t crossed my mind. Thank you Bob!
I think the scroll and the white lamps look amazing against that black shiplap. Your space also appears to be sufficiently lit to pull off the black. I did find myself wondering, though, what it would look like if you just let the white from the original wall peek through the rows, kind of like black grout between white subway tile.
I have the same denim sofa. Comes apart with zippers for easy washing. Bought in 1984 from Eatons in Canada. LOVE it still. Back when your purchase was quality? My choice would have been navy maybe I’ll send a pic… 🙂
Although it looks it, our sofa is not denim. It’s the Ektorp from Ikea. And in this article, the photos include the Nordvalla Gray slipcovers. I am so glad you still love your sofa though! That’s awesome!
We have been considering shiplap in our home since we moved in and finally got all the large renos done. I knew you would have a great tutorial. Pinned and thank you.
🙂 Thanks!