Our fireplace was functional, but it didn’t match the cozy farmhouse vibe I had envisioned for our living room. While I gave it a quick refresh with paint shortly after we moved in, I always knew I wanted something with more personality and warmth. That’s how our Shiplap and Barn Beam Fireplace Mantel Makeover came to life—a project that added character without altering the gas fireplace itself.

If you love adding charm to your home with budget-friendly DIYs, you’ll want to check out my DIY Shiplap Wall Tutorial, where I transformed a plain wall into a feature that’s become a favorite in our home. That project inspired me to carry the shiplap idea over to our fireplace, giving it a cohesive look that ties the entire space together.
Shiplap and Barn Beam Fireplace Mantel Makeover
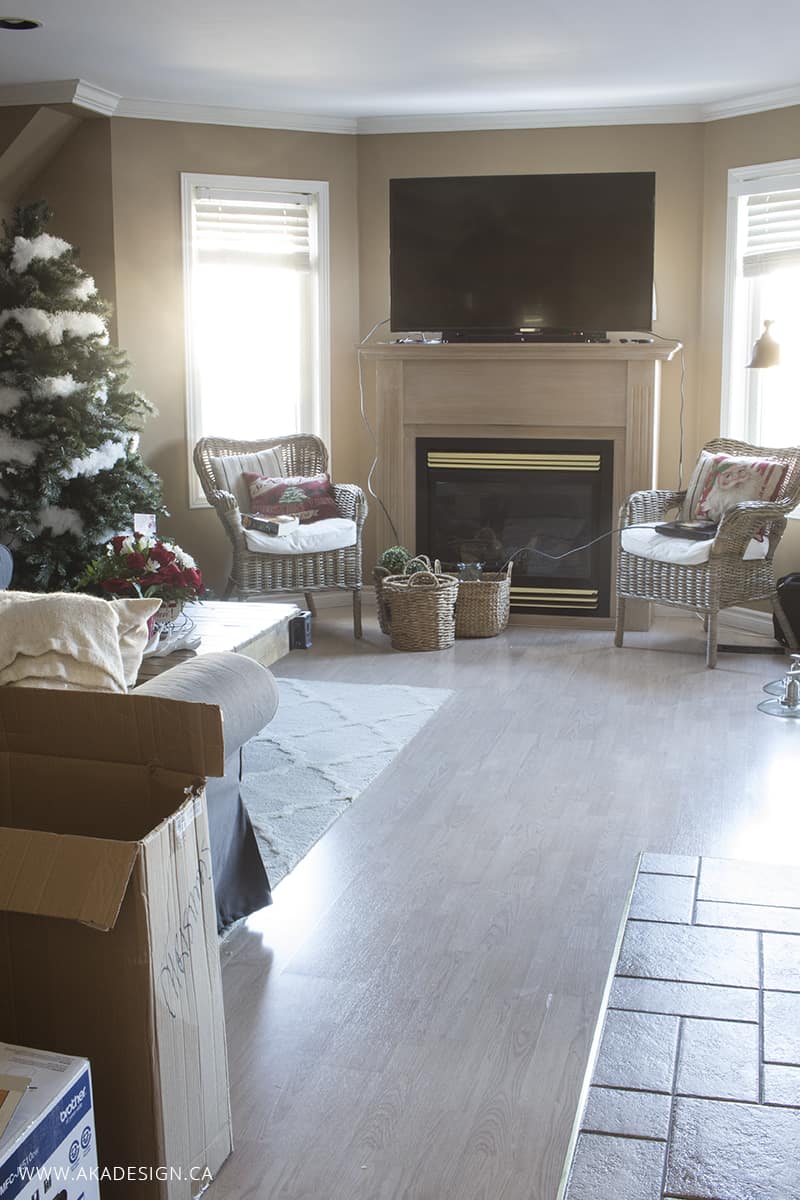
Fireplace Before: The Starting Point
When we moved in, one of the features I was most excited about was the gas fireplace. Coming from a home with an electric fireplace, I couldn’t wait to enjoy the cozy warmth of a real flame. However, the look of the fireplace itself left a lot to be desired. The mantel and surround felt dated, and the overall style didn’t fit the cozy, modern farmhouse aesthetic I was going for.
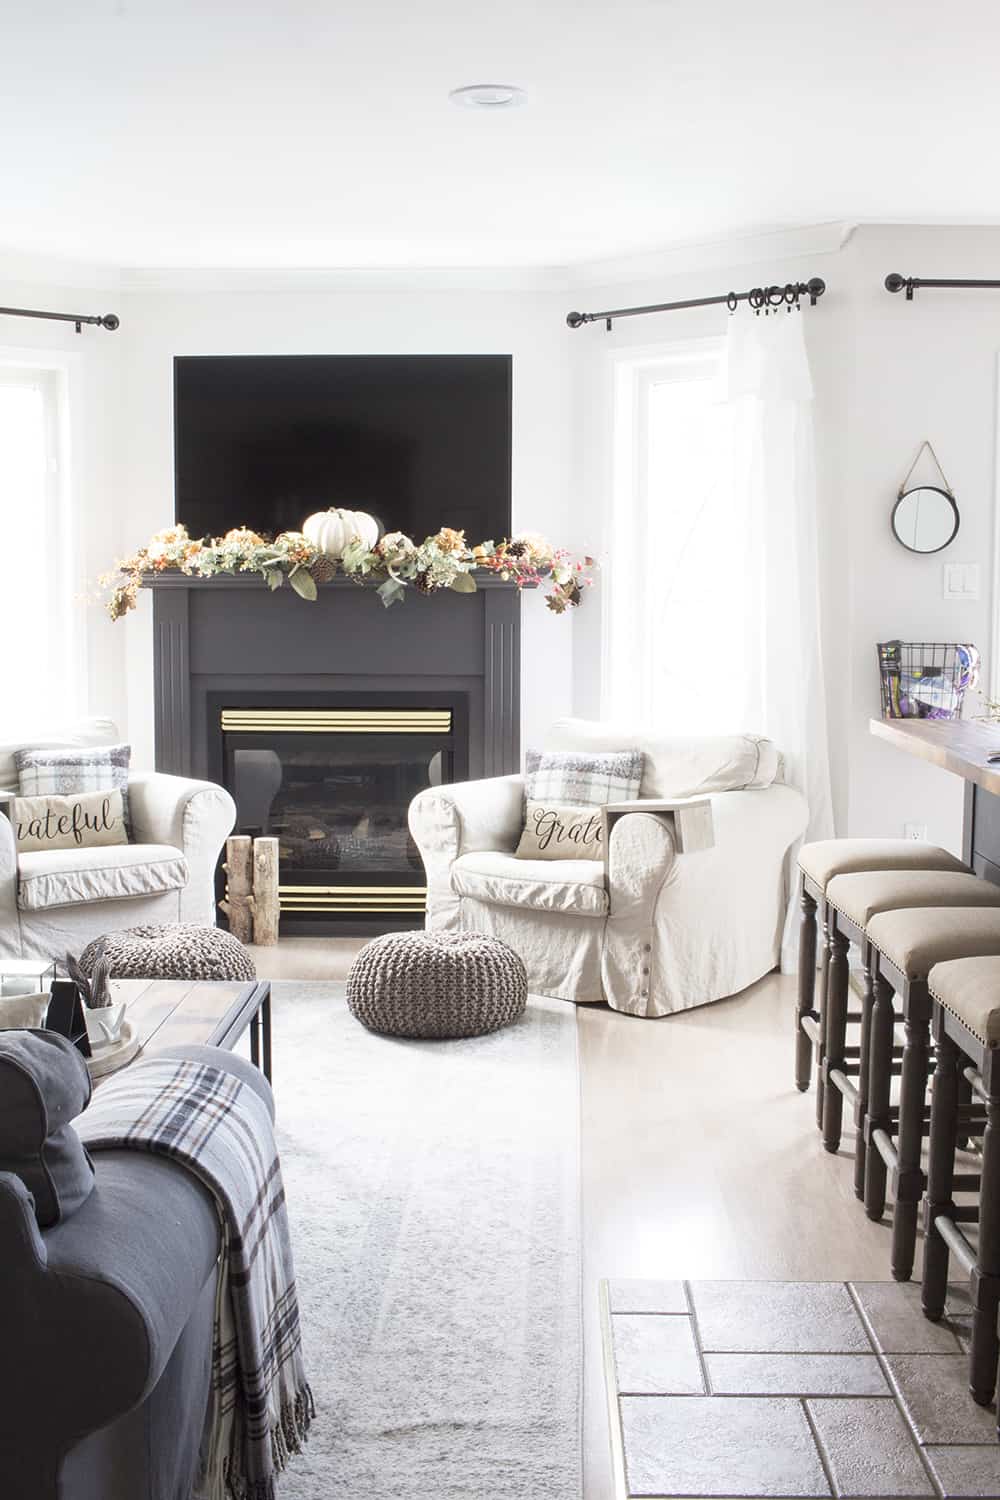
A quick coat of paint on the mantel and surround made an immediate difference, and we even spray-painted the vent covers with black stove paint to make them blend in better. But after living with it for a couple of years, I realized I wanted to take it further. That’s when I stumbled upon the perfect barn beam in a little shop outside of Port Perry—and the wheels started turning for a more dramatic update.
The Vision: Why We Chose Shiplap and a Barn Beam Mantel
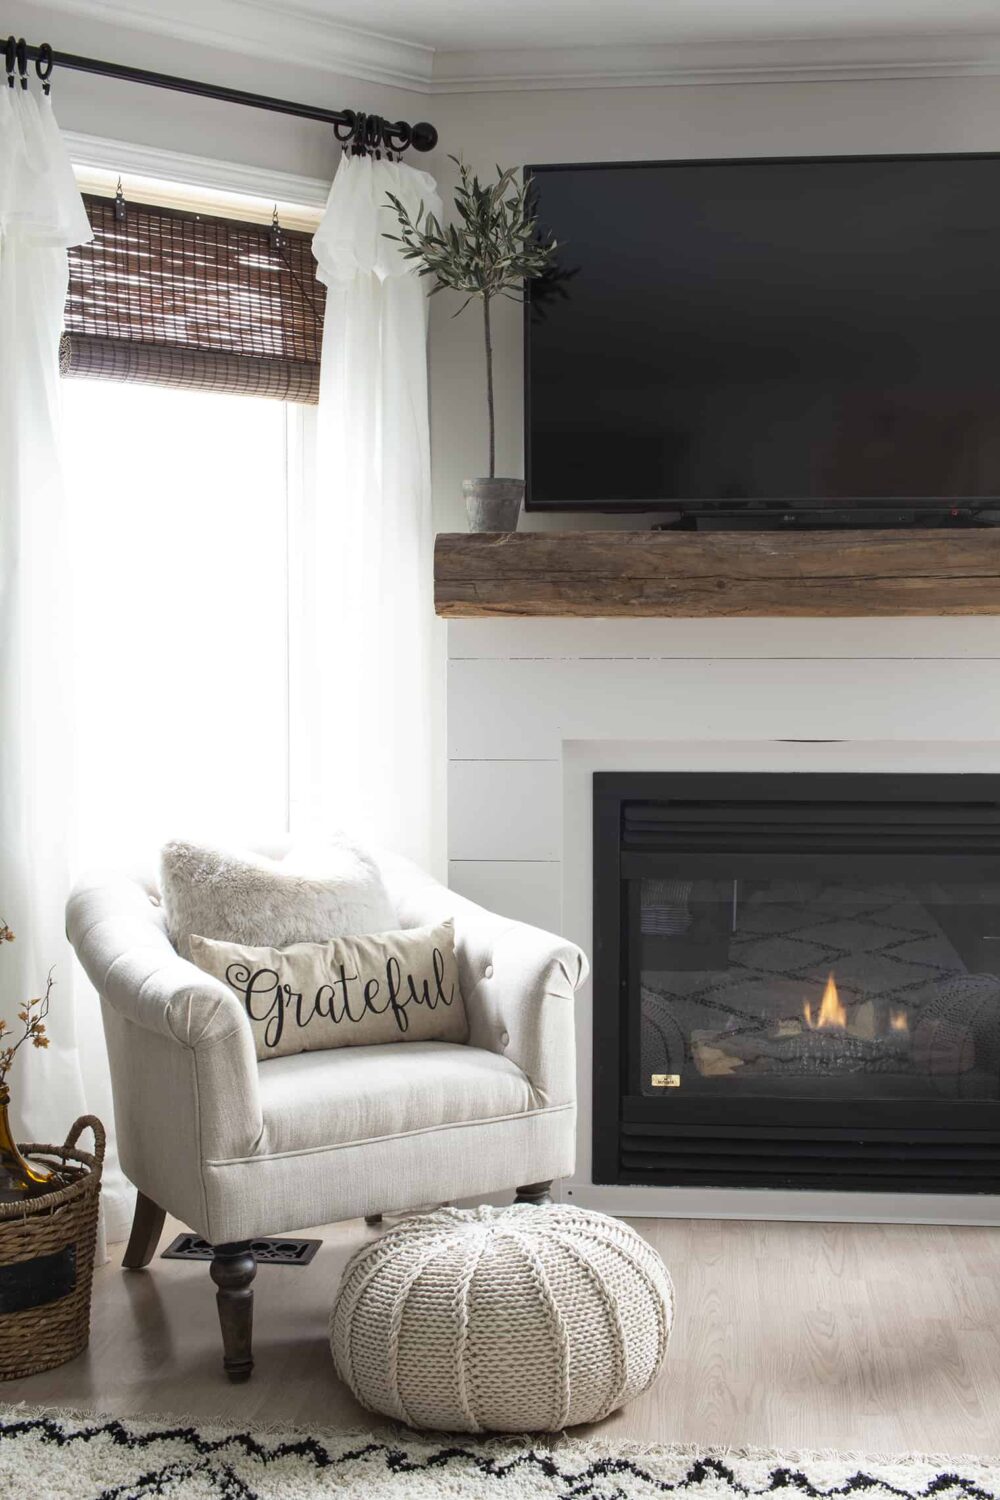
The barn beam was a lucky find, and I immediately knew it would bring the rustic charm I wanted to the space. Pairing it with shiplap seemed like the perfect way to create a cohesive farmhouse look. Having already used plywood shiplap in other areas of our home, like the kitchen backsplash and a living room accent wall, I knew it would be a cost-effective and stylish solution.
The Process: Adding Character Without Altering the Insert
One of the biggest considerations for this project was safety. Since gas fireplaces have strict clearance requirements, we didn’t modify the fireplace surround itself. Instead, we built a shell around it that extended beyond the original dimensions. This gave us the freedom to add shiplap and the barn beam mantel without interfering with the functionality or safety of the insert.
Dean, my husband, built the structure and added custom brackets to support the barn beam mantel. The shiplap was cut from plywood sheets, continuing the budget-friendly trend we’d used in other parts of the house. Once the structure was complete, it was time to decide on a paint color—a step that turned out to be surprisingly tricky!

Choosing the Perfect Paint Color
Choosing a paint color might sound simple, but I went back and forth between two options: a clean white for a classic farmhouse look or a deep black for a bold, modern vibe. Both colors coordinated beautifully with our existing decor, thanks to the Valspar Pinterest Analyzer and Photo Match tools I used to find the perfect shades:
- Deep Well 4011-2 (Deep Kettle Black): A moody, gray-black that added sophistication.
- Heirloom Pink 7001-18: A soft white with subtle pink undertones that complemented our floors.


After polling my Instagram audience (who leaned slightly toward white), I decided to start with white. The beauty of paint is its flexibility—it’s easy to change your mind later!
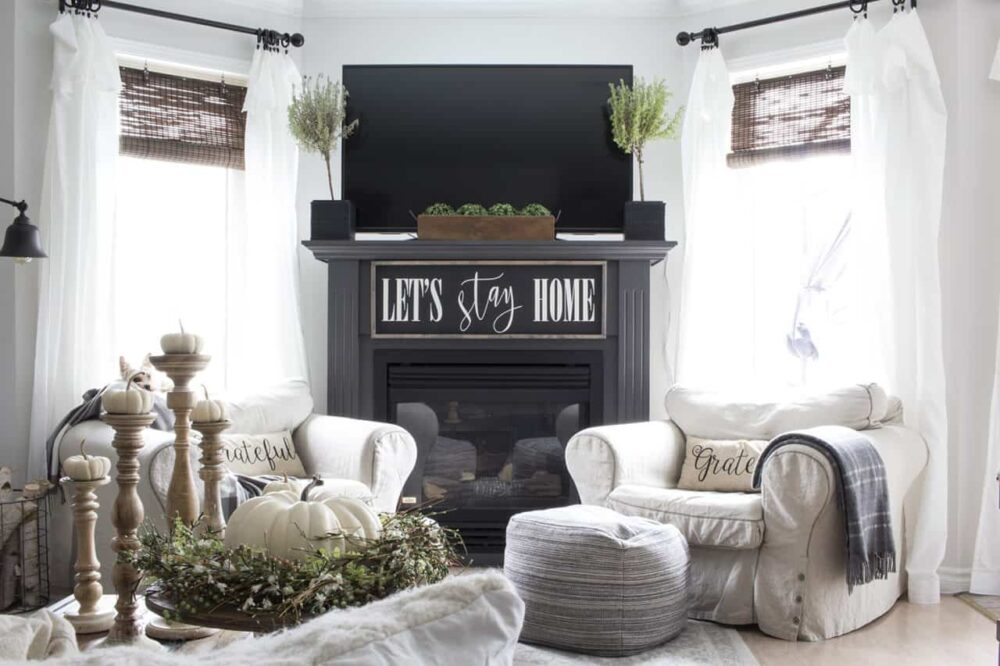
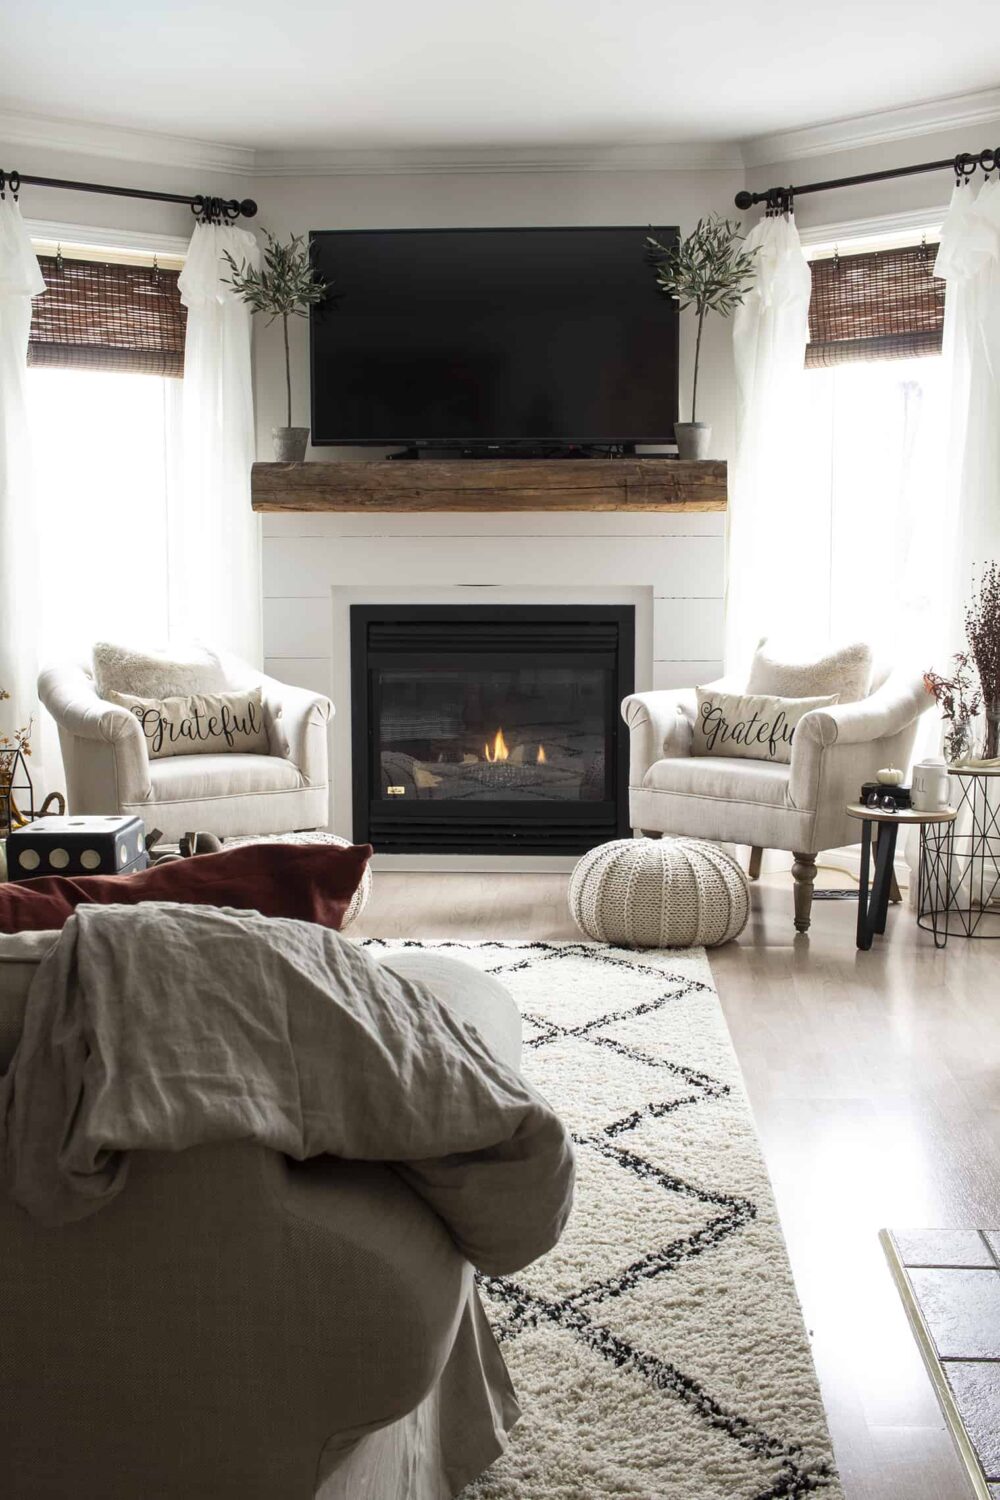
The Result: A Fireplace We Love (For Now)
The finished fireplace with white shiplap and the barn beam mantel became an instant favorite in our living room. It added the farmhouse charm I was craving and made the fireplace a true focal point. But, as anyone who loves decorating knows, design is an ever-evolving process.

Recently, I decided to go bolder and painted the fireplace and the wall behind it a rich, dark green to help the TV blend in. The result is a dramatic, cozy look that I adore. You can catch glimpses of this update in my Color Drenching post and on social media. It’s a reminder that your home is never “done”—and that’s part of the fun!

FAQs About Our Shiplap and Barn Beam Fireplace Makeover
Yes, but it’s crucial to follow the clearance requirements specified by the fireplace manufacturer and your local bylaws. Consult a professional if you’re unsure.
We used plywood cut into strips, which is an affordable and versatile option for DIY shiplap projects.
We used heavy-duty custom brackets and supports to hold the beam securely in place.
Yes! Just ensure you use heat-resistant paint if you’re painting areas close to the insert.
Adding shiplap, a rustic mantel, or even a fresh coat of paint can make a big impact without requiring major renovations.
More Character-Adding DIY Projects
- DIY Board and Batten Tutorial
- How to DIY a Shiplap Wall the Cheap and Easy Way!
- How to DIY a Professional Looking Coffered Ceiling for Less than $500!
- How to Install Panel Moulding: Adding Character to Your Home
- How to Install Beadboard Paneling: A Step-by-Step DIY Guide
- How to Install a Cedar Plank Ceiling: Step-by-Step DIY Tutorial
- Shiplap and Barn Beam Fireplace Mantel Makeover
Updating our fireplace with shiplap and a barn beam mantel has been such a rewarding project. It’s become a cozy focal point that we love, and the best part is that it’s versatile enough to evolve with our style. Whether you’re dreaming of a classic farmhouse look or something bold and modern, there’s always room to experiment and make your space truly yours. What do you think—would you keep it white, go bold with black, or try something completely different? Let me know in the comments!

Want to see more content like this in your Google searches?
This button tells Google that Home Made Lovely is a source you like, so it can show you more of it.