Have you ever wondered how to make large-scale art or custom signs without expensive tools or fancy equipment? I’ve been using the pencil transfer method for years, and it’s my go-to for creating DIY art at home. This simple technique is featured in several of my projects, but after so many requests for a dedicated tutorial, I decided to give it its own post.
The pencil transfer method is beginner-friendly, budget-friendly, and incredibly versatile. If you’re interested in creating art like my DIY Hand Lettered Canvas Sign, this method is a must-know!
Pencil Transfer Method How-To
Supplies
Materials Needed
- Paper (to print or sketch your design)
- Pencil
- Something to trace (e.g., a computer printout or sketch)
- Something to trace onto (e.g., wood, canvas, or paper)
Tools Needed
- Printer (optional, for printing digital designs)
- Eraser (to clean up smudges after tracing)
Step-by-Step Instructions
1. Create or Print Your Design
- Use your computer to design a word, phrase, or image, or sketch something by hand. Print the design at the size you need or adjust it to fit your project.
- Tip: Double-check copyright rules if you’re using digital designs or fonts from the internet.
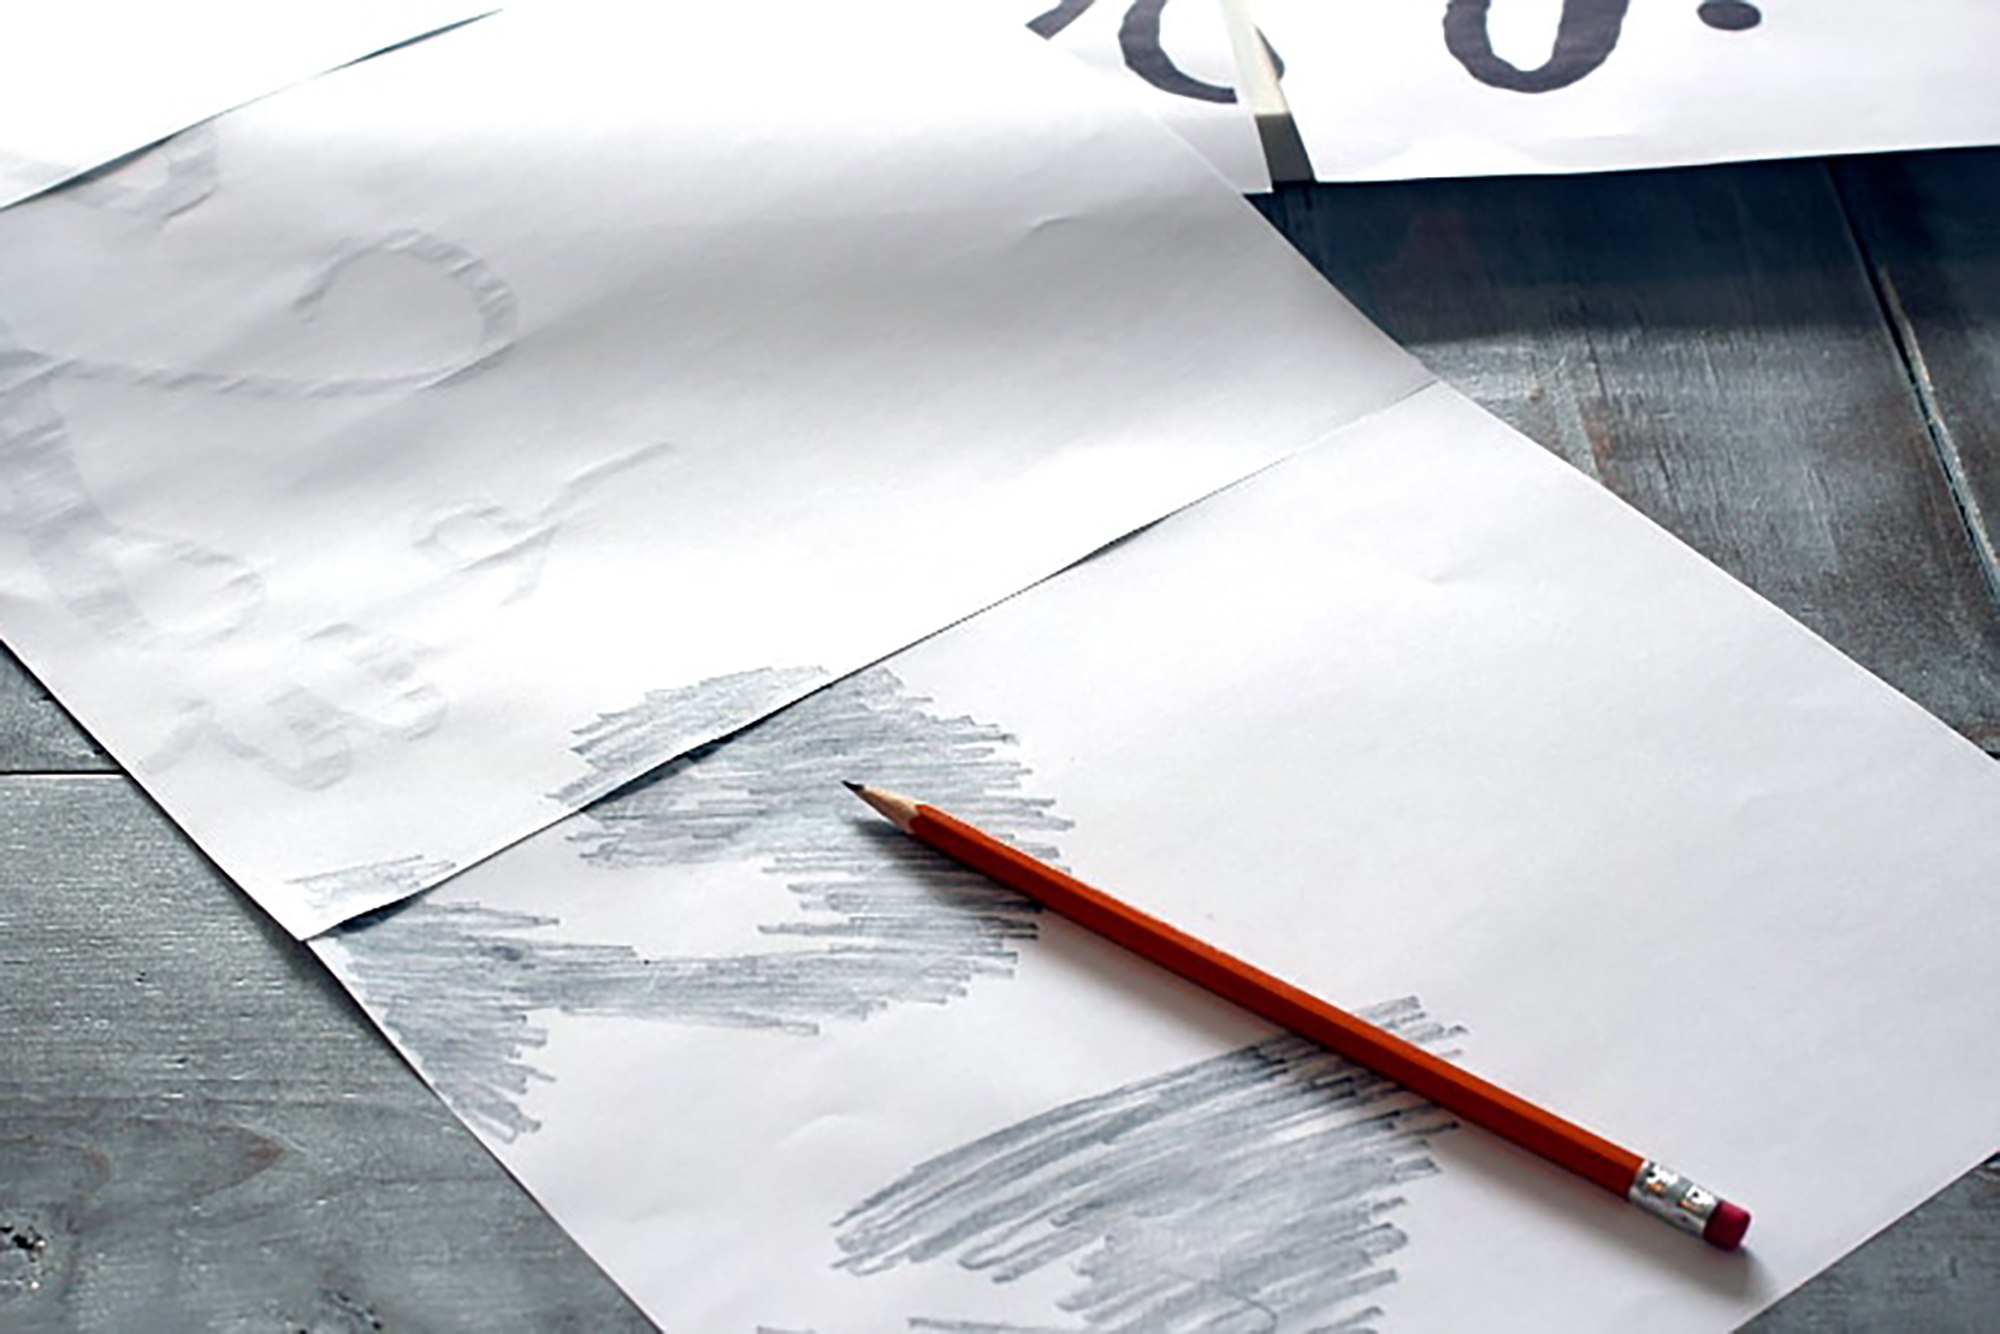
2. Rub Pencil on the Back of the Paper
- Flip your design over so the back is facing up. Using the side of a pencil, rub generously over the entire back of the design. This will create the transfer medium.

3. Place and Trace the Design
- Position the paper (pencil side down) on your chosen surface—wood, canvas, or paper. Secure it with tape if needed.
- Use a pen or pencil to trace over the design. The pressure will transfer the pencil outline onto your surface.
4. Add Finishing Touches
- Once the outline is transferred, use paint, markers, or any medium of your choice to fill in the design. Let it dry, and you’re done!

Tips for Success
- For Crisp Lines: Use a sharp pencil when rubbing on the back of your design. This ensures the transferred lines are clear and easy to follow.
- Secure Your Paper: Use painter’s tape to keep the paper in place while tracing. This helps prevent shifting for a clean transfer.
- Erase Smudges Gently: After filling in your design, use a soft eraser to remove any leftover pencil marks.
FAQs
Yes! For fabric, make sure the pencil transfer is visible and use fabric-safe markers or paints to fill in the design.
The pencil lines may smudge slightly during filling. Use a light hand or seal the design with a fixative spray before adding color.
If the lines are faint, press harder while tracing or ensure the pencil shading on the back of the paper is thick and even.
Yes, but the pencil shading may wear off. Reapply pencil to the back of the paper before each transfer.
While it works best for bold shapes or text, you can use it for detailed designs with patience and precision.
More Home Decor Crafts
- DIY Topiary Trees from Dollar Store Supplies
- Embroidery Hoop Orbs – Easily Make Your Own
- DIY Moss Topiary Balls | How to Make a Topiary
- Photo Coasters – Make Your Own Picture Coasters
- DIY Wood Bead Garland with Tassels & Tag
- Mod Podge Photo Transfer: Easy Canvas Art How-To
- How to Make a Magnolia Leaf Wreath on the Cheap!
- How to Make a Hand Lettered Canvas Sign the Easy Way (No Skills Needed!)
- How to Make a DIY Floating Frame to Enhance Your Art

How to Pencil Transfer Method Tutorial
Learn the pencil transfer method to easily create custom art and signs. Perfect for beginners, this technique works on wood, canvas, and paper.
Materials
- Paper (to print or sketch your design)
- Pencil
- Surface to trace onto (wood, canvas, or paper)
Tools
- Printer (optional, for digital designs)
- Eraser
- Tape (optional, to secure the paper)
Instructions
- Create Your Design
Print a design or sketch one by hand at the desired size. Adjust to fit your project if necessary. - Rub Pencil on the Back
Flip the paper over and rub the side of a pencil over the entire back of the design. - Trace the Design
Place the paper (pencil side down) on your surface. Tape it in place if needed.
Use a pen or pencil to trace the design, pressing firmly to transfer the outline onto the surface. - Fill in the Design
Use paint, markers, or your preferred medium to fill in the traced outline. Allow to dry.
The pencil transfer method is a quick, affordable, and beginner-friendly way to create custom art and signs for your home. Whether you’re working on wood, canvas, or paper, this technique opens up endless possibilities for DIY creativity.
Have you tried the pencil transfer method? What will you create next? Share your projects in the comments or tag me on social media—I’d love to see your art!

So, I see you have several sheets you taped together. Did you print it a certain way or just created your phrase and picked your font and font size and printed it so it would be several pages?
I created the file full size (in the case of the canvas sign shown I made it 24′” x 24″) and then when I went to print I selected full size and my printer gave me the option to tile it out as you see it. See if your printer gives you that option. 🙂
Otherwise you’d have to print a letter per sheet of paper and match it up. Still doable. 🙂
Oooops. Just replied on the other pencil transfer post. Either way…great info. Will let you know how it goes. Suz
🙂 Great!
Great idea! Thanks so much for sharing!!!
Great info! Thank you for sharing. Now hoping my computer has the tile feature for printing.
Hope so!
I’ve used this method and I adore it. I usually use a charcoal pencil, I didn’t realize regular pencil lead would work! Good to know!
I love your singing sign, would you mind sharing what font this is?
New to your blog and ❤️❤️❤️❤️’ing it!
Love the vintage bakery sign, you make it all look incredibly easy. Great blog, thanks for sharing.
How did you determine the font size to use to get the 24×24 finish size….sorry if that’s a dumb question…
You create a custom sized document in whatever program you’re using and then size the font to fill the document. 🙂 Not a dumb question if you’ve never done it before!
I’ve always wanted to know how to do this! Thanks so much for the easy step by step tutorial. I’ll definitely be trying it for my next project. Hope you’re having a great day, Coco
Awesome!!! Have fun with it!
LOVE this! Thank you for sharing! I have a question: WHAT FONT DID YOU USE? Thank you so much!!
Hi Tina, I’m sorry but if it’s a font we use for creating our art prints, we don’t share the font!
Thanks so much for addressing this transfer method! I now have EXACT directions! Look out!
This is so awesome! Thanks so much for sharing this method. It looks like fun too!
it looks like you painted straight on the canvas, what kind of paint did you use that it didn’t need to be primed?
I’m not exactly a professional artist and I like the look of canvas so I didn’t prime or use a paint that took the place of primer. If you are going for a professional look I’d suggest looking for a canvas primer first. Sorry – I know not much help.
Hi Shannon,
I used to find transparencies with beautiful, inspirational quotes on them and I could attach them to bottles, repurposed books. Do you by any chance carry them or know yourself where to find them. I used to see them at Michaels, Joannes…
Hmm. Have you tried Amazon?