I have a confession—keeping real plants alive indoors just isn’t in my skill set. But that doesn’t mean I can’t enjoy a little greenery around the house! When I dreamed up this project, I wondered: Can I make cute, stylish DIY topiary trees using only dollar store supplies? Spoiler alert—I totally did, and I’m so excited to share how you can too!
These topiary trees are a perfect way to add a touch of charm to your kitchen, mantel, or entryway without breaking the bank. Each one costs about $5 to make, and they look just as good as the pricey versions you’d find in stores.
If you’re looking for more affordable DIY projects to spruce up your home – or you can’t find the topiary toppers at the dollar store! – check out my DIY Moss Topiary Balls tutorial. It’s another budget-friendly way to bring a bit of greenery indoors!
Instructions:
1. Prepare the Base:
Cut floral foam to fit snugly into your pots. Plug in your glue gun to heat up, then glue the foam into the pot, pressing firmly to secure it.


2. Add the Skewer:
Insert the pointy end of a skewer into the center of the foam. Add hot glue to the other end of the skewer, then quickly slide on the faux greenery ball. Straighten and hold it in place until the glue sets.


3. Create the Stem and Vines:
Paint the skewer in a mossy green color and let it dry. Roll a small piece of modeling clay into a skinny roll, twist it around the skewer to mimic vines, and repeat with a second piece. Paint the “vines” the same mossy green as the skewer.


4. Age the Pots:
To give your pots a vintage look, dry brush mossy green paint in random spots, followed by a little white paint to blend and soften. Let dry.

5. Finish with Moss:
Apply hot glue to the top of the floral foam and cover it with moss, making sure to tuck it neatly around the edges.


FAQs
Yes! Wooden dowels or even sturdy sticks from your yard can work if you want a more rustic look.
Not at all! If you like the natural look of terra cotta or bamboo, you can skip this step entirely.
Dollar stores often carry them, but you can also find affordable options online or at craft stores. Or you can make some by following the DIY moss topiary ball tutorial here.
If you’re worried about the moss shifting, a quick spritz of hairspray can help keep it secure.
More Home Decor Crafts
- DIY Topiary Trees from Dollar Store Supplies
- Embroidery Hoop Orbs – Easily Make Your Own
- DIY Moss Topiary Balls | How to Make a Topiary
- Photo Coasters – Make Your Own Picture Coasters
- DIY Wood Bead Garland with Tassels & Tag
- Mod Podge Photo Transfer: Easy Canvas Art How-To
- How to Make a Magnolia Leaf Wreath on the Cheap!
- How to Make a Hand Lettered Canvas Sign the Easy Way (No Skills Needed!)
- How to Make a DIY Floating Frame to Enhance Your Art

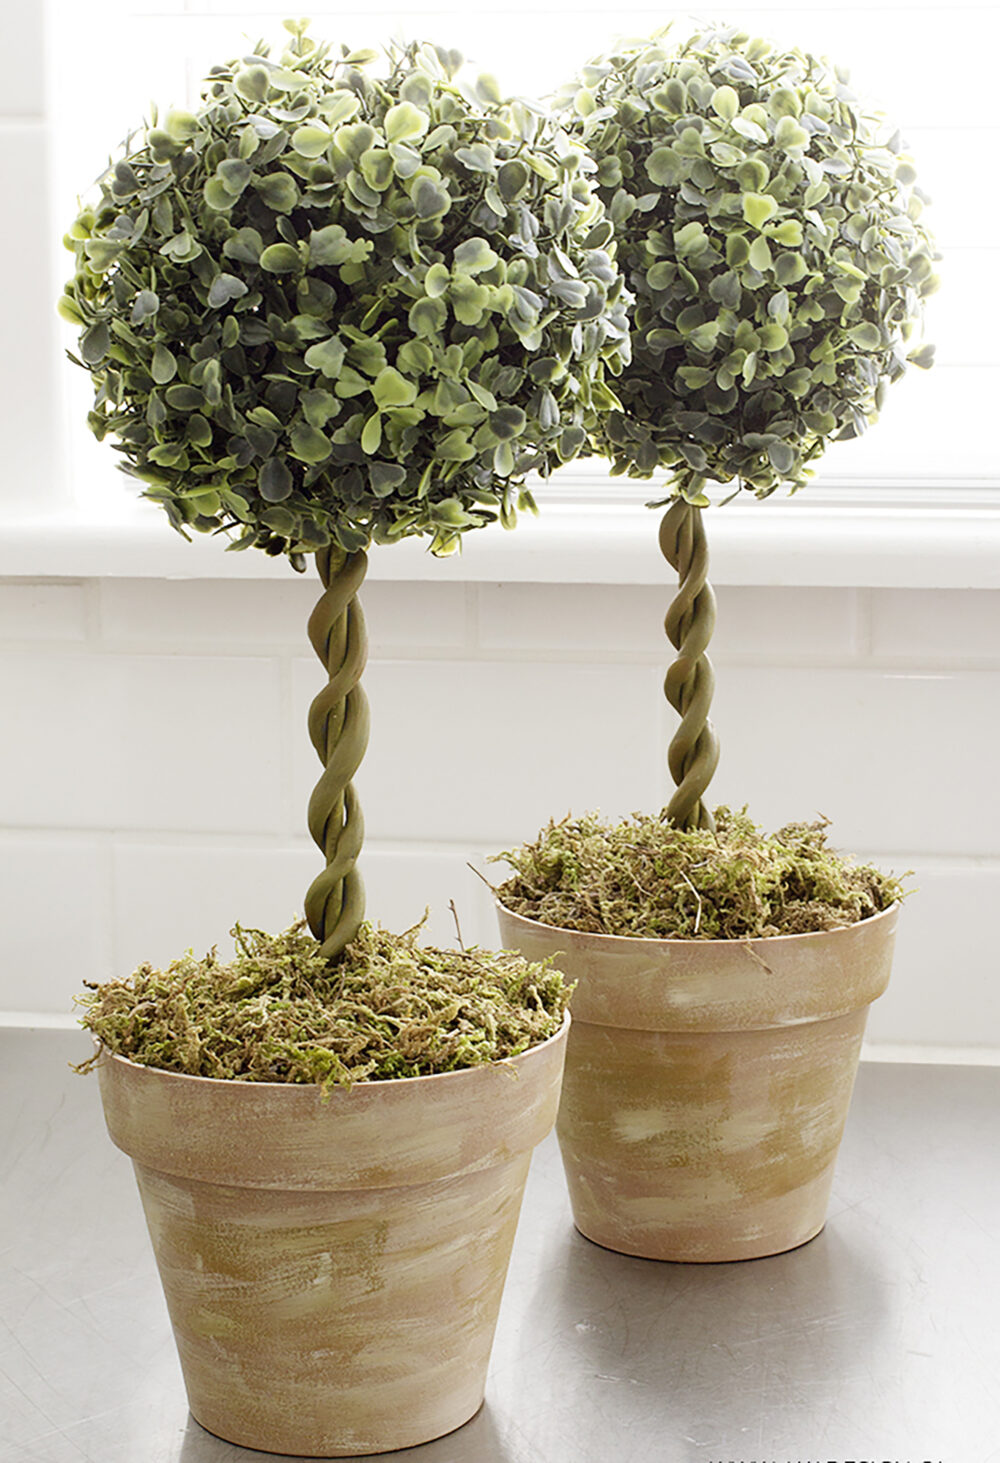
DIY Topiary Trees from Dollar Store Supplies
Love the look of topiary trees, but don’t want to pay the high price tag? Here’s a way to make DIY topiary trees from Dollar Store supplies! (Amazon links included for ease too!)
Materials
- faux greenery balls
- pots (terra cotta - or bamboo which is what I used)
- floral foam
- skewers
- modelling clay
- moss
- paint (green, brown, white)
- plastic dish
- napkins
- hairspray (optional)
Instructions
- Cut floral foam to fit snugly into pots. Meanwhile plug in hot glue gun to heat it up.
- Apply hot glue to bottom of floral foam and place inside pot, pressing firmly to allow glue to adhere the foam to the pot.
- Insert pointy end of skewer into center of floral foam.
- Add some hot glue to other end of skewer. Then quickly slide faux greenery ball onto skewer, straighten and hold in place for a minute or so to allow hot glue to set.
- Now paint the skewer in a mossy green. Let dry.
- Roll a smallish piece of modelling clay into a long skinny roll. Twist around skewer. Repeat with a second piece. This mimics the look of a vine.
- Now paint the modelling clay “vines” in the same mossy green as the skewer stem. Let dry. Don’t worry about getting paint on the floral foam as it will be covered by moss.
- To age your pots (whether terra cotta or bamboo!), sparingly dry brush on a little of the mossy green paint in various places. Then dry brush on white, blending white and green together in some spots. Let dry.
- Finally apply hot glue to the top of the floral foam and cover with moss. Be sure to get the moss all down in beside the floral foam too.
And there you have it—your very own DIY topiary trees made entirely from dollar store supplies! I love how easy and affordable this project is, and the results are just so charming. Whether you’re adding a pop of greenery to your kitchen, living room, or patio, these little trees are sure to bring a smile to your face. Plus, there’s something so satisfying about creating beautiful home décor with your own two hands.
I’d love to know—where would you display your DIY topiary trees? Or do you have any creative twists you’d add to this project? Share your ideas in the comments below, and if you try this project, don’t forget to let me know how it turned out. Happy crafting!

Want to see more content like this in your Google searches?
This button tells Google that Home Made Lovely is a source you like, so it can show you more of it.
Wonderful!
Such a great idea! Thanks for sharing! I love using faux greenery inside the house 🙂
Yay! I’m glad I’m not the only one.
How cute and creative you are. You think outside the box on your projects and that helps the rest if us to see things in a different way as well. Did you find the box wood balls recently? If so can you share where? I live in a small town in the south with multiple dollar stores. Lol. So hope I might get lucky. Always look forward to your blog in my inbox. Thank you for sharing your talents with us.
I’ve found the greenery balls consistently at Dollarama for several years. And I’m so glad you enjoy all our projects!
What a beautiful look!
Great tutorial! You wouldn’t believe what I paid for a set of 3 boxwood topiaries- and mostly because I loved their vine stem. Who knew how easy it is to recreate?!!
Now to figure out how to make a cheaper boxwood wreath! 😉
Super cute! Thanks for sharing!
They are stunning! It was genius to make the vines from clay.I love a good dollar store craft that looks classy and elegant.
It was fun – and yes making dollar store crafts look good is the best! I’m glad you approve!
Love these. Gonna give it a whirl. Thanks for sharing
Have fun!
What a clever idea! Love how you made the vines that wrap around the skewer–they really add an upscale look to the finished topiaries. Thanks for sharing!
Brilliant! Absolutely bloody brilliant! Cheers, Ardith
Lol. Why thank you! 🙂 *blushing*
I love my Daily Shannon fix. This one is outstanding. I will finally get some these little guys!
This made me smile so big! Thank you so much Susie!
Amazing what a bit of creativity and the Dollar Store can produce! Great job and great look for pennies what would cost sooooo very much more done in any other store.
Absolutely amazing! Clever, and beautiful job! These get really pricey to buy and can’t believe you did it so frugally. Love this! (sharing)
Thank you so much – for sharing too!
These are awesome! Totally doing this and I already have the boxwood balls and the perfect flower pots too. Thanks for the inspiration!
Yay! Have fun!
so I went today and litterly scoured the shelves, walls and floors to find any green ball 😉 I found one that looks like a boxwood and one that does not.. i have completed my topiaries but forgot the clay..dang it! a quick run to the $ store always costs about $20!!LOL
Lol. True.
pretty neat hack, although can’t say I’ve ever seen the greenery balls at dollar store
That’s too bad – we have them at Dollarama all the time!
I abaolutely love your blog and find many of your post’s to
be just what I’m looking for. can you offer guest writers to wwrite content available for you?
I wouldn’t mind creating a post orr elaborating on some of the subjects you write regarding here.
Again, awesome web site!
I love love love this project!!! The stem is so creative! Thanks for sharing it THE SCOOP! PINNING AND FEATURING YOU ON FACEBOOK!
Love the topiary. This looks nice and easy, my kind of craft!
Mine too!
These are very similar to a project of mine I did on my crafting blog a couple of years ago, but I LOVE, LOVE, LOVE your idea with the modeling clay. Really kicked it up a notch, I may have to try! Thank you for sharing.
I would have never thought to use modeling clay for the stems. . . too cute!
The vines make a difference – a little more detail. 🙂
LOVE these!! Love topiaries so I’m totally going to make these!! Thanks so much for the idea and all the great instructions!!
I got soo excited when I saw this project! I have been looking everywhere for boxwood balls and can’t find any! 🙁 Wish I had access to a Dollarama
These are great, I especially like the chunky look the vines you added give the stem. I’m actually ok at keeping house plants alive most of the time (I do stick to easy, good tempered ones though!) but I love the look of these.
Yeah, sadly I can’t even keep the easy ones alive!
Totally amazing! How creative you are to come up with something that looks similar to the costly topiaries at the expensive home design stores, and yet for a few bucks! Great job!
I’m in Ga. We don’t have Dollarama stores here. Might have to go to Michael’s. Also I have a covered porch. Can I make them bigger by using double balls and long dowels? And place them outside?
I love these topiaries! I am going to purchase some clay, and I have already bought the boxwood balls at HL – these topiaries will be my sister’s birthday gift. Is the clay found in the toy section or crafts? Thanks so much!
You are so welcome! Where the club is depends on the store. I used plain grey clay. Have fun! And happy birthday to your sister!
Shannon, I love these little topiaries! You’ve done a knockout job on them. I love it when bloggers (or anyone) shows me how to make something cool from DT supplies! I shop there often and just found some moss-covered “rocks.” I will soon make a wreath using them and adding some tiny houses or fairy garden supplies. Love DT!
DT is also a good source for books. I just picked up 2 novels and one cookbook/gardening book last week.
That’s awesome, Barbara! Sounds like you’re making good use of a great resource!
Hi Shannon! I stumbled upon your website as I was looking for great DIY topiary tutorials. You are absolutely amazing! I’m making these as inexpensive centerpieces for my son’s backyard bday party. Question: did you let the modeling clay dry for a period of time before painting? Also, I saw the picture of the paint you used but I’m completely unfamiliar with the do’s and dont’s on painting (or anything crafty for that matter). Do you have any suggestions on the type of paint or what to steer clear from? Any suggestions or tips you can share would be GREATLY appreciated.
I subscribed and am looking forward to creating the comfy home I’ve always wanted but never knew how to accomplish! 🙂
Hi Sandra, thank you so much! I only let the clay dry for a very short time. You could let it dry longer, but I don’t think it really matters. Any craft paint would work for the paint. No worries. You can do it!
Where were you when I purchased mine from Pier One at three times the price. I can hardly wait to make my very own.
OH dear! I’m sorry! I’m glad you can make some of your own now though.
This is absolutely gorgeous, and I can’t wait to make this.
Hi, Shannon. I just stopped by sort of by acciident from Petite House blog. I do grow house plants and have quite a bit of success. Especially with African Violets which I dearly love. I think that’s because they remind me of my dear maternal grandmother who always had them growing in her house. I also have cactuses which were about the only thing my dear mother could grow! In fact I have one that was given to her when I was a baby and that was seven-plus decades ago!
I like the topiaries and especially the fact that they didn’t cost a lot to make. Before I read your tutorial I read one for making moss balls with styrofoam balls and dried moss. I tho’t of combining the two sets of instructions and placing the real moss balls on the skewers in the pots. I’m not so fond of the plastic topiary balls, so I tho’t I might like the moss balls better. But they might look funny because moss doesn’t really grow at the end of a long stem!
Anyway, I enjoyed your tutorial!
Hello Naomi! That is such a beautiful story about the Violets and the Cactus! I know what you mean, I don’t love all the plastic topiary balls. Some are good though. And you made me giggle with the moss balls on a stem! 🙂 Happy to have you reading!
Shannon you are a rock star! I found some great topiary balls on clearance,but have been on a, dare I say it, quest! to find stems. This is brilliant. Your topiaries look lovely. I’m headed to the dollar store ! Hugs!!
Love these topiaries- and the stems are brilliant!
You have such great ideas-
Great idea 😊
Thank you, Linda!
I love this post. I had no idea, until now how simple it is to make a topiary tree. Thanks to your fabulous step by step tutorial, I now can make one to. Going out today and get supplies. You rock!!!
Yes! They can be so easy!
Omg LOVE THESE.CANT WAIT TO GO SHOPPING AND MAKE THEM.I totally love topiarys.Thank You so much.
You are welcome! Have so much fun making them for your house!
Shannon, a great tutorial and fabulous, expensive looking end result. Definitely gonna try this. Pinned.
Thanks, so much!!! I appreciate the shares on Pinterest!
I love those. My dollar trees around here never have the faux greeeny balls
Thank you for sharing. This is exactly what I was looking for. You’re Awesome!
I’m so glad! Yay!
gorgeous! I love this DIY. Thanks for sharing
Thanks, Ivory!
Omg these are awesome 👏. Can’t wait to make these! Thank you 😊
Enjoy!
If this space is to leave a comment about the topiary… What about the TOP part? Did you buy the greenery at the dollar store as well? How did you put that on the styrofoam ball? I’m assuming that’s what you used. Right? You didn’t finish explaining how you made the top part!🥴
The top part was bought as is from the dollar store, as indicated in the blog post. No styrofoam ball!
I love this and I’m going to make these but as I went through the list of supplies, where does the hairspray come in?