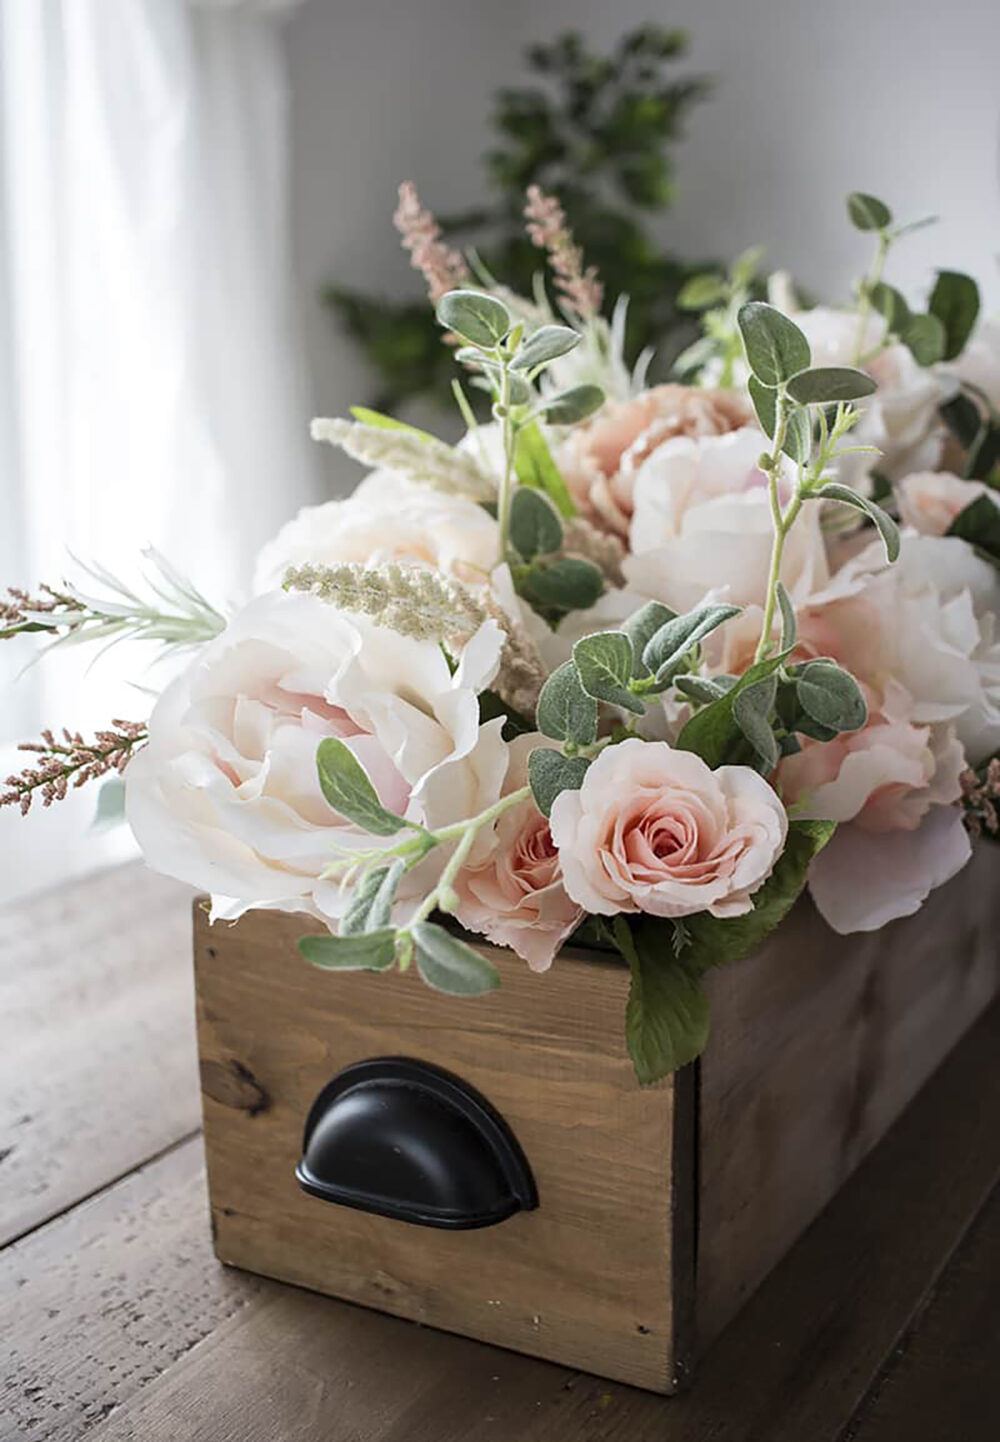
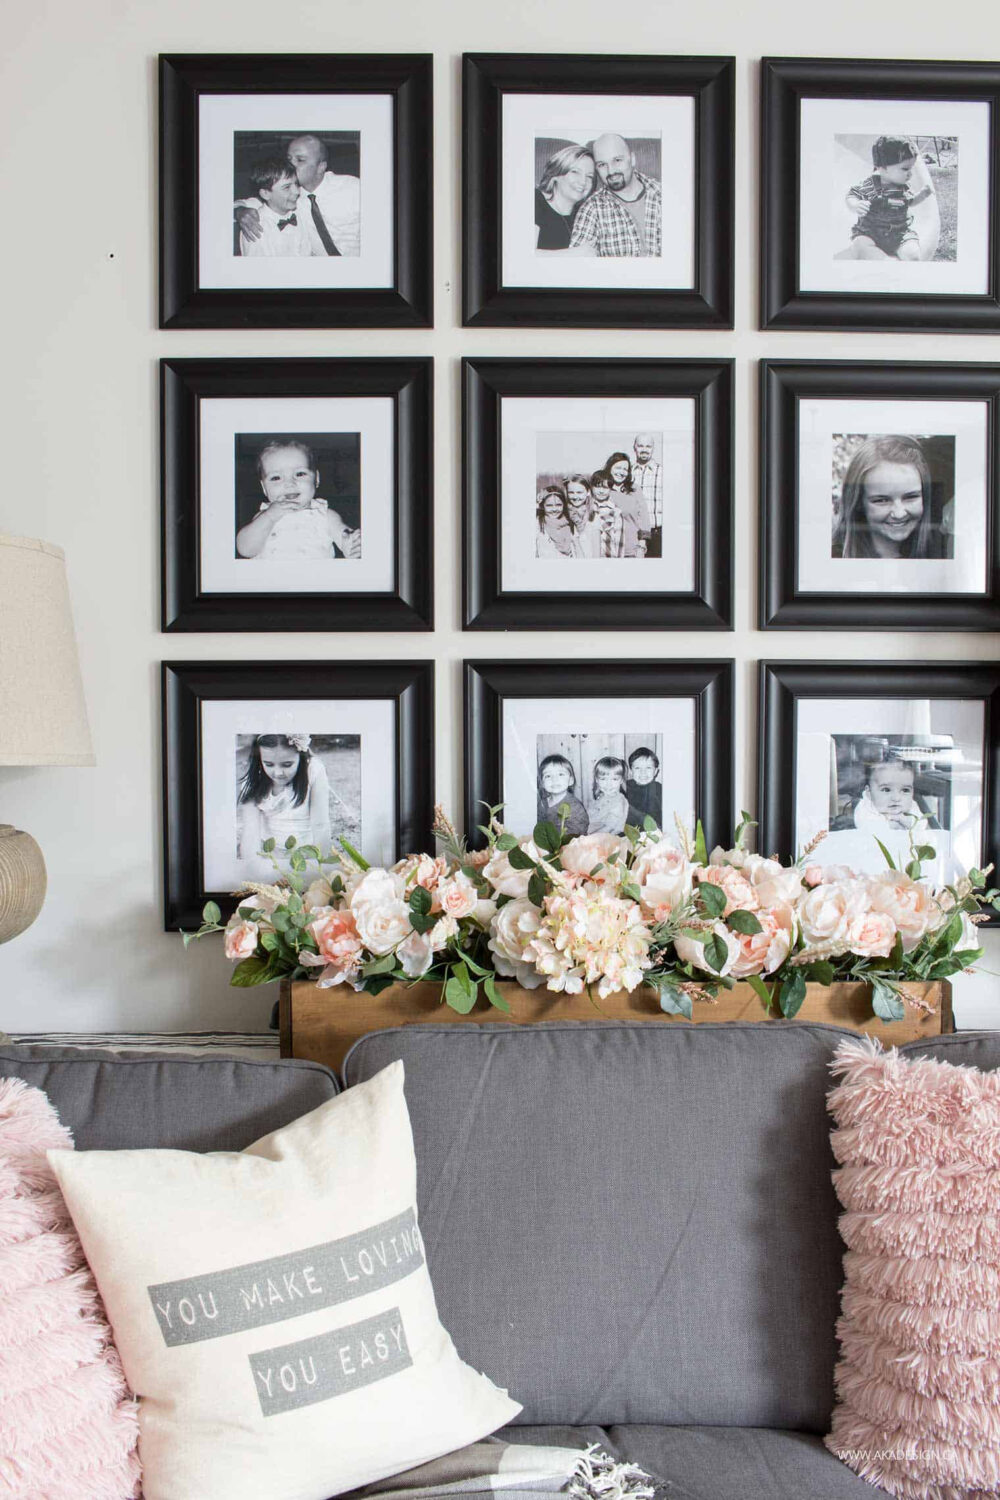
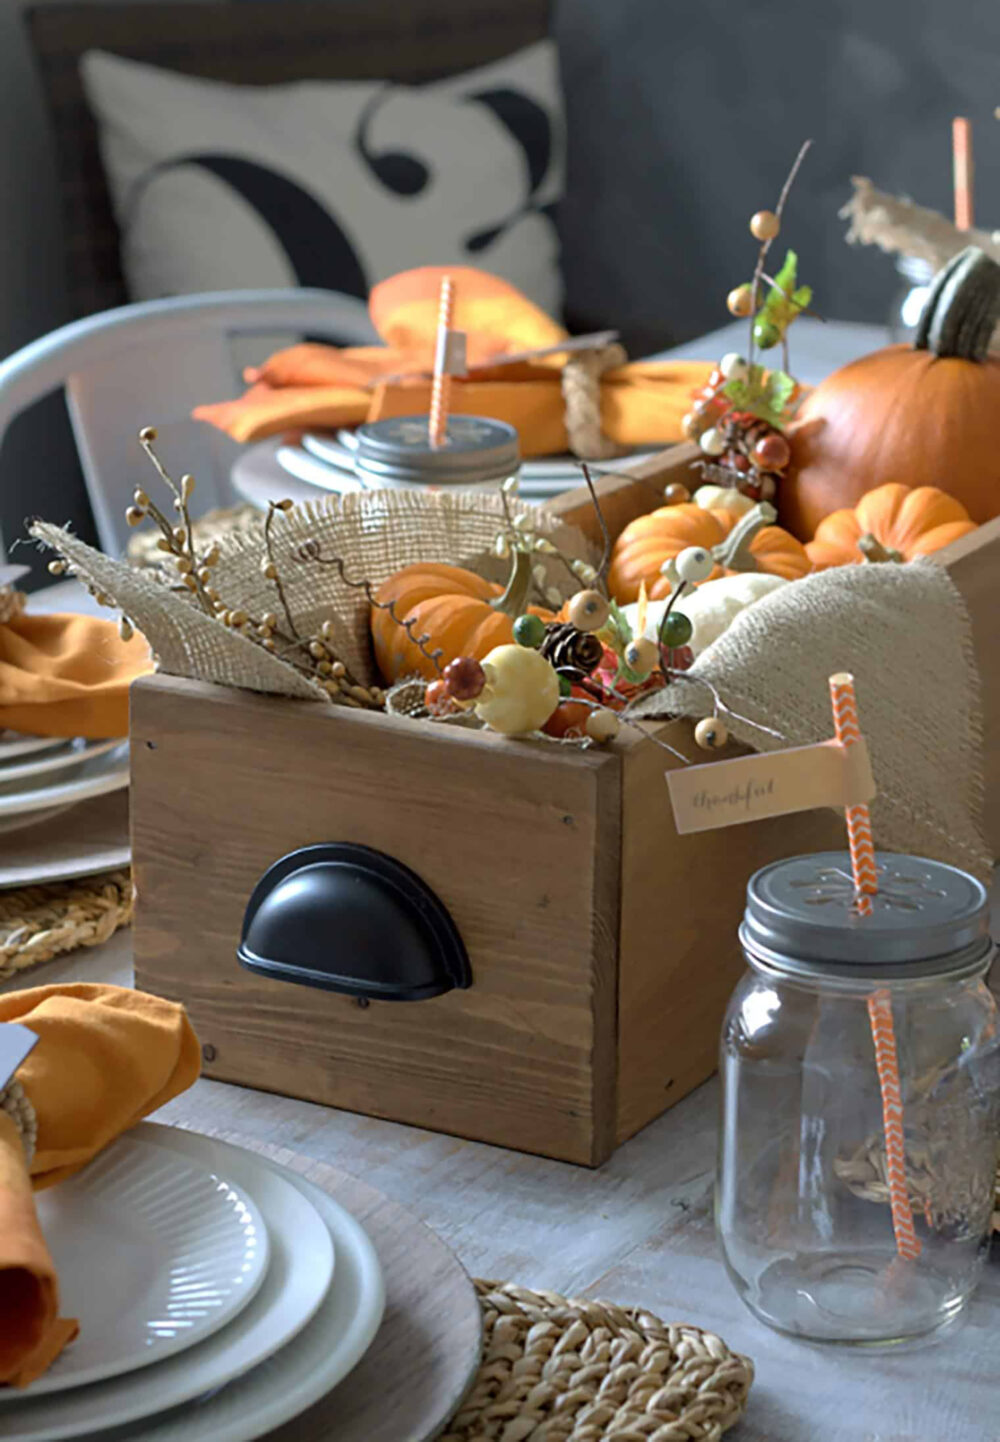
A wooden box centerpiece is such a charming way to add a touch of rustic elegance to your table! It’s perfect for showcasing flowers and greenery—whether faux or fresh—and it works beautifully for every season. Dean and I first made ours back in 2013, and it’s been a staple in our home ever since, gracing three dining tables and even a sofa table. I’m so excited to share how you can make your own DIY wood box centerpiece that will bring that same cozy charm to your space.
Once your box is complete, you might enjoy learning How to Create a DIY Faux Flower Arrangement to style it beautifully for any occasion or season. It’s the perfect finishing touch to make your centerpiece truly stand out!
How to Make a Table Box
This DIY wood box centerpiece is delightfully simple to make. In fact, you can whip one up in no time and customize it to suit your decor style. Here’s everything you’ll need to get started. (List includes affiliate links.)
Supplies
Materials
- Two 1x6x8 ft boards (or two 1x6x6 ft boards if available)
- Paint or stain of your choice (we used Minwax Dark Walnut)
- Foam brush
- Lint-free rags
- Two drawer pulls (we used half cup pulls similar to these, but you can use whatever you like!)
- Screws for the drawer pulls (if not included)
Tools
Cut List
- 3 – 1 inch x 6 inch x 35 inch (for the sides and bottom)
- 2 – 1 inch x 6 inches x 7 inches (for the ends)
Instructions
1. Measure and Cut Your Boards
Start by measuring and marking your boards according to the cut list. Accuracy is key here to ensure your box assembles perfectly. Use a saw to cut three pieces for the sides and bottom (35 inches each) and two shorter pieces for the ends (7 inches each). Double-check your measurements before cutting—measure twice, cut once!
2. Sand the Pieces
Before you assemble the box, sand each piece thoroughly. Pay special attention to the edges and surfaces to ensure they are smooth and splinter-free. A palm sander works quickly and evenly, but you can sand by hand if needed. Sanding at this stage is much easier than trying to get into tight corners after assembly.
3. Assemble the Box
It’s time to put your table box together! There are two ways you can assemble it:
- Option 1: Start by attaching all four sides together to create a rectangular frame, then attach the bottom piece inside the frame.
- Option 2: Begin with the bottom piece and attach the sides directly to it, working your way around to form the box.
Both methods work, so choose the one that feels easiest for you. Use a nail gun and 1-inch nails to secure each joint. If you don’t have a nail gun, you can use wood screws, but pre-drill holes to prevent the wood from splitting.
4. Apply Stain or Paint
Once your box is assembled, it’s time to give it some character with stain or paint. I used Minwax Dark Walnut stain for a rich, warm finish, but you can choose whatever fits your style. Apply the stain with a foam brush, working in long, even strokes. Let the stain sit for a few minutes to soak into the wood, then wipe off the excess with a lint-free rag. Allow it to dry completely before moving to the next step.
If painting is more your style, use a good-quality paint and apply at least two coats for even coverage. Don’t forget to lightly sand between coats for a smooth finish.
5. Drill Holes and Attach Drawer Pulls
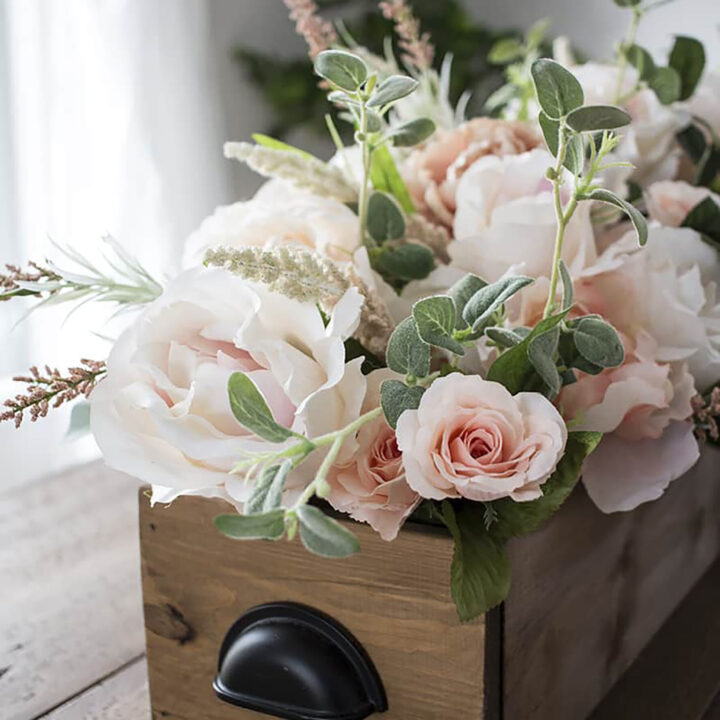
To add a little extra charm and functionality, attach drawer pulls to the ends of your box. Measure and mark where you want the pulls to go, ensuring they are centered. Use a drill to make the holes, then attach the pulls with screws. Drawer pulls not your thing? You can skip this step or experiment with decorative knobs or rope handles for a different look.
6. Style Your Table Box
Now comes the fun part—decorating! Fill your table box with faux or fresh flowers, greenery, candles, or seasonal decor. If you need inspiration, check out my post on How to Create a DIY Faux Flower Arrangement for tips on styling it beautifully.
FAQs
You can use pine boards, as they are affordable and easy to work with. If you want a more durable box, consider hardwoods like oak or maple.
Yes! You can use wood screws or even wood glue with clamps, though it may take a bit longer to assemble.
To create a distressed look, lightly sand the edges and corners after staining or painting. You could also try using a dry-brush technique with a lighter paint color.
Absolutely! Adjust the measurements to fit your space or desired look. Just ensure you cut the pieces accurately and maintain the same assembly process.
More DIY Decor Projects
- Shiplap and Barn Beam Fireplace Mantel Makeover
- DIY Range Hood Cover: Easy Custom Kitchen Upgrade
- Build a Faux Mantel Shelf For YOUR House to Decorate Each Season!
- DIY Balustrade Coffee Table + Where to Get Balustrades!
- DIY Faux Floral Arrangement: Feminine Yet Rustic Crate
- How to Seal Butcher Block Counters for a Durable Finish
- DIY Farmhouse Bathroom Mirror Tutorial
- How to Make a Large Hanging DIY Chalkboard
- Walnut Butcher Block Counters: Installation and 8-Year Review
DIY Decorative Table Box Tutorial
Learn how to make a DIY wood box centerpiece with this simple tutorial! Perfect for adding rustic charm to your table with flowers or decor.
Materials
- Two 1x6x8 ft boards (or two 1x6x6 ft boards if available)
- Paint or stain of your choice (we used Minwax Dark Walnut)
- Foam brush
- Lint-free rags
- Two drawer pulls (we used half cup pulls similar to these, but you can use whatever you like!)
- Screws for the drawer pulls (if not included)
Tools
- Nail gun and 1 inch nails
- Tape measure
- Pencil
- Palm sander
- Drill
Instructions
- Measure and Cut: Cut all your 1x6 boards to the sizes listed above.
- Sand: Sand each piece thoroughly before assembly. This is much easier than trying to sand inside corners later!
- Assemble the Box: Use the nail gun to assemble the box. Start by attaching the sides together, then add the bottom. Alternatively, you can attach the sides directly to the bottom and work your way around—whichever feels easiest for you.
- Stain or Paint: Apply your chosen stain or paint with a foam brush. Let it sit for a few minutes, then wipe off the excess with a lint-free rag. Allow it to dry completely. If you need help, check out my step-by-step tutorial on staining wood for detailed instructions.
- Attach Drawer Pulls: Drill holes at each end of the box to fit your drawer pulls, then screw them into place.
- Decorate: Add your favorite flowers, greenery, or other seasonal decor to complete the look.
Cut list:
3 – 1 inch x 6 inch x 35 inch (for the sides and bottom)
2 – 1 inch x 6 inches x 7 inches (for the ends)
This DIY wood box centerpiece has been a favorite in my home for years. I love how versatile it is—whether it’s holding seasonal flowers, greenery, or candles, it adds a warm, rustic charm to any room. I hope this tutorial inspires you to create one of your own. It’s simple to make, fun to customize, and such a satisfying way to bring a little handmade beauty into your home. If you make one, I’d love to see how you style it—drop a comment below and share your ideas!

Want to see more content like this in your Google searches?
This button tells Google that Home Made Lovely is a source you like, so it can show you more of it.
yay!! I’ve always adored this in your photos – I may just have to make my own! 😀