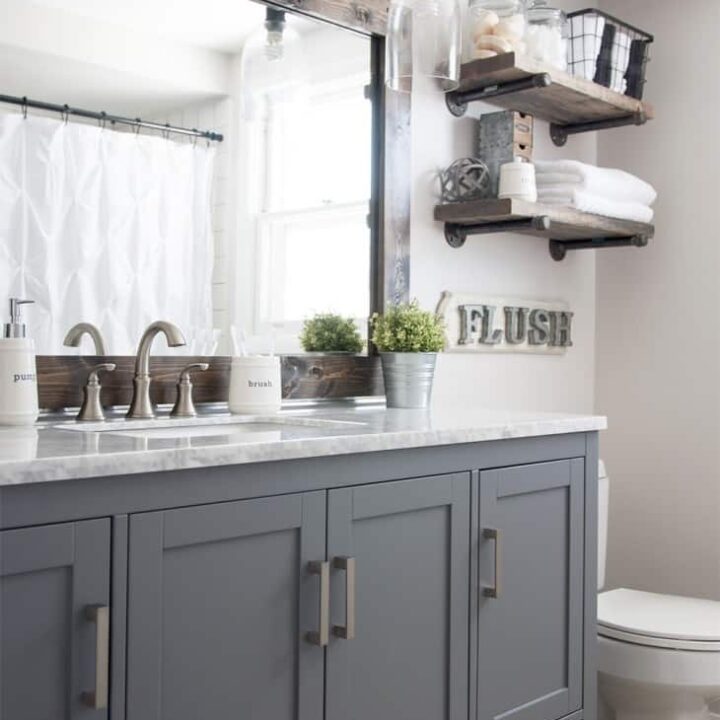
Want an easy way to make that boring bathroom mirror look stylish without breaking the bank? I’ve got you covered! My friend Ashley from Cherished Bliss graciously shared her simple and stunning DIY Farmhouse Bathroom Mirror tutorial with us, and trust me, this project is a game-changer.

When I first saw Ashley’s mirror, I was inspired to rethink how we approach boring builder-grade mirrors. If you’re already feeling crafty, this tutorial is a perfect weekend project. And if DIY isn’t your thing, you might just find yourself inspired to refinish a thrifted frame instead. Before you dive in, you might also enjoy my post on how to create a rustic wood headboard, which complements this farmhouse look beautifully!
DIY Farmhouse Bathroom Mirror Tutorial
Materials
- Four pieces of 1″ x 4″ wood (cut to fit your mirror size)
- Wood glue
- Minwax Jacobean wood stain
- Gray paint (I used Sherwin-Williams Urban Bronze)
- Helmsman spray varnish
- Four corner braces
- Black spray paint (optional, for corner braces)
- 3M Command Strips
Tools
- Sandpaper
- Lint-free cloths
- Paintbrush
- Staple gun and staples
- Miter box or miter saw
Instructions
1. Cut the wood
Measure and cut four pieces of wood: two to match your mirror’s height and two for the width. Miter the corners at 45 degrees for a clean, professional look.
2. Prep the wood
Sand the wood pieces and remove any dust or debris.
3. Apply the stain
Using a lint-free rag, apply a coat of stain to both sides of the wood to avoid reflections of the unfinished wood in the mirror. Let it sit for five minutes before wiping off excess stain, and allow it to dry completely.

4. Add a gray wash
Mix equal parts gray paint and water for a light, watery consistency. Brush the mixture over the stain and immediately wipe it off with a cloth. This technique creates a weathered, farmhouse look. Let it dry thoroughly.


5. Seal the wood
Protect the frame from moisture with Helmsman’s spray varnish. If you’re less concerned about moisture, you can use a regular polyurethane instead.

6. Assemble the frame
Apply wood glue to the mitered corners and staple them together on the backside.
7. Attach corner braces
For a decorative touch, secure black corner braces to each corner. If needed, spray paint them black for a cohesive look.

8. Hang the frame
Attach the frame to the mirror using 3M Command Strips for a non-permanent solution. Alternatively, you can screw it directly to the wall or glue it to the mirror. If your mirror has bulky brackets, replace them with smaller washers to ensure a snug fit.

FAQs
Yes, you can use any type of wood that fits your style and budget. Pine is a great affordable option, while oak or cedar will add a more premium look.
Not at all! You can customize the finish to match your bathroom decor. Consider using whitewash for a lighter look or a rich, dark stain for added drama.
Yes, if you follow the instructions on the package and use enough strips. For larger mirrors, consider screwing the frame into the wall for extra security.
Simply replace the brackets with smaller washers to help the frame sit flush.
More DIY Decor Projects
- Shiplap and Barn Beam Fireplace Mantel Makeover
- DIY Range Hood Cover: Easy Custom Kitchen Upgrade
- Build a Faux Mantel Shelf For YOUR House to Decorate Each Season!
- DIY Balustrade Coffee Table + Where to Get Balustrades!
- DIY Faux Floral Arrangement: Feminine Yet Rustic Crate
- How to Seal Butcher Block Counters for a Durable Finish
- DIY Farmhouse Bathroom Mirror Tutorial
- How to Make a Large Hanging DIY Chalkboard
- Walnut Butcher Block Counters: Installation and 8-Year Review
DIY Farmhouse Bathroom Mirror Tutorial
Transform your boring bathroom mirror into a stunning farmhouse-style statement piece with this step-by-step DIY tutorial!
Materials
- Four pieces of 1" x 4" wood (cut to fit your mirror size)
- Wood glue
- Minwax Jacobean wood stain
- Gray paint (I used Sherwin-Williams Urban Bronze)
- Helmsman spray varnish
- Four corner braces
- Black spray paint (optional, for corner braces)
- 3M Command Strips
Tools
- Sandpaper
- Lint-free cloths
- Paintbrush
- Staple gun and staples
- Miter box or miter saw
Instructions
- Cut the Wood
Measure and cut four 1" x 4" wood pieces to fit the mirror. Miter the corners at 45 degrees for clean edges. - Sand the Wood
Sand each piece to remove rough edges, then wipe off any dust or debris. - Stain the Wood
Use a lint-free cloth to apply stain to all sides of the wood. Let it sit for five minutes, then wipe off excess. Allow to dry completely. - Apply a Gray Wash
Mix equal parts gray paint and water, brush the mixture onto the stained wood, and immediately wipe it off to create a weathered look. Let it dry thoroughly. - Seal the Frame
Apply a protective coat of Helmsman spray varnish to guard against moisture. - Assemble the Frame
Glue the mitered corners together, then staple the back for added stability. - Attach Corner Braces
Secure black corner braces to the front corners of the frame. If needed, spray paint them black first. - Hang the Frame
Use 3M Command Strips to attach the frame to your mirror. Replace bulky mirror brackets with washers if necessary for a flush fit.
This project is such a fun and satisfying way to add farmhouse charm to your bathroom! Whether you’re sprucing up your space for the first time or just looking for an easy weekend DIY, this tutorial makes it approachable and rewarding.
A huge thank you to Ashley for sharing this with us. I’d love to hear how your project turns out—let me know in the comments below!

Want to see more content like this in your Google searches?
This button tells Google that Home Made Lovely is a source you like, so it can show you more of it.
Love it! I’ve been planning to do something like this, just need to figure out how to get the pieces cut without a saw 😉 Did you also create those shelves?
You can buy a $10 miter box saw that would do all those cuts just fine! 🙂
Thanks. Can’t wait to try this. Your posts are confidence-building.
Awesome!!! Would love to see it!
I love everything about this bathroom! Can you share where the vanity and lights came from?
Yes please share!
The rest of Ashley’s bathroom makeover can be found here: http://cherishedbliss.com/industrial-farmhouse-bathroom-reveal/.
Hello Shannon!!
In the farmhous mirror feature, could you tell me about the vanity? Did you purchase (where) ? Also, love the color! Can you share?
This vanity looks similar to the one I special ordered from Lowes…. OVE is the manufacturer and Daniel Grey is the color name. The one I have has three drawers in the middle and two doors on the sides, and has a marble top – all one piece and extremely heavy – but stunning!
Thanks for sharing this Judy! And for further info on the bathroom, Ashley’s industrial bathroom makeover can be found here: http://cherishedbliss.com/industrial-farmhouse-bathroom-reveal/.
Hello,
Also interested in color of vanity as well as the soap / toothbrush holders (are those Rae Dunn?!).
Sorry! I’m not sure where Ashley got them from! But here bathroom makeover post is here: http://cherishedbliss.com/industrial-farmhouse-bathroom-reveal/
Hi Shannon. I totally love your rustic mirror frame! Just what I’m looking for! Did you place it directly over an existing mirror? I’m hoping this will work as I don’t want to take down the large mirror we have in our master. On one side of our mirror tho it butts up to the wall. Will that be a problem?
Thanks for your advice!
Lori
Hi Lori, I believe that Ashley put the frame over an existing mirror. 🙂
Did you mean to say that you attached the command strips directly to the mirror FRAME instead of the miror?
You went on to say that you put four command strips on each board, so I am assuming you put the strips on the boards and not directly on the mirror itself. Thanks for clarification.
Yes, I believe Ashley did attach the command strips to the mirror and the frame – i.e. she attached the frame to the actual mirror with Command strips so she could change the frame easily if and when she decided she didn’t like it anymore. 🙂
Two comments: (1) Bummer that no one is getting their questions answered by the blogger, (2) I notice that on all the pics, the corners of the frame are strategically covered. Makes me wonder.
Also, please don’t rely on a $10 miter box for good corners. Someone suggested that and it’s dubious advice.
1. The questions have all been answered as far as I can see. 2. You can fully see a corner of the frame just fine in this photo https://homemadelovely.com/wp-content/uploads/2016/03/Spray-Paint-Corner-Brace.jpg. Also if someone is a beginner a $10 miter box may be all they can afford and it will work for a rustic looking project like this. Thanks for your comments.
Hi Shannon,
I noticed that it is mentioned the boards used to frame the mirror were 1×4’s. Is this accurate? That seems so thick?! And the pictures don’t seem to look that dramatic. I had a spare 1×4 in the garage and held it up and it looks so much more chunky! Any idea if a thinner board was used or would work?
Thanks!
Yes, Sandra, that is accurate. I would imagine that any size board you’d like would work! It’s up to you!
Thanks for the reply Shannon! Looks like I will have to use something thinner. The 1×4 blocks my outlet 🙁
Can’t wait to get it done though!
Aw, sorry about that! Let us know when you finish though!
What kind of wood did you use? If I want more of a pecan finish, what color stain would I use. Love this idea of framing the mirror. The bathroom looks amazing!
Hello Cheri. Sorry I missed this comment earlier. I’m not sure what Ashley used – I’m guessing either pine or spruce from the hardware store.
Oh and try Puritan Pine or another similar stain color for a more pecan look.
Loved this how-to!!! My husband and I made our very own mirror frame this weekend and it turned out perfect. Thank you for sharing!
Awesome! I’m so glad Ashley’s post was helpful!
What is the color on your wall?
Sorry, Tiffany, I’m not sure what the color is on Ashley’s bathroom wall. Perhaps she has it on her blog CherishedBliss.com.
I’m so excited to tackle this project. I bought the miter box and hand saw, but I’m not sure how to cut the boards to the proper size, since they are cut at a 45 degree angle. I have no idea how to measure for this. Any help would be so appreciated!!
I’m pretty pleased to uncover this website. I wanted to thank you for ones time just for this fantastic
read!! I definitely appreciated every little bit of it and I have
you book marked to look at new things in your website.
Thank you for sharing! Exactly what I have been looking for.
Awesome!
Fantastic tutorial! Thanks for the step by step! Might have to give it a whirl over spring break!
Perfect idea!
I am about to start this project and I’m a total newbie – does it matter what grit the sandpaper is? The link provided is a variety pack. Also, when you wipe off the excess stain and paint, should the lint free rag be dry or wet? Thank you! Just trying to up my odds off success 🙂
Hi! Fine grit sandpaper (100) or medium grit (60-80) would be best for preparing raw wood for finishing. And when removing the excess stain, the rag should definitely be dry!
Looks great and so simple! Does the finish of the gray paint matter? I have so many gray sample cans and would prefer to use one of them rather than buy another.
I would suggest not glossy!
How do you attach the mirror to the frame?
You don’t. You actually leave the mirror as it is on the wall (most bathrooms have these), replacing those large plastic holders with washer and then just hang the frame over that with command strips. 🙂
Love it!!! Totally off the mirror but what is the paint color on your cabinets???
I’m sorry! I have no idea what paint color Ashley used on her cabinets!
I’m confused. You do not explain how to get the mirror onto the frame.
The mirror is not on the frame. The mirror is mounted to the wall, and the frame is simply placed over top of it!
Hi there! I just made this and it came out perfect! My only issue is the command strips will not stick to the wood frame. Any idea why that would happen or suggestion for another way to put the gram on the mirror.
Can I ask what paint color is used on your vanity?
Hi there Mandy,
I don’t believe the bathroom vanity was painted. Ashley bought the vanity from Wayfair. Sorry!
xo, Shannon
What color are these bathroom cabinets? Love it!
HI Stacey,
This is our friend Ashley’s house. Unfortunately, she didn’t paint the cabinets, they were purchased in that color!
Can you give a little more detail or show a picture of the “washers” that are referred to when changing the large clips that hold the mirror.
Hi Joann,
Unfortunately this was created by our friend Ashley at her house. So we don’t have anymore photos than what is here.
Love this look! What color are the bathroom walls?
I believe Ashley painted them Sherwin Williams Simple White. It just looks gray in the space.