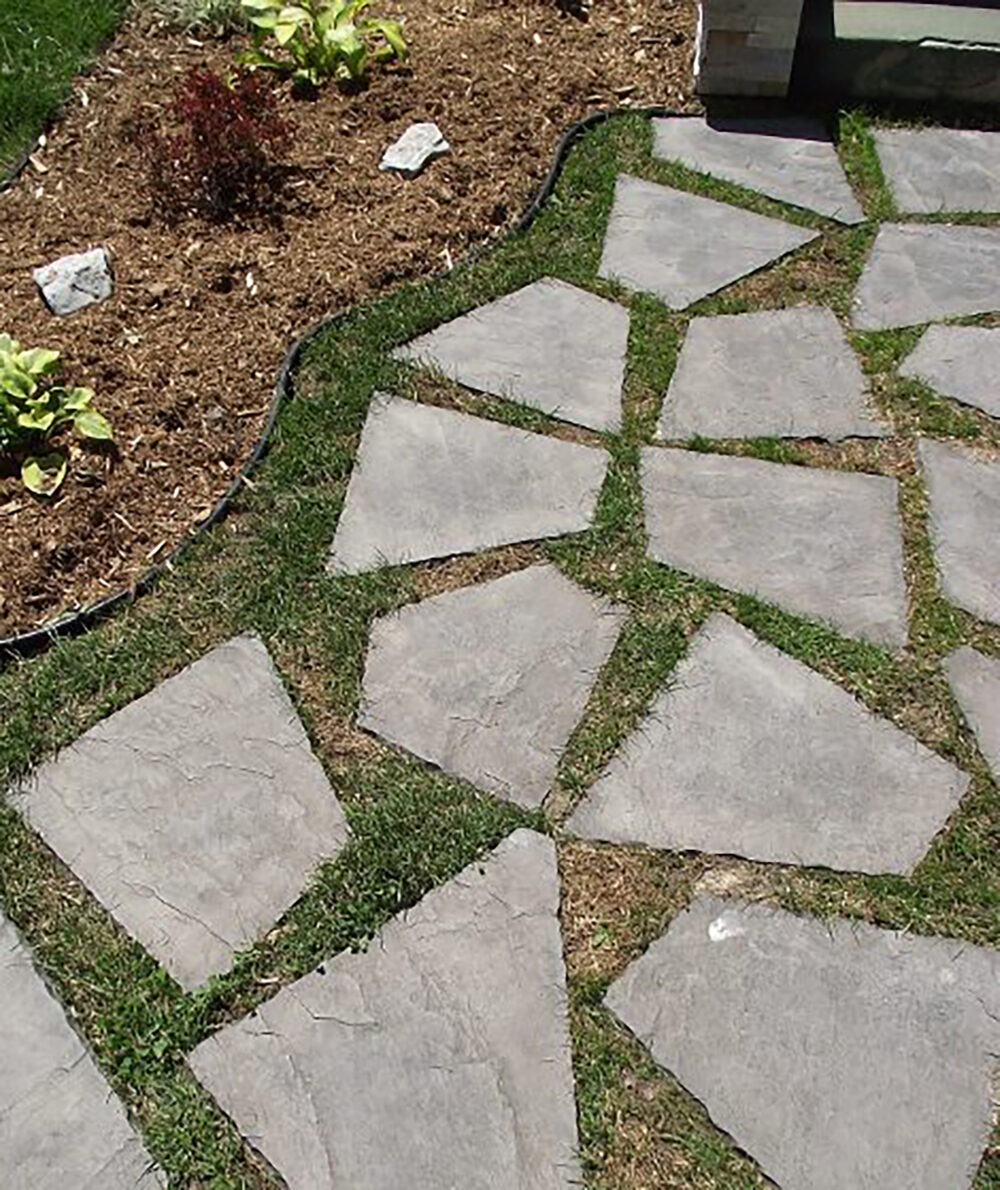
One of my favorite projects for boosting curb appeal was installing our flagstone walkway. There’s just something timeless and charming about those natural stone paths that makes your yard feel like a cozy cottage retreat. Plus, it’s functional, easy to maintain, and totally doable as a DIY project!
When we first tackled this project, I was knee-deep in other outdoor upgrades, like improving our home’s foundation. If you’re also looking to give your home’s exterior a polished look, check out my Foundation Refacing – How to Cover a Cinder Block Foundation post. It’s another great way to add curb appeal!
Let me walk you through how we created our flagstone walkway, step by step, so you can achieve the same beautiful results at home.
How to Install a Flagstone Walkway at Your House
Materials:
- Random flagstone
- Crushed limestone
Tools:
- Square-headed spade
- Tamper or 2×4
- 4-foot level
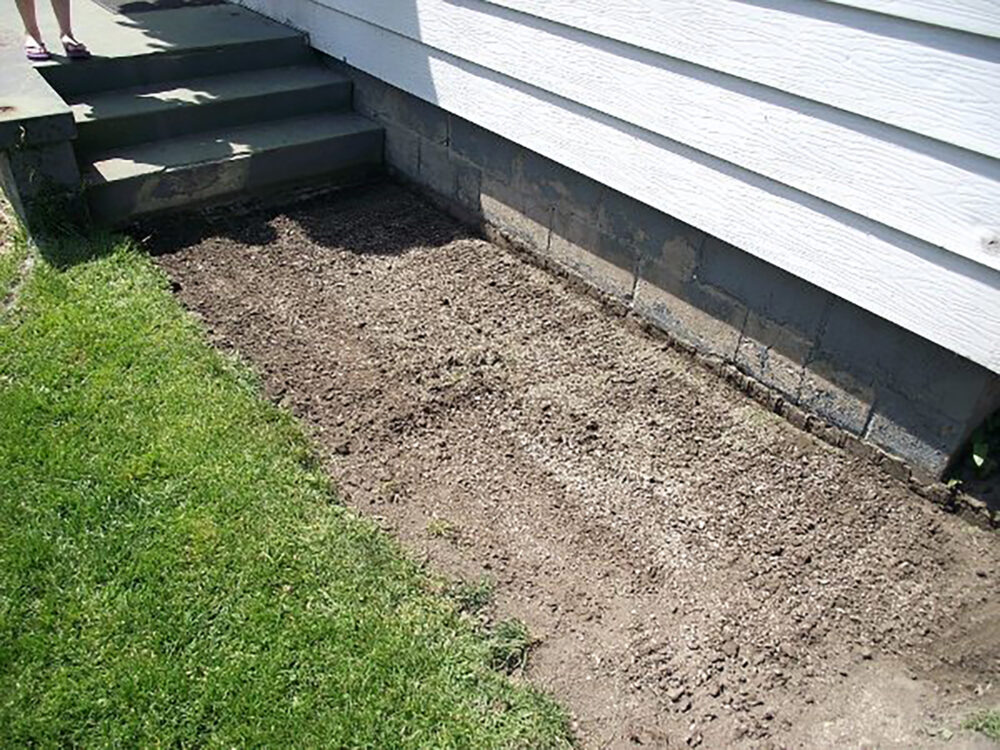
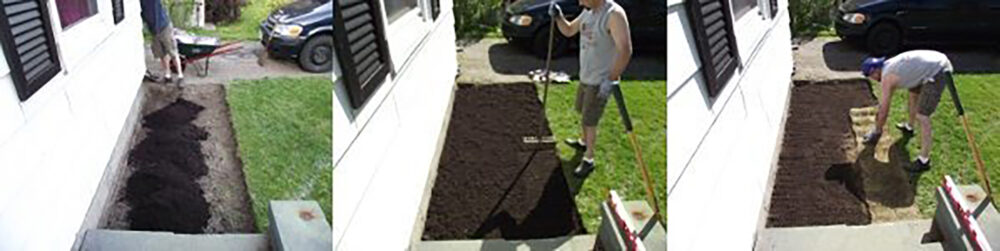
Optional Step: Remove Existing Walkway and Prepare the Area
If you’re replacing an old walkway, start by removing the existing material. For example, we had a brick walkway that required extra prep. Once removed, check the ground underneath for stability and fill any gaps with soil and/or crushed rock. If your new pathway will feature grass between the stones, relay sod over the prepared area before moving on to the next step.
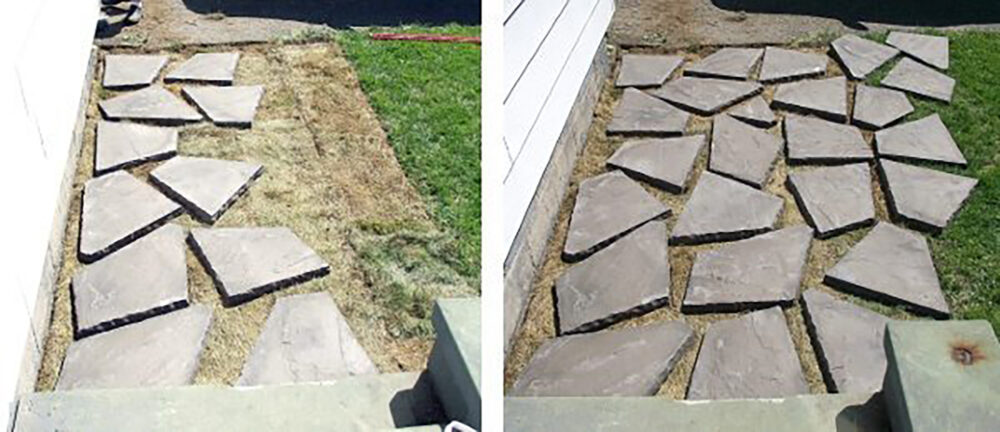
Step 1: Plan Your Pathway Layout
Start by laying out the flagstones on your lawn in a random pattern. Play around with the arrangement until it feels balanced, but avoid creating uniform gaps. Look at it from all angles—now is the time to tweak anything that feels off.
Step 2: Mark Around Each Flagstone
Once you’re happy with the layout, grab a square-headed spade (or similar tool) and carefully trace around each stone to mark its placement.
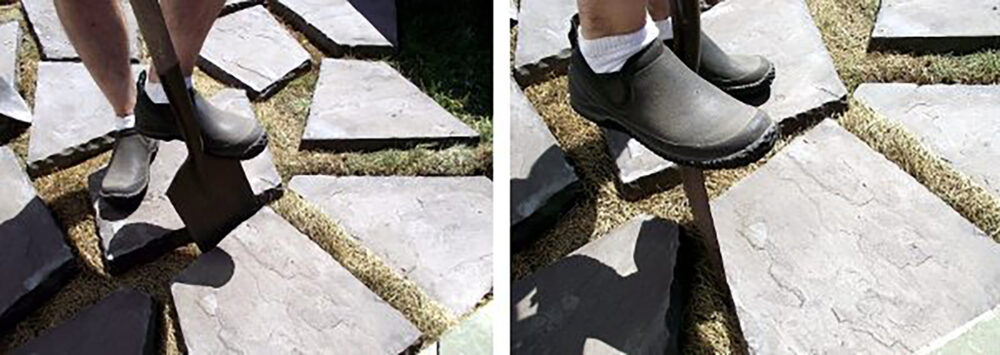
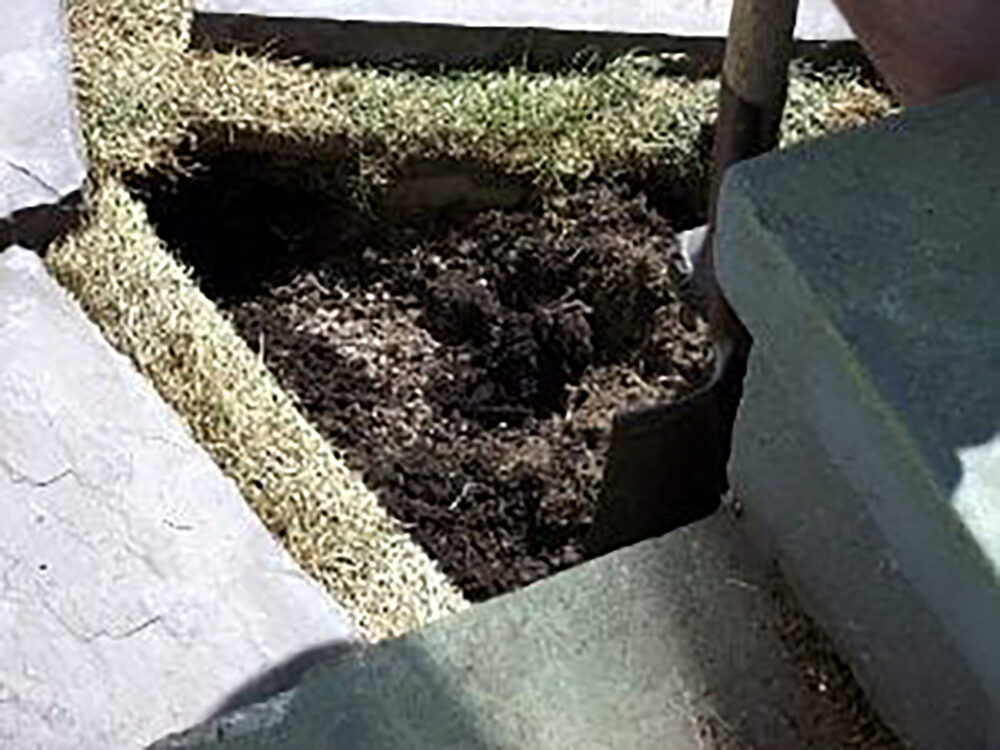
Step 3: Remove Sod and Soil
Lift the stone and dig out the sod and some soil underneath the marked area. This step might seem counterintuitive if you’ve recently sodded, but it’s essential to ensure your flagstones sit securely. Pro tip: save the removed soil for garden projects!
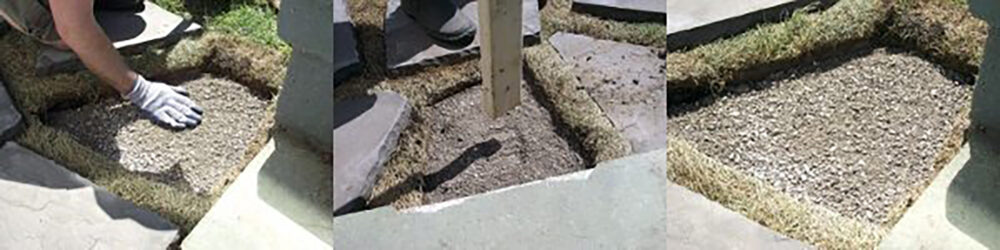
Step 4: Add Crushed Limestone
Pour 1–2 inches of crushed limestone into the hole. Smooth it out, then use a tamper (or the end of a sturdy 2×4) to compact the base. A level, compact surface is crucial for stability.
Step 5: Position Your Flagstones
Place the flagstone back into its marked spot and press it down firmly. Adjust as needed to ensure it sits evenly.

Step 6: Check and Level
Repeat these steps for each stone. Once all stones are in place, use a long level to make sure the tops are even with each other. This step keeps your walkway looking polished and functional.
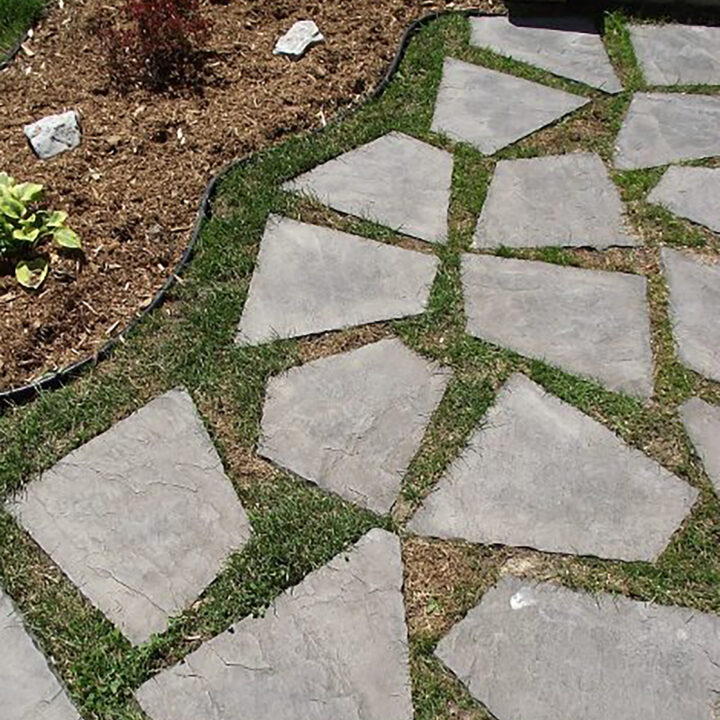
And that’s it! Your stunning flagstone walkway is complete. Over time, grass will fill in the spaces, creating that lush, natural look that’s so inviting.
FAQs About Installing a Flagstone Walkway
Costs vary depending on the size of your walkway and the type of flagstone. DIY installation is budget-friendly, as you’ll save on labor costs. Expect to spend around $4–$10 per square foot on materials.
Digging is essential to create a stable base. Without it, your stones may shift, sink, or become uneven over time.
Regularly mow the grass between stones, sweep away debris, and reseed any bare patches. If a stone becomes uneven, you can lift and re-level it.
Choose natural stones like sandstone, limestone, or slate, depending on your region and aesthetic. Make sure the stones are thick enough to withstand foot traffic.
Choose natural stones like sandstone, limestone, or slate, depending on your region and aesthetic. Make sure the stones are thick enough to withstand foot traffic.
Sealing isn’t necessary for most flagstones, but it can help preserve color and prevent stains if you prefer a polished look.
How to Lay a Flagstone Walkway Tutorial
Learn how to install a flagstone walkway with this easy DIY guide. Step-by-step instructions, FAQs, and tips for a beautiful path!
Materials
- Random flagstone
- Crushed limestone
Tools
- Square-headed spade
- Tamper or 2×4
- 4-foot level
Instructions
- Optional Step: Remove Existing Walkway and Prepare the Area
- Remove old materials, like brick or concrete.
- Check the ground for stability and fill gaps with soil.
- If adding grass between the stones, lay fresh sod over the prepared area. - Step 1: Plan Your Layout
- Lay out the flagstones on the lawn in a random pattern.
- Adjust the stones to ensure balance and avoid uniform gaps. - Step 2: Mark Around Each Flagstone
- Trace around each stone with a square-headed spade to mark its placement. - Step 3: Remove Sod and Soil
- Remove the flagged sod and enough soil to fit the flagstone and crushed limestone.
- Save the soil for other garden projects. - Step 4: Add Crushed Limestone
- Pour 1–2 inches of crushed limestone into the hole.
- Smooth it out and compact it with a tamper or the end of a 2×4. - Step 5: Position Your Flagstones
- Place each flagstone back in its marked spot, pressing it down firmly. - Step 6: Check and Level
- Use a 4-foot level to ensure the stones are even with each other. - Step 7 (Optional): Fill Gaps
- For a grassy look, allow grass to grow naturally or plant seed between the stones.
Creating a flagstone walkway is one of those projects that truly transforms your yard. It’s a perfect blend of form and function, and every time I look at ours, I smile knowing we made it with our own hands. If you’re ready to roll up your sleeves and get started, I hope these steps inspire confidence and excitement to tackle your own!
Have questions or need tips? Drop them in the comments—I’d love to hear from you!

This came out nice…cant’ wait to see more!
Thanks, Tammy! Can hardly wait to share the rest!
Looks awesome Shannon and Dean! Can’t wait to see the rest!
Kim:)
Thanks, friend! How are you doing?
Really like your progress pic. WIth all the rain, I’m sure it will green up nicely!
I sure hope so!!!
Very nice!
This project looks phenomenal! How long did the whole project take? How would you cut the grass thats in between the stone?
It should realistically take the better part of one focused weekend. It took us a little longer because we were fitting it in around several other previously-scheduled family activities. xo. S.
Sorry, forgot your second question! The stones are set just below the grass. We can actually run the law mower right over the top to cut the grass! (if you do this, be sure your blade is set high enough and your stones are indeed below the grass.)
I was avoiding doing this project for the backyard but now I think im going to reconsider. My mom’s house have similar stone and layout but I would have to use a trimmer to trim all the grass around the stone which is such a pain. This is a good tip to set the stone below the grass. Thanks!!
the walkway is going to look really cute 🙂
Love this, guys! You did a wonderful job!
Thanks, doll!!!
I visited many web sites but the audio feature for audio songs present at this site is truly wonderful.