I love giving new life to old treasures, especially when they bring a little extra charm to my home. When I came across a gorgeous vintage window on one of my thrifting adventures, I just knew it had to come home with me. It wasn’t perfect—it had a bold red frame that clashed with my décor—but the potential was undeniable. A little paint and a lot of imagination transformed it into a stunning DIY vintage window flower box. And now, I get to share the process with you!

If you’re looking for more ways to create unique, personalized home décor, you might enjoy Shannon’s post on how to build a faux mantel shelf. It’s perfect for decorating your home seasonally and adding character to any space!
DIY Vintage Window Flower Box Tutorial
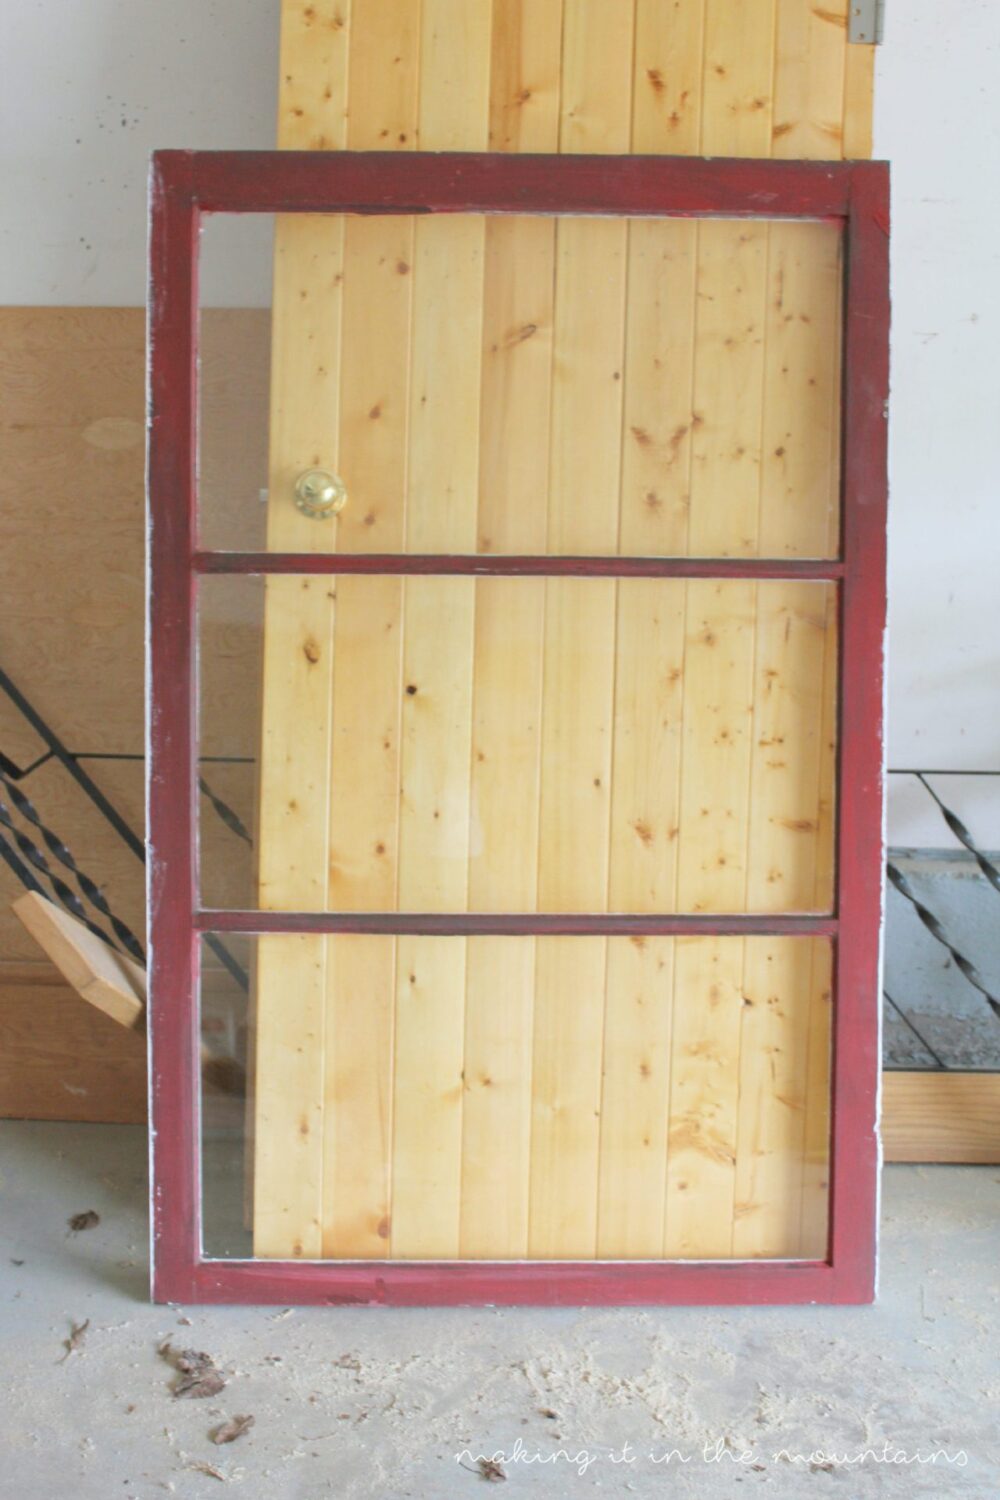
It all started with this fab vintage window I snagged for just $30 at one of my very favorite antique shops while I was enjoying a thrifting trip in Spokane. It was red, which wouldn’t necessarily work in easily with my home decor, but it was big, beautiful and in such great shape. A no-brainer really!
Supplies and Tools You’ll Need
Materials
- Vintage window
- Chalk paint
- Primer
- Plastic liner (e.g., clear garbage bag)
- Potting soil and flowers
- Wood for the box (dimensions below)
- Trim for the box edges
- Finishing nails or a nail gun
- “L” brackets and screws for mounting
Tools
- Paint brushes
- Paint scraper
- Hammer or nail gun
- Power saw (or hand saw) for cutting wood
- Drill with bits (for drainage holes and mounting)
- Screwdriver
Instructions
1. Prep and Paint the Window
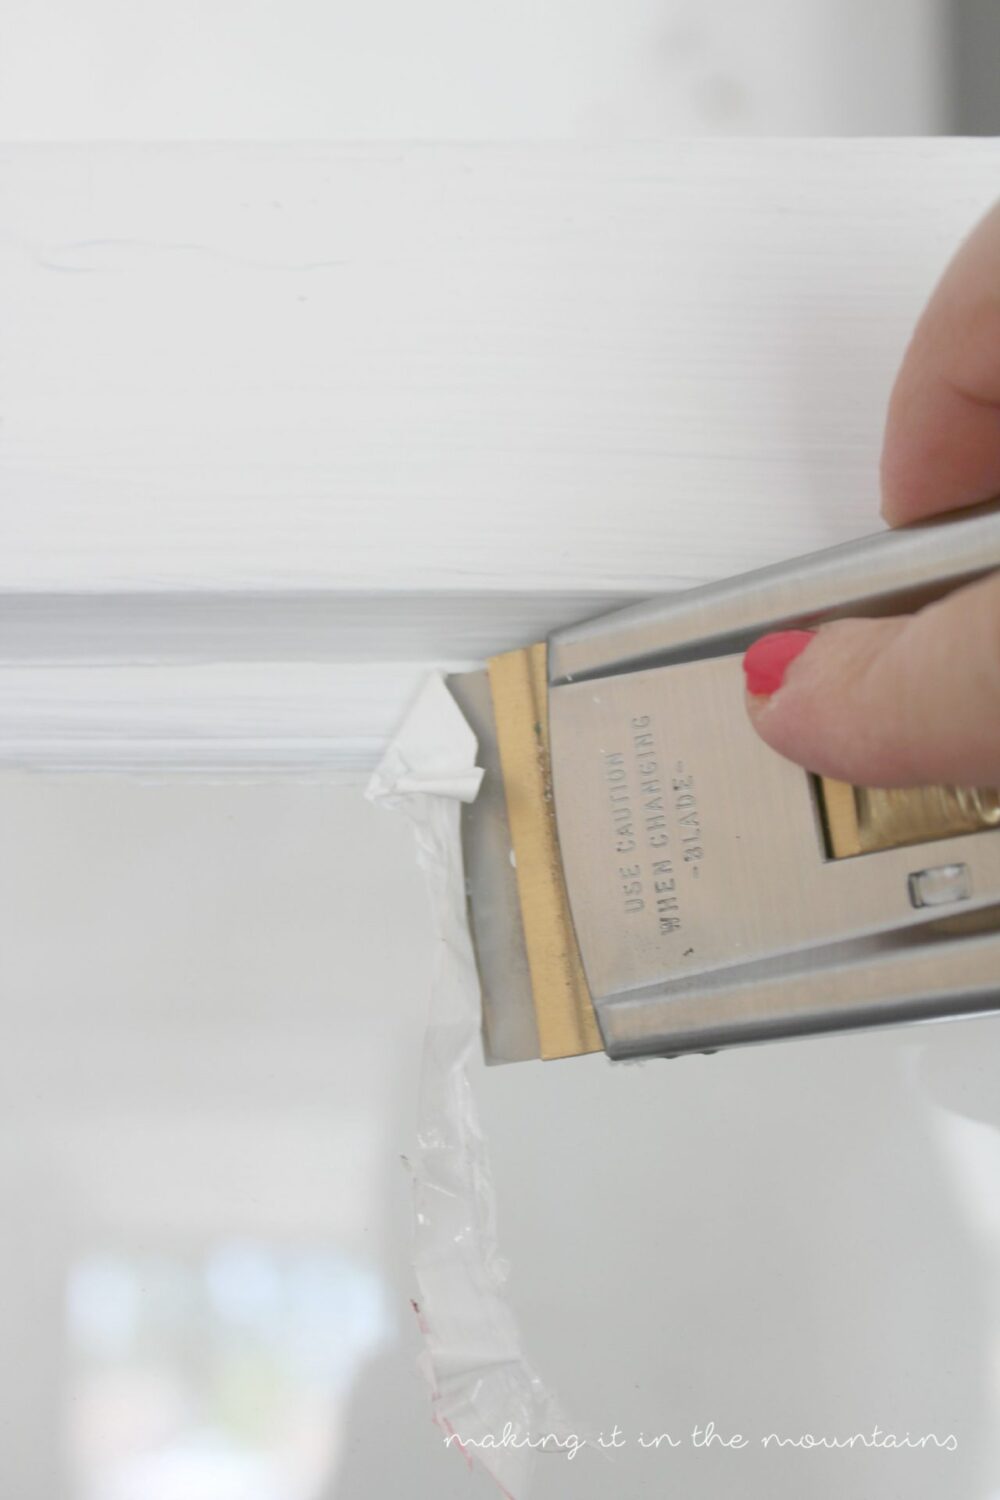
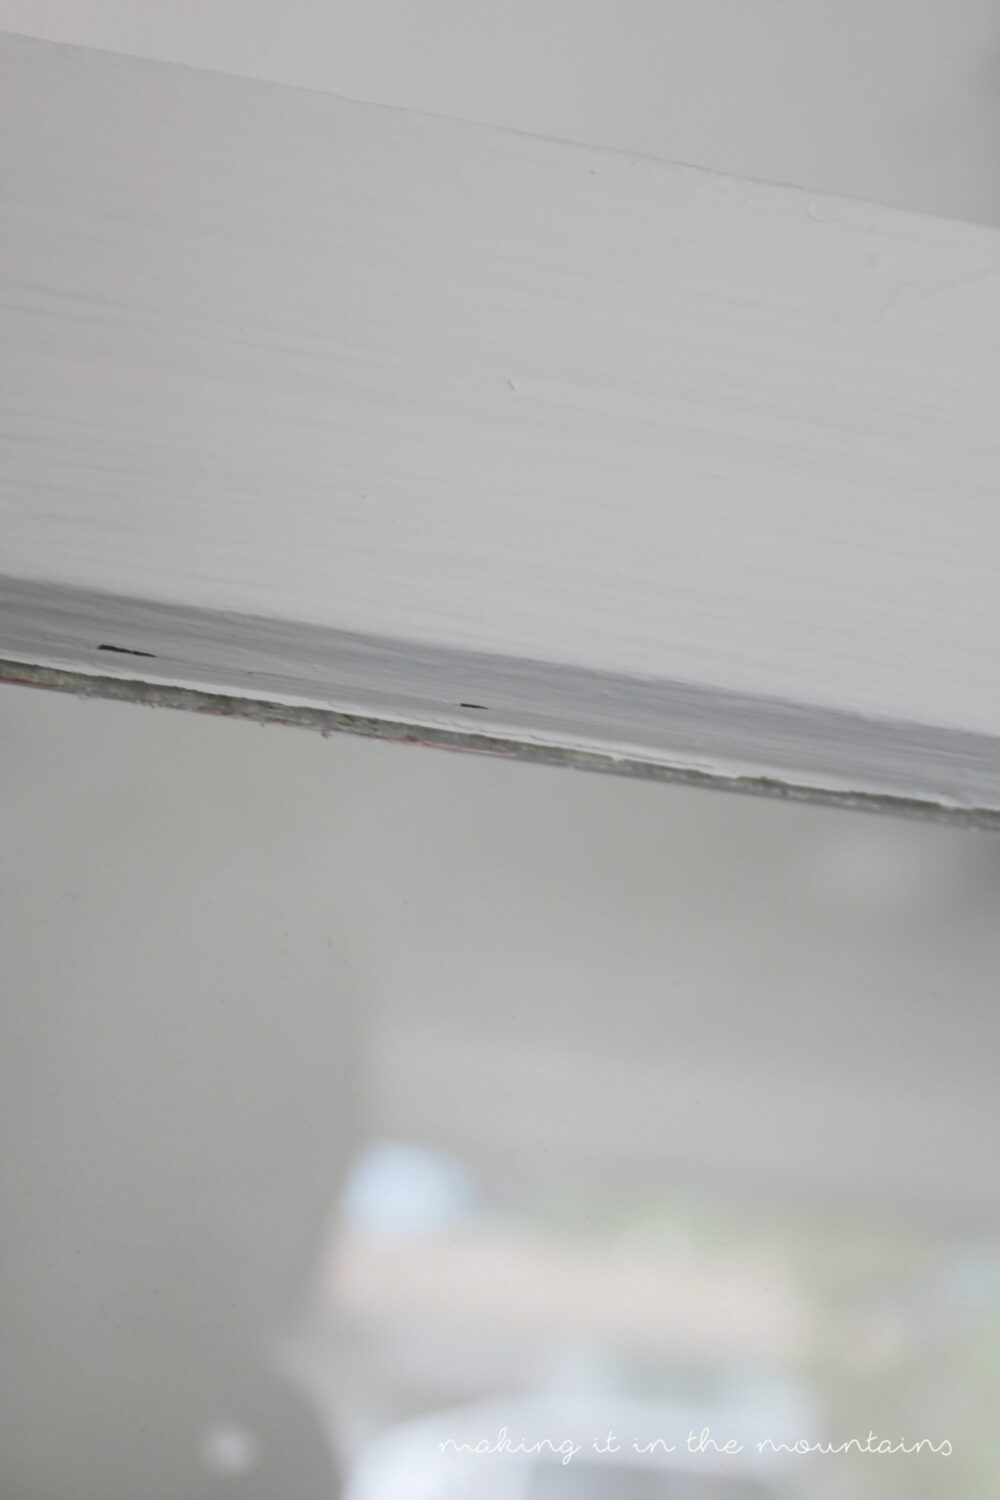
After cleaning the window, I applied two coats of white chalk paint to brighten it up. A handy trick I swear by? Skip the tedious taping—paint over the glass, let it dry, and scrape it off with a paint scraper. It’s a total time-saver and leaves clean edges!

2. Build the Flower Box
We used scrap 2×6 boards to build the flower box, cutting the pieces to be slightly wider than the window (about six inches on each side). Once assembled, the box measured 4′ long x 5.5″ deep x 5.5″ high. For a rustic look, I skipped filling nail holes, but you can use putty if you prefer a polished finish.


3. Paint the Flower Box
After priming the wood, I painted it to match the window frame. If rustic charm is your goal, don’t worry about perfection—imperfections add character!
4. Mount the Window and Box
To hang the window, I attached a chain to the back with screws. For the flower box, we used “L” brackets to mount it separately underneath the window. This makes it easy to remove the box in winter or swap out décor.


5. Prepare for Planting
Drill drainage holes into the box and line it with plastic (poke holes in the liner, too). Fill with potting soil and your choice of flowers. I went with a simple white and green palette, adding sweet pea flowers for a pop of color.


FAQs
Look for a sturdy frame in decent condition with intact glass. Even if the color doesn’t match your décor, you can easily paint it.
Absolutely! You can repurpose it as a decorative piece indoors—just swap out flowers for faux greenery or seasonal décor.
Water your plants regularly and check the drainage holes to ensure they aren’t clogged. In colder months, remove the box to prevent damage from freezing temperatures.
Yes! A simple hammer and nails work just fine. It may take a bit longer, but it’s totally doable.
More DIY Projects
- How to Build Your Own DIY Vertical Garden Wall
- Foundation Refacing – How to Cover a Cinder Block Foundation
- DIY Vintage Window Flower Box
- How to Install a Flagstone Walkway
- 3 Easy Summer Porch Updates That Make a Big Impact
- 10 Best Pool Deck Ideas to Make Your Space Stylish and Private
- How to Paint Exterior Trim That’s Peeling Without Scraping or Sanding

DIY Vintage Window Flower Box Tutorial
Transform a vintage window into a stunning DIY flower box with this step-by-step guide. Add rustic charm to your home today!
Materials
- Vintage window
- Chalk paint and primer
- Plastic liner (e.g., clear garbage bag)
- Potting soil and flowers
- Wood (cut to size for box and trim)
- Finishing nails or nail gun
- "L" brackets and screws
Tools
- Paint brushes
- Paint scraper
- Hammer or nail gun
- Saw (power or hand saw)
- Drill
- Screwdriver
Instructions
- Paint the Window: Clean the window and apply two coats of chalk paint. Scrape excess paint off the glass with a paint scraper once dry
- Build the Flower Box:
- Cut wood to size: 3 pieces (2x6) for the box sides and bottom, and 2 smaller pieces for the ends.
- Assemble the box with nails or a nail gun.
- Add trim along the top edges for a polished or rustic look. - Paint the Box: Apply primer and chalk paint to match the window. Leave nail holes unfilled for a rustic look or fill with putty for a polished finish.
- Mount the Window and Box:
- Attach a chain to the back of the window with screws for hanging.
- Mount the flower box under the window with “L” brackets. Ensure everything is level. - Prepare for Planting: Drill drainage holes in the bottom of the box, then line it with plastic and poke holes in the liner. Fill with soil and flowers.
Creating this DIY vintage window flower box has been such a fun and rewarding project! It’s a beautiful way to repurpose old windows while adding personality to your home’s exterior (or even interior). I love the charm it brings to my front porch, and I hope it inspires you to try something similar in your own space. If you have questions or want to share your own creations, let me know in the comments—I’d love to hear from you!

What a cute idea! Such a smart idea to add some personality to the outside of your house and give the illusion of more windows (since there’s no such thing as too many windows, right?). Thanks for sharing!
Thank you SO much Lauren! I love the balance and personality it’s brought to the front of our home!!!
Very nice Kristi! It adds so much character to your front porch. Personally I would leave the flower box up year round – just think of the decorating possibilities for the seasons! Looking forward to following your porch makeover – I know it’ll be fabulous. Question: what is the name of the paint color on your siding?
Thank you Marie! You’re totally right, I can already think of a few pretty ways I could dress it up for the Holidays! I just went to look for our stain colour, but couldn’t find the colour name anywhere on the can. It is a stain from Home Hardware, so you should be able to find it there 🙂
very nice post
Thank you SO much Ariel! I’m so thrilled with how it turned out!
Never thought of this! How clever and effective. So much inspiration from you! Thank you!
Anne
Awww, well thank you so much Anne! I’m so happy you love it! It’s definitely brightened up our front porch!
Shannon
I just rescued an old laminate chest of drawers heading to the tip – because the drawer fronts were solid wood. I though they would be perfect for the front of some window boxes.
Event though it’s autumn down here, I am inspired to get hammering and drilling and planting.
Thanks for the awesome tutorial (the photos are gorgeous).
I’m off to make a mess.
<3
Pia
Thank you SO much Pia! I’m thrilled that you like it! I love the idea of turning some old drawers into window boxes!!! What a brilliant idea!
This is one of the cutest things ever!
You are so sweet! I’m so happy you love it Marie!
Such a cute idea Kristi! Love the personality it brings to the outdoor area.
Thank you SOOO much Gilly! It definitely makes me smile each and every time I walk up the house 🙂
What a great idea! Who needs a real window for a window box right? I love it and want to make one soon. Thanks for the inspiration!
I’m SO happy you love it Terri! I love it so much, I’m already planning another for our backyard now too 😉
I love this idea. And the trim…. aaaahhhh just so great!!! I’m pinning it to ad a window flower box to our barn later on!
Thank you SO much Joor! And how amazing would it look hanging on a BARN! Brilliant!
Oh my, yes! On a barn!!!
This is brilliant! No window for a window box? No problem! Just make one! I love how simple and pretty it is with all the white and green.
Awww, thank you Meredith! I was so excited to come up with such an inexpensive way to add a “window” to our front porch!
Kristi’s a pretty smart girl!!!
I adore window boxes. You don’t see too many of them here in Florida. Thanks for sharing at Merry Monday.
Thank you Sherry! I’ve always loved the charm of them too! So excited to finally have one of my own!
We built some at our old house and I’m trying to figure out where to put some here!