When we moved into this house, I couldn’t wait to finally have a dedicated laundry room. Having a real room instead of a dark corner of the basement felt like a dream come true! But while I was grateful for the space, it definitely wasn’t functional or stylish enough for our busy family of five.
I’ve tackled other DIY projects that transformed spaces on a budget, like adding shiplap walls, so I was excited to bring that same charm into this room. Let me show you how I turned our outdated laundry space into a bright, organized, farmhouse-style haven—and share tips you can use in your own home!
Before Photos & Challenges
Like most “before” spaces, our laundry room wasn’t pretty. It was dark, cramped, and lacking the storage we needed. The scuffed blue walls and chipped paint weren’t helping, and the old laundry tub wasn’t even plumbed correctly! While we were thankful for the dedicated space, it wasn’t functional for a family of five, especially since we also needed some overflow pantry storage.
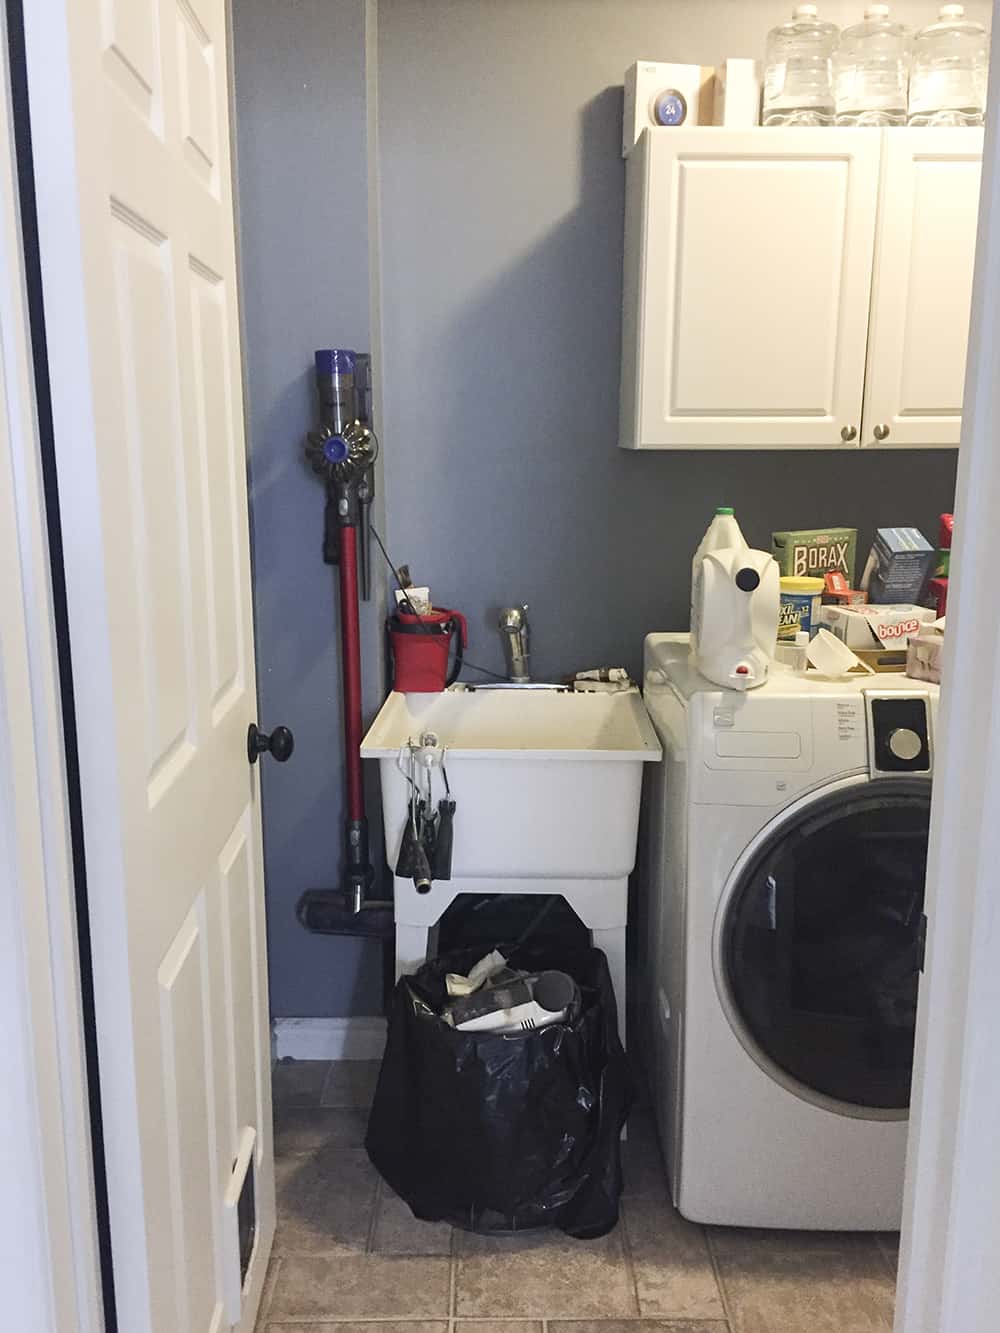
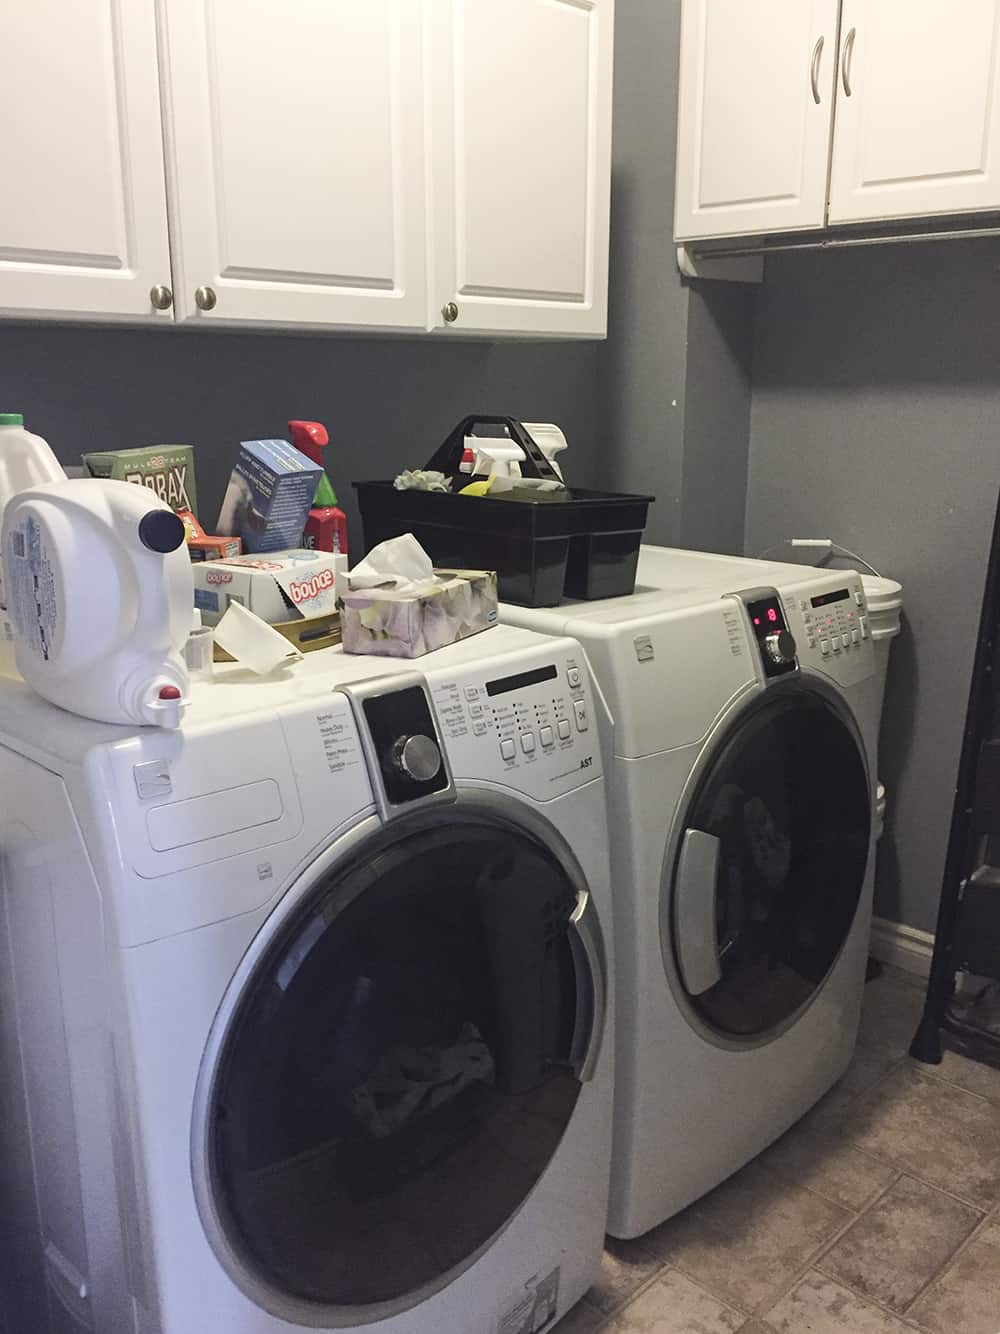
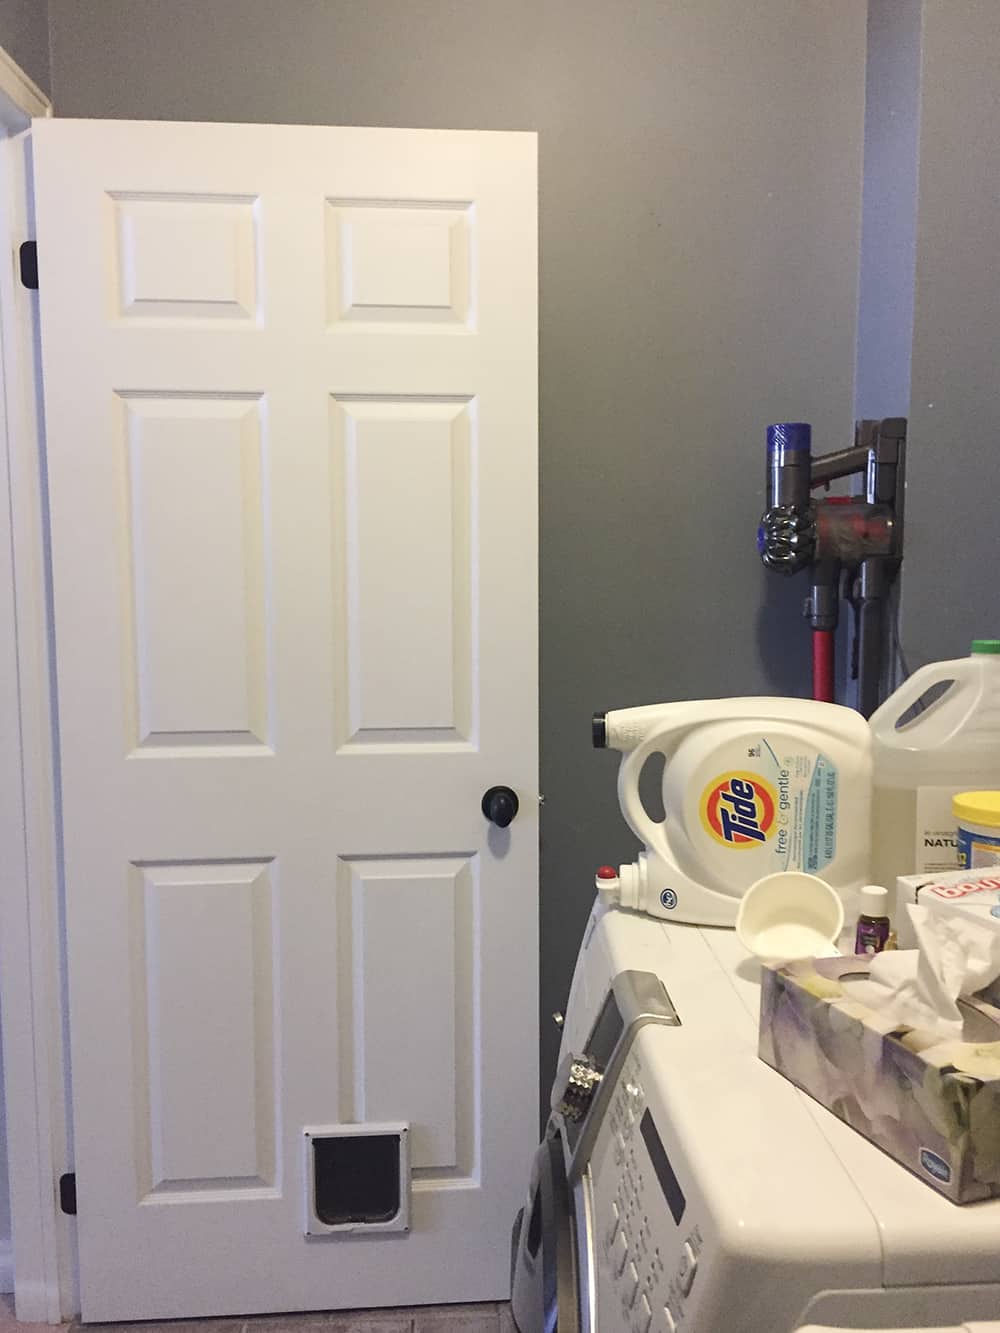


Budget was a challenge, too. We had to be creative and work with what we already had, but I knew we could make it beautiful and practical without spending a fortune.
How We Updated Our Farmhouse Laundry Room
Adding Shiplap for Charm and Texture
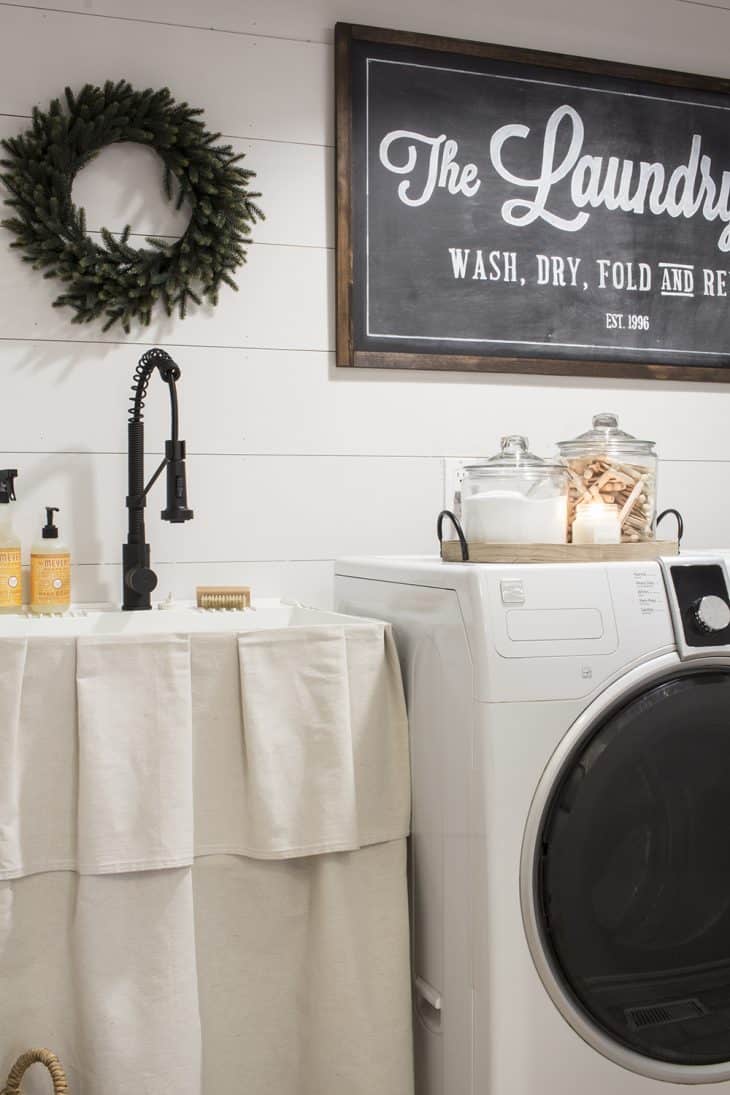
The first step to adding farmhouse charm was installing shiplap on the back wall, behind the washer and dryer. It immediately gave the room texture and warmth, transforming the space from bland to inviting. Using affordable plywood, cut into strips, we created this look without breaking the bank.

Painting for a Bright, Neutral Look
We painted the entire room in Sherwin Williams Eider White—a bright, neutral color that made the space feel larger and cleaner. This color ties in beautifully with the rest of our home and acts as the perfect backdrop for farmhouse decor.
DIY Shelving for Storage and Style
Next, we installed open shelving at the far end of the room, using the bulkheads as natural shelf ends and the method we used in a spare closet before. This gave us space for overflow pantry items, laundry supplies, and a few decorative touches. Open shelves are not only practical but also help create that airy farmhouse vibe.

Updating the Sink and Faucet
The original laundry tub was stained and poorly plumbed, so we replaced it with a clean, basic tub and dressed it up with a DIY drop cloth skirt and a gorgeous Kraus faucet. The skirt added charm while hiding clutter—a simple, budget-friendly solution anyone can recreate!

Adding Functional Accessories and Decor
Small details brought the room together:
- A DIY MDF sign painted with a farmhouse-style design.
- Vintage-inspired clothes pins and a stylish lint pail.
- A decorative jar for dryer sheets.
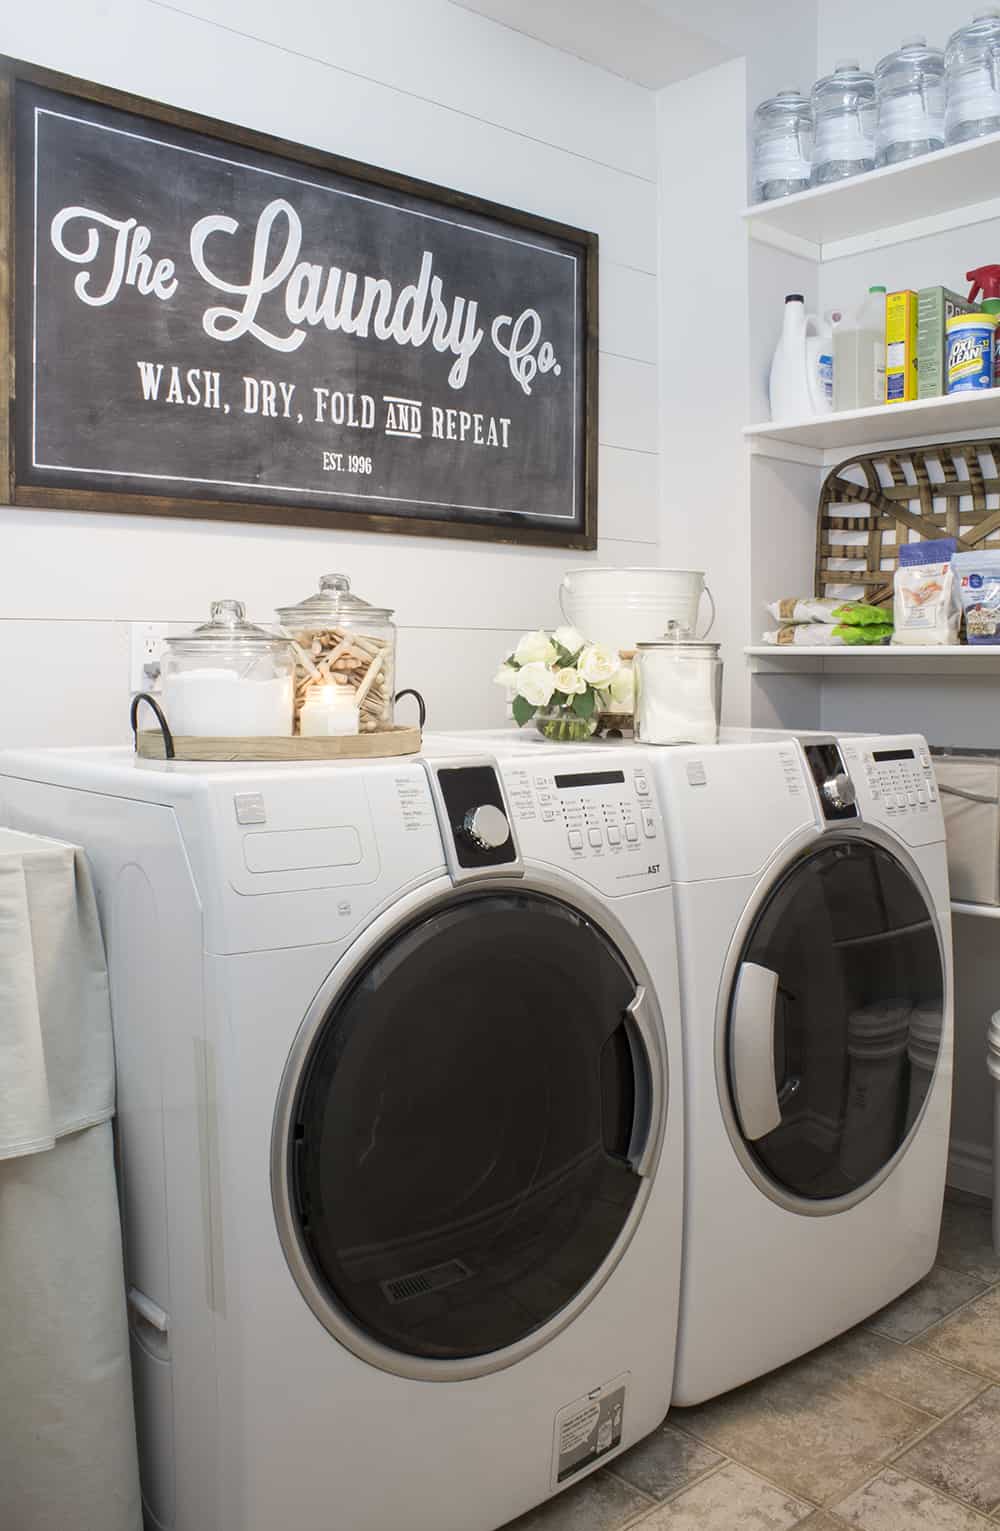
These functional yet beautiful touches turned a utilitarian space into a room I actually enjoy spending time in.
Tips for Budget-Friendly Farmhouse Laundry Rooms
If you’re ready to refresh your laundry room, these ideas can help you get started:
- Use Neutral Paint Colors: Light tones make even small rooms feel open and airy.
- Add Texture with Shiplap: Affordable and easy to install, shiplap adds instant character.
- Repurpose and DIY: Use drop cloths for skirts, MDF for wall art, or thrifted items for decor.
- Maximize Storage: Open shelving is budget-friendly and makes everything easy to reach.
- Focus on Functionality: Decorate with items you’ll actually use, like baskets or jars.

FAQs
Shiplap costs vary, but using plywood strips can cost as little as $2–$4 per square foot, making it an affordable DIY project.
Bright, neutral colors like Sherwin Williams Eider White make small spaces feel larger and more inviting.
Focus on natural textures like wood, light neutral colors, and functional decor like baskets, jars, or vintage-inspired accessories.
Even the most basic laundry room can become a space you love with a little creativity and effort. Whether it’s adding shiplap, updating storage, or decorating with practical touches, farmhouse style is all about blending charm and functionality. I hope these ideas inspire you to transform your space into something you’ll enjoy using every day. What’s the first change you’d make to your laundry room? Let me know in the comments—I’d love to hear about your projects!

Want to see more content like this in your Google searches?
This button tells Google that Home Made Lovely is a source you like, so it can show you more of it.
Great job!
Thank you!
Looks Amazing!!!
Thanks!
Beautiful!
Thank you, Nicole.
Stunning!
Thanks, Leanne.
WoW i love it!!!!
Thank you!
Nice job! Where did you get the glass jars?
Um, Kitchen Stuff Plus maybe? I don’t remember, I’ve had them for years. We used them in our old kitchen for flour and sugar on the counter.
Where did you find that adorable sign?!
I painted it/Dean framed it. It’s inspired by a Joanna Gaines/Magnolia/Fixer Upper sign.
LOVE the new look!
Thank you!!! 🙂
With the addition of the shiplap and the cute skirt you created for the laundry tub you really transformed your laundry room, Shannon! What a sweet spot to repeat that never-ending task! Quick off the side question. I surely know why you would have a big bucket of flour… but starch? What is it and how do you use it?
Lol. We do pretty much all of our baking gluten free because one of my daughter’s needs to be strictly gluten free and I should be 99% of the time. SO the starch is for Tapioca Starch. We buy our flour (rice) and starch in 10 kg bags from a grain supplier. It takes about a year maybe to go through all that starch, but it’s so much cheaper to buy in bulk.
Beautiful !!!! it inspires me for my own home!!!
Curious how big is your laundry room!?
It is about 5.5 feet by 9 feet. Give or take a few inches. 🙂
Hey Shannon,
The new look is just awesome! This would probably make me love to do the laundry everyday if this is my laundry room. 😉 The laundry sign is amazing.
Thanks for sharing.
Cheers,
Jess
I’ve had this post saved for a while and the quarantine is finally spurring me to work on the laundry room. How did you make the utility sink skirt? I love it!
Yay for fun projects! The sink skirt was super simple…we just pinch pleated some drop cloth and secured the pleats with hot glue. Then we velcroed it to the sink with heavy-duty double sided sticky velcro. (Dean did have to reattach some of the velcro with more hot glue after about a year of daily use.
Wow, fabulous job. So many wonderful ideas to apply in getting our laundry room beautiful and handy to. Thank you!
What color did you paint the upper cabinets?
Where can I find the shiplap? What is the width of the “boards”?
We have a post about how we shiplap with all the details here: https://homemadelovely.com/diy-shiplap-wall/
Would you please tell us how you made the laundry sink skirt. The box pleats modernize it.
Honestly, it was super easy. We just bought a piece of drop cloth that was much longer than the perimeter of the sink. Then we attached it at one side of the sink (the back right for example) and folded and hot glued the box pleats every couple of inches or so until the opposite corner (the back left in our example). If there is any excess, simply trim it off. No fancy math for us!