
Painting furniture is one of the easiest and most affordable ways to transform a piece you already own—or a thrift store find—into something beautiful and uniquely yours. I know how overwhelming it can feel when you’re just starting out (trust me, I’ve been there!), but with a little guidance, you can turn almost any piece into a showstopper.
In this guide, I’ll walk you through how to paint furniture step by step, covering everything from prep to the final protective coat. Whether you’re tackling a hand-me-down dresser or giving a secondhand buffet a fresh look, I’ve got you covered!

If you’re ready to dive in, don’t miss my how to stain wood tutorial, which is a great companion to this post. Between painting and staining, you’ll have all the tools to makeover furniture like a pro!
Why Paint Furniture?
There’s nothing quite like giving a worn piece of furniture new life. Painting is:
- Affordable: A can of paint and a good brush cost far less than buying new.
- Creative: You can customize the color, finish, and style to fit your home.
- Sustainable: Save old furniture from the landfill and create something you’ll love.
When you learn how to paint furniture the right way, you open up a world of possibilities for personalizing your home.
How to Choose the Right Piece to Paint
Not all furniture is created equal, so it’s important to pick a piece that will give you the best results.
- Look for Solid Wood: It holds paint well and lasts longer.
- Avoid Structural Damage: Skip pieces with major cracks, warping, or missing parts.
- Good Bones Matter: Focus on the shape and style—paint can’t fix bad proportions!
- Laminate or Veneer: You can paint these too, but they require extra prep (see below).
Tools and Materials You’ll Need
Before you start, gather everything you need:
- Sandpaper (medium and fine grit) or an orbital sander.
- Tack cloth or lint-free rags.
- Primer (I love Kilz or Zinsser).
- Paint: Latex, chalk, or mineral paint.
- Brushes: Synthetic for water-based paints; natural for oil-based.
- Topcoat: Wax or polycrylic for protection.
Pro Tip: High-quality brushes like Purdy will give you a smoother finish and last longer.
Step-by-Step: How to Paint Furniture
1. Prep the Furniture
- Remove hardware, doors, and drawers.
- Clean the piece thoroughly with dish soap or Murphy’s Oil Soap to remove grease and grime.
- Test for lead if it’s an older piece (pre-1978).

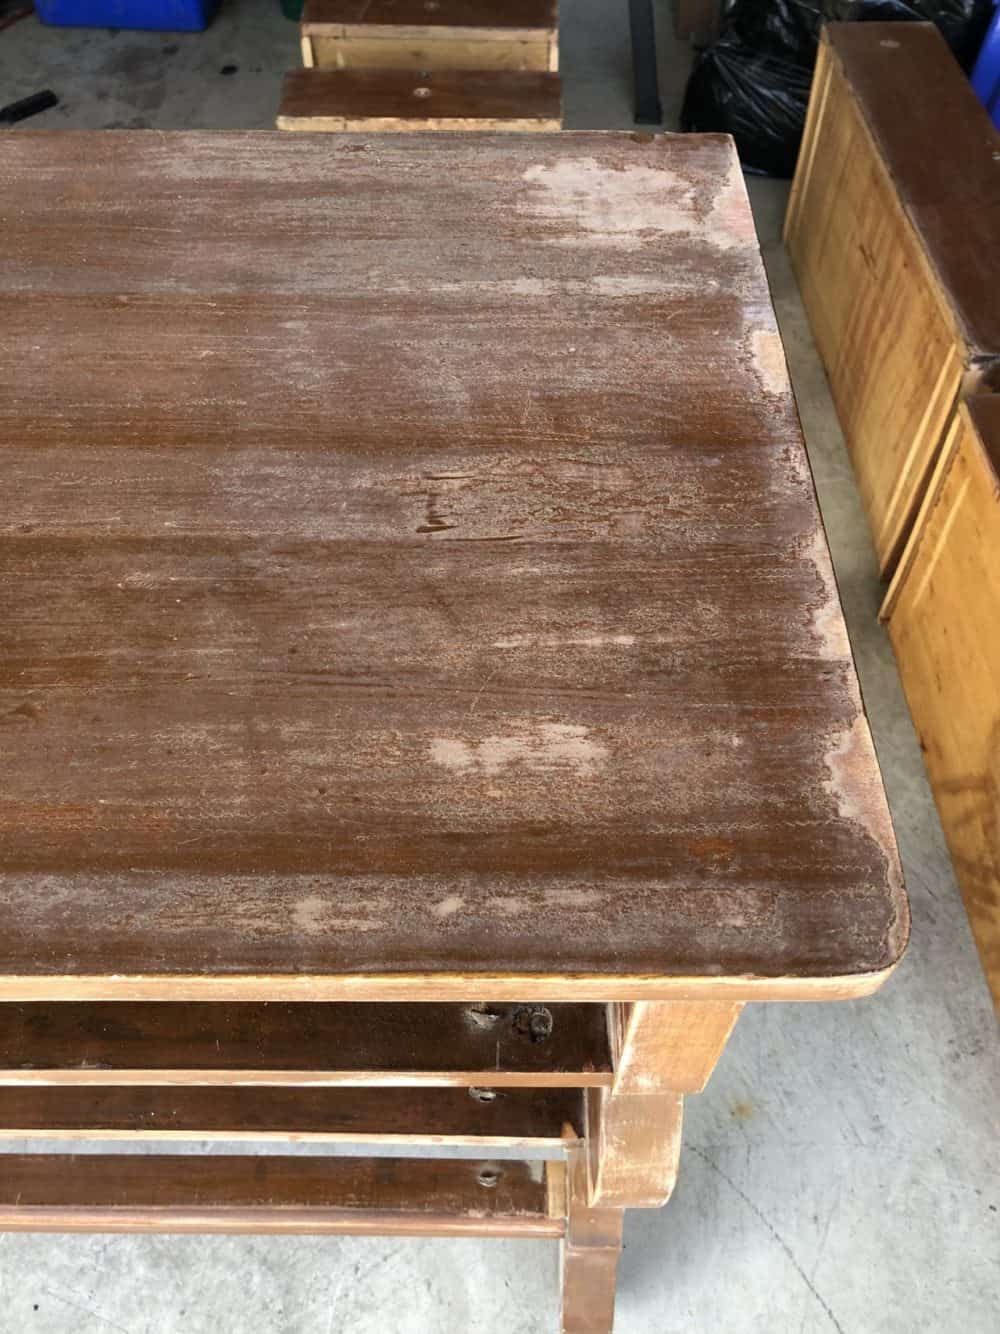
2. Sand the Surface
- Lightly sand to remove any gloss and roughen the surface.
- Use medium-grit sandpaper (150-180), followed by fine grit (220).
- Wipe away all dust with a tack cloth.
3. Repair Any Damage
- Fill cracks or holes with wood filler and let it dry completely.
- Sand smooth and wipe clean again.
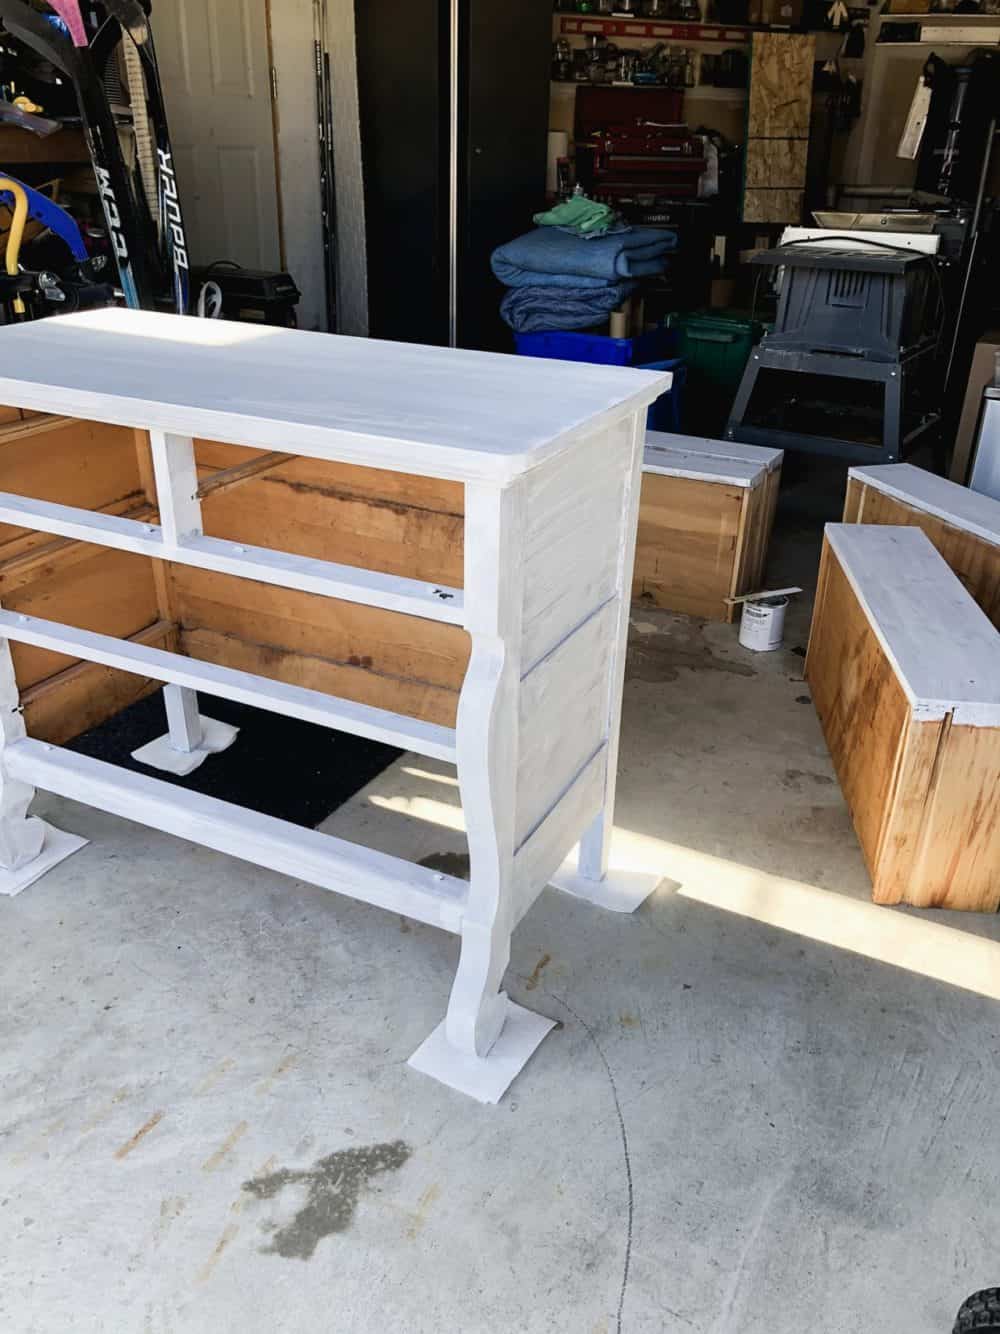
4. Prime the Furniture
- Apply a high-quality primer for better adhesion and color coverage.
- Use a brush for detailed areas and a roller for flat surfaces.
- Allow to dry fully before moving on.
5. Paint
- Use even, thin coats of paint, brushing with the grain.
- Allow each coat to dry fully, sanding lightly between coats for a smooth finish.
- Repeat until you achieve the desired color and coverage.
6. Protect the Finish
- Apply a topcoat to seal and protect your work.
- Use wax for light-use furniture (side tables, decor pieces).
- Opt for polycrylic for high-use furniture (dining tables, desks).
Painting Tips for a Professional Finish
- Always paint in the direction of the wood grain for a smoother look.
- Don’t overload your brush—several thin coats are better than one thick coat.
- Invest in good brushes or rollers to avoid bristle marks or bubbles.
- Sand lightly between coats for a flawless finish.
Common Mistakes to Avoid
- Skipping sanding or cleaning—it will cause peeling paint.
- Using the wrong primer or skipping it altogether.
- Not allowing enough dry time between coats.
- Forgetting the protective finish—it’s essential for durability.

FAQs About Painting Furniture
It’s possible with high-adhesion primer, but sanding ensures the paint adheres properly and lasts longer.
Latex paint is versatile and durable, while chalk and mineral paints are beginner-friendly.
Yes, but you need to sand lightly and use a primer designed for slick surfaces.
Sand lightly between coats and apply thinner layers of paint. Use a high-quality brush or foam roller.
If you want the best results, yes! A topcoat protects your painted furniture from wear and tear. If you need help choosing see The Best DIY Wood Finishes: Transform Your Projects with Style post.
More Paint Finish Tutorials
- How to Paint Kitchen Cabinets: Complete Step-by-Step Guide
- Grey Wash Wood Finish
- How to Get the Lime Wash/White Washed Wood Finish without Blue Undertones!
- How to Stain Wood – Step-by-Step Tutorial for Beginners
- How to Whitewash Stain (Plus FAQ & Staining with Minwax Pickling)
- How to Paint a Sideboard: Step-by-Step Guide for a Stunning Makeover

How to Paint Furniture
Materials
- sander and sandpaper
- lint-free rag/tack cloth
- flat paint (I used the Duration line by Sherwin Williams)
- quality brush (like Purdy)
- furniture beeswax (I used Miss Mustard Seed beeswax I had on hand) or finishing paste (like Minwax)
- clean cloth
- painter's tape is optional (I used FrogTape on the glass)
Instructions
- Remove doors, drawers, and hardware.
- Sand well. You don't have to sand down to bare wood or anything. Just get the shine off.
- Wipe off dust with a lint-free cloth. Get rid of all the dust you just sanded off.
- Prime with a quality primer.
- Paint a base coat with a quality brush and quality paint in the direction of the wood grain. Let dry.
- Sand with fine-grit sandpaper and paint a topcoat.
- Optional: Distress edges if desired using sandpaper.
- Wax or finish with a protective coating and a clean cloth. I used Miss Mustard Seed's Furniture Wax and Antiquing Wax because I really like it and had some on hand. But you could (and I have) use Mixwax's Finishing Paste in Regular and Dark, which are fabulous too.
Notes
- I used a good quality paint from a line called Duration at Sherwin Williams - it's wipeable and durable.
- Use FLAT paint for a nice finish.
- Be sure to test “paint and primer in ones”. A lot of them are more like thick, gloppy paint. Which means they won't go on well and won't go as far.
- Use clear wax/paste first and then use the darker was/paste on top. If you end up with a look that's too dark add some more clear wax and buff off some of the darkness.
Painting furniture doesn’t have to be intimidating—it’s all about the right prep, tools, and techniques. With a little effort, you can turn an old, tired piece into something fresh and fabulous for your home. I hope this guide gives you the confidence to start your next furniture painting project. Be sure to share your results in the comments or tag me on Pinterest—I’d love to see what you create!

Want to see more content like this in your Google searches?
This button tells Google that Home Made Lovely is a source you like, so it can show you more of it.

The piece looks amazing! I love the color!
Thanks so much for this post! LOVE it as you know! I have not painted with chalk or milk yet… but I have used latex and mixed that with plaster of paris, I adore the finish, after it’s sanded and finished with Minwax paste. So I can imagine that it is a similar finish! I’m so glad you are getting attention for your beautiful home. Hoping by this time next year, people will want to see mine too! xo
Laurie, I was just thinking after all the home tour love that I’ve been blogging for over three years…and I can finally take decent photos 99% of the time and I’ve finally found “my style”. 🙂 Stick with it!!!
This is beautiful. I have a piece of furniture I’ll have to try this on! 🙂
The hutch looks fantastic! Great job, Shannon! x
I would never of thought of those colors but they look fantastic!
Your hutch is gorgeous! I love it, the colour is perfect and the style of it is very pretty. I have a china cabinet just like it sitting in my sons basement. I have no place for it yet. I am hoping to move to a larger house in about six months time and I hope to have room for it then. It is solid oak, but it needs a good paint job like yours.
Oh I hope your plans happen as you hope! Xo
thank you Shannon for the awesome idea 🙂 I have a very retro old bedroom set and cannot afford to get new ones and want to do something with them… They are not real wood either… I will give it a try, what do I have to loose? Make my ugly furniture uglier? lol
Lol – exactly!!!
STUNNING!!! Love the colour and finish, and it’s perfect 🙂
It’s quickly become one of my favourite pieces!
I was so glad to see this project. Love it. I have a bedroom set that needs painted but was reluctant to spend the money on the chaukboard or milk paint. I do have a question though regarding keeping the furniture clean. On my wood furniture I use a Microsoft cloth to dust but use lemon oil twice a year to brighten and clean it. My furniture is an old fruitwood finish with lots of decorative carved wood. How do you clean and refresh the wax finish?
Mari the wax can be buffed with a soft cloth. You can also add more wax sparingly if necessary! 🙂
Thank you!
Brava for saying this! I like latex flat paint, too, and your hutch turned out beautifully!
It works like a charm, yes?! 🙂
Looks Beautiful! I love the color, I seem to be painting all the furniture I once painted white, gray. Is gray the new white? I also loved how you styled your pretties on the inside. Lovely.
PS Found you on Tatertots and Jello link party.
I think perhaps grey just might be the new white! 🙂 Happy you visited!!
i wanted to say that i have been painting furniture for over 3 years and i have never used just straight flat paint…i’ve always used gloss or semi gloss, chalk paint, or homemade chalk paint…you don’t have primer listed…that is correct? i am trying this for sure…one of my junk friends has a hutch for $50 OBO…i am for sure getting it after seeing this…yours is beautiful!
No primer – just quality flat latex after sanding off the glossy surface! Have fun!!!
EEEKKK! i’m so excited…i just bought some flat black paint and i’m about to try this on a set of coffee tables…
That is exciting!!! Let us know how it turns out!
Really beautiful! I recently painted a bathroom cabinet with flat paint and clear wax and I was so thrilled with the result!
🙂 Linda
That is fabulous!
With laminate furniture, use Zinsser oil or water based primer first. No sanding is required before applying the primer. You have to wait 4 to 7 days for the primer to cure. Then use latex paint over the primer. Use fine sandpaper on first coat of latex and paint second coat of latex. Distress furniture if wanted. Finally apply wax or polycrylic.
Thanks for the tips, Pam!
I LOVE your hutch! I’ve been debating on painting my grandmothers hutch, but you’ve made up my mind. One question, why is it good to use flat paint?
I know this is an old post but this hutch is what I long for!! I love it and your step by step tutorial helped tremendously, excited to be following your blog! Cheers!
I love the hutch. It looks beautiful. Can you tell me what color paint you used?
It’s called Grey Tweed!
Looks GREAT! Never thought of the wax. Finish look looks better than when I have used gloss paint. Now I have to find something to paint. With flat latex of course. PS love the color. So rich looking.
I’ve used gloss too. It’s great for certain looks. But this flat/matte finish is perfect with wax!
YOUR CABINET IS GORGEOUS!!!! EXCELLENT JOB…WHAT A DIFFERENCE!!
Thanks!
Looks great, you did a fantastic job of color coordination and achieving that distressed finish.
One comment, if you find the latex scraping off or peeling easily (which often happens with those laminate panels)
Be sure to use a shellac based primer first. It will seal the wood and adhere to almost anything. Then your latex will stick like glue, no peeling!
Great job!
Thanks for the tip. On this particular piece that hasn’t been an issue.
I am so happy I found this blog while looking for “painting a hutch” . The one I have was solid oak bought in NC in the mid 80’s I know I am showing MY AGE,! After painting my living, dinning, and kitchen a pale gray/ taupe the piece just stood out like a sore thumb, almost a week later I’m,getting close to the distress and wax steps. I purchased minwax paste wax and the lowes chalky Paint aging wax for the finish. I. Am nervous to go the next step but excited to get done. Thanks for the step by step directions! For the paint I used SW emerald matte finish matched to Ben Moore Copley gray. I painted the inside back with a pale cream satin latex I had on hand. I will post a pic when it is done. You have a lovely home, stick with “your style” it definitely works. I love the warm and welcoming entry way!,
Thank you so much for your comment, Judy. I’m so happy to hear you’re painting your hutch to make it more you!
I love this!! I just found this on pinterest and has given me plenty of ideas for a hutch I’m taking from my mother. One question though, how much paint did you use? The hutch I’m acquiring is similar in size and I don’t have paint on hand so just curious as to how much I should buy! Thanks in advance! 🙂
You could get away with a quart I think. 🙂 Have fun!
I love this piece, I been looking for one but they all seem to be so expensive. Love the colors inside and out. My favorite place to find great old furniture are garage sales and estates sales at high end neirhborhoods, it never fail.
What is the CIL Gray Tweed? Is CIL a Canadian Paint. If so, would Sherwin Williams in USA be able to match it? I am wondering if they would have the formula here. It is very pretty. I have a narrow chest in upstairs hallway. Not too pretty, but right size for hallway.
Thank you. Like you and your posting friends articles.
It is a Canadian company. You could always ask!
Shannon, your hutch is gorgeous! I recently started subscribing to your blog and came across this post while looking for ways to change our existing furniture. We have a few Ikea pieces that I would love to paint. Is this furniture considered laminate? Not exactly sure what laminate is. 🙁 How should I paint it? I know very little about furniture and am relatively new to all this DIY, but find I’m loving it.
I recently purchased a console table at an antique/collectible store that is pretty scratched on top – perfect for a makeover. It has a dark, very glossy finish that I’d like to make look rustic. My mom gave me an antique sewing case (for thread) that desperately needs some help. Any suggestions?
Thanks so much for all your advice and tutorials. Keep it up! You help people like me actually believe we can do this! God bless!!
Ikea furniture can be painted. You’ll need to use a really good primer likely. And even with that it won’t stay perfectly painted, so if you want perfect paint, don’t paint laminate type furniture. But if you don’t mind the chippy look – go for it! You can always sand a piece to get the gloss off (I recommend it) before priming too. 🙂 Have fun with it!
Love your tips. As a former faux finisher, I’m not crazy about chalk paint. I only use water based acrylic for most projects. I do, however, always use TSP to clean the furniture first. I love your color. It’s so smart looking, and at $50 how could you go wrong. BTW, that bar cart was stellar. Bar carts I like are around $500, so I transformed an end table.
I know! Bar carts are hard to find cheap!
hi, I am painting an old stand up jewelrybox of my mothers that I think is part presswood with wood grain something on it. I’m using SATIN latex paint in zebra stripes. I want to make it old looking..muted. Not bright white and black. Something I saw, the white/black looked yellowed. I think I put a stain over it and wipe it off to do that right? But what color stain? Help. What is glazing?
That’s a lot of questions! Yes, you can put stain over the top of paint. It will require a longer dry time. Or you can use a dark wax over clear wax (using it over clear wax makes it easier to work with rather than just using the dark wax) like in this post http://akadesign.ca/easiest-furniture-glazing-antiquing-ever/. Glazing is when you mix paint with water. Like in this post: http://akadesign.ca/coffee-table-makeover/. I hope that helps!
I love this post! I just bought a sideboard at an antique store today and was looking for a way to refinish. Do you have any tips on how to pair the paint color with wax color? I’d like to make my piece an off white or cream but, I’m terrified of choosing the wrong combo.
Most wax is clear-ish. So you can choose whichever color paint you like!
Hi Shannon,
I agree about the paints. I’ve tried them all. Specialty paints are very expensive for a tight budget, so I prefer latex. Also, living in dry Colorado, I’ve found eggshell is a little easier to wax than flat. It seems to use up less clear wax, but doesn’t give a high sheen. I like it.
Love your hutch!
Ann
Good to know about the dry area. We have it so humid much of the year here. 🙂
Shannon,
I am about to start a project painting the inside of a hutch just like this one. I’m concerned about the paint being tacky and sticking to my china/peeling. Is the wax a sufficient sealer?? I saw another post about using Polycrylic??? You’re the expert….what do you think??
You could do either!
Turned out beautiful – really lovely work and colour
Would take it off your hands in a flash lol
Lol. Thanks, Emz.
Hi! Excellent how-to article of the hutch painted with latex paint!! I’m absolutely disgusted by the cost of all those fancy milk and chalk paints. I simply won’t pay that much for paint…period. I’ve always painted my furniture with latex paint. Once you distress the piece, I really don’t see much of a difference between latex and chalk paint. They both look beautiful! I’m not as good as you though…I don’t wax afterwards; that’s too much work! I just get paint in egg shell or satin. All my furniture pieces painted with latex have held up so well and have stood the test of time, so save your money and go with latex. You can also make your own chalk paint out of latex, if you’re dead set on that look. Instructions are all over the internet. So, your hutch looks amazing!! Enjoy!!
Thank you!
Love the hutch! What is CIL paint?
CIL is a Canadian brand of paint.
Hi Shannon, love this piece. Question though; I was under the impression that latex paint was too hard to absorb a wax finish unless you added plaster of paris or another additive to make it into chaulk paint?
I used flat latex paint so it is somewhat chalky! It “absorbed” the wax just fine.
Do you think satin finish would work ok or does it have to be flat?
I honestly don’t know because I’ve only tried it with flat. The wax wouldn’t take so well on satin if you wanted to wax it afterwards.
Wow! That is exactly what I need to do to my 70s hand me down China cabinet. I can’t believe the difference.
Crazy difference, right?!
Love this post! I need to start finding thrift stores in Florida! You were so lucky to find that hutch at a steal of a deal! The makeover, is absolutely gorgeous! I’m still repainting my entire house inside. Walls, sealing, trim. Oh My! I’m thinking about painting the hardware on the doors black. What do I use for this? Also, do I use Latex paint for my kitchen cabinets? ( When I get to that point). Thanks for your advice, Shannon!
Wow! That’s a lot of work! I’ve heard of bloggers using spray paint for the door hardware. But I honestly have no experience with that. We just bought oil-rubbed bronze hardware one door at a time. You can use latex for your kitchen cabinets. Read about our kitchen cabinet painting adventures here: http://akadesign.ca/how-not-to-paint-kitchen-cabinets/.
Could I use flat latex paint OVER chalk paint? I am mid-project on a side table and not thrilled with what I have so far. Can I just paint it all out with flat paint?
I don’t see why not!
Love this – great job! But I especially love the wreath do you have instructions on that anywhere on your blog? Thank you
Do you mean the paper roll wreath, Mary Beth? If so, I don’t think I ever did a tutorial for it because I used this one ages ago from Miss Mustard Seed: http://missmustardseed.com/2009/12/theres-nothing-new-under-sun/
I have a solid teak handmade hutch that I bought in Japan in the early 80’s. They stained it what we would know call in IKEA language “black/brown”. I’ve wanted to paint it for decades but my mother and others insisted that because it’s 100% teak that it would be a sin to paint it because it would lose it’s value. I could care less about the value because I don’t ever see me selling it. We recently retired from the military and it has withstood all the moving like a pro (it’s heavier than yeck!!!) Would it really be a full-fledged sin to paint it? Perhaps I’m just not seeing what others are. I think a 3rd party opinion like yours would be helpful..whatever advice you would give even if its not a vote for me. 🙂
~Thanks bunches~
Honestly I’d paint it. It’s yours and you don’t like it as is. So change it!
I too was looking for an inexpensive piece for my living room, as well as an inexpensive paint!! I checked out the milk and chalk paints and laughed. I’m a single mother and there was no way I was going to be able to afford that! I painted my piece with latex (gray also!!). Then I finished it up with a finishing wax. However, I believe I may have used too much wax and it’s “gummy” in spots. Is there a way to save my piece without having to re-sand & paint the entire piece? I truly hope there’s something that can be done! Granted, it’s still has a day or two to “cure” as I literally just finished it. My 2nd coat of wax was last night (1-23-17). Perhaps if I give it time? But, what if that doesn’t solve the problem?!? Help, please!! I truly love the way it turned out with the exception of the sticky wax in areas! (First time distressing a piece and now I’m hooked!!)
TIA
Finishing wax should be able to be buffed out. Just get a clean, lint-free cloth and work it out. 🙂
Hi! Just to be clear, you’re saying to use 2 waxes…correct?? First the clear one, then the darker one correct? After that, do I need to seal it with a poly or anything?? Thanks so much!!
Yes. By applying the clear wax first, you won’t have such a concentration of dark wax and you’ll have more time to work in the dark wax. And no you don’t apply poly over wax! 🙂
Thanks Shannon, you’re the best!! Now, off to Lowes to get some waxes! Wish me luck! Lol
Wow! Thank you for restoring my faith that refinishing my dresser, bedside tables AND HUTCH in *Gasp* latex paint is not detrimental! Heaven forbid I use something other than chat or milk paint!…… or the fancy name brand wax finishes!
This is gorgeous, as is your farmhouse table !!! Do you think it is essential to use flat paint?? I bought glossy just for the easy of wiping it down,,, I wasn’t sure i was going to use a wax finish, but you have convinced me!
THANK You for this post!! LOVE It!!!!!!
You could try the glossy paint – I’ve not used glossy on our projects but I don’t see why it wouldn’t work. Just be careful with your brush strokes – glossy paint shows those more.
Hello! What do you mean by CIL color match? If I take those words into Sherwin Williams with the color you said you used, will they be able to mix it for me or do I need additional information? Thank you!
Hello Emily! CIL is a paint brand here in Canada. So the color was matched to CIL’s Grey Tweed and Stratosphere into a Sherwin Williams paint. Does that help explain it better?
Hi, I was wondering what shade of gray pint you used? I have the hardest time with gray as they hold a purple background hue. I amlooking for a true light gray paint.
Thanks
Hi Sue,
As the post says:
“the paint color of the outside of the hutch is Grey Tweed (a CIL color matched at Sherwin Williams) and the inside is Stratosphere (also a CIL color matched at Sherwin Williams).”
So, I failed to do my research ahead of time and we ended up with a semi-gloss latex paint for two pieces in the soon-to-be nursery. How necessary is the wax or paste after painting, both generally and given the type of paint we used? Also, bear in mind one of the pieces also contains some stained portions, because we had to make things more complicated… Thanks in advance!
Don’t worry! It happens! If you let the semi-gloss fully cure (like 30 days I think, but check the label on the can) before heavy use of the pieces, you should be okay. 🙂 And congrats on baby coming!
Thanks for the information!! I have loved refinishing these pieces and now I want to do it to everything! My husband, however, hates it and refuses to help with another project. I guess that means I’ll have to wait until after the baby is here, you know when I have all that spare time. Ha!
Lol. Yes, all that spare time!
I painted 6 dining room chairs with latex paint about 6 years ago and now it’s rubbing off on the backs where we grab the chairs to pull them out from the table and on the seats.. They look awful and I don’t know what to do short of stripping them down and starting over. I hate painting with oil so is it possible to sand down the bad parts and paint them with chalk paint (which I’ve never used before). BTW….your hutch is GORGEOUS!
Thanks!
Kathy
Aw. I’m so sorry. It’s tough when it’s something that gets used so constantly AND likely with unclean hands too. Do you have the original paint? Or know the color and finish? You could try cleaning those areas and sanding just enough to get rid of any edges and then paint those parts to match? Just make sure you shake any leftover paint really well or the color may not match perfectly! Please let me know what you decide and how it turns out!
Thank you so much for the reply! And thank you for the suggestion. That is what I was thinking might be the best solution. I do still have the original paint. LOVE your blog!
This is beautiful. When you use a finishing wax, does the piece turn out “shiny”? I really want a semi-gloss look on my finished project. Thank you for posting.
Yes and no. Wax can be a tiny bit shiny. But in my experience it’s been pretty matte.
“Don’t buy a paint and primer in one!” That was my first mistake. I recently did that, not realizing how gloppy and thick it was. The piece did not turn out like I wanted, not to mention I still had to do three coats for coverage, plus it dried super fast before I was done working it. Thanks to you, I now realize why that paint was wrong. I’m now going to go to Sherman Williams for a better paint to redo this piece. Thanks for the tip!
Yes! Paint and primer in one can be great when painting walls, etc. But not so much for furniture!
Thanks for the info! So, even though you did not use a paint and primer in one, you didn’t need a primer at all?? Planning on painting my china cabinet – it’s a blonde wood that my MIL started to repaint to a yellow. Time to finally do something about it!
I just found your blog and 😍😍😍! I’ve been searching for a blog with someone who isn’t afraid to use latex paint on furniture. Thank you! Latex paint is so easy to find and choose the perfect color for.
I’ve painted a dresser and couldn’t find anyone who used wax over latex… THANK YOU!
I’ll be digging through your blog for the rest of the day lol
Do you lightly sand before you apply the wax? I didn’t get flat paint, unfortunately. I only used a paint sample size and it didn’t come in flat.
Sherwin Williams advertises their duration interior paint as a paint and primer in one, so I don’t understand how you didn’t use a primer?
Hi Emily,
I’m not sure I understand the question? When this post was originally written, most paint and primer in ones were pretty awful – thick and gloppy. I didn’t use a separate primer. And yes, SW now advertises their duration line as a paint and primer in one. I don’t recall that being pointed out when I originally purchased the paint though, so it wasn’t really a deciding factor. If that doesn’t help clarify, please let me know what I can clear up!
xo, Shannon
Hi! I’m preparing to paint furniture for the first time ever (eek) with an old china hutch I’ve bought recently. After going back and forth with all the conflicting opinions about chalk vs latex paint, I think I am leaning latex after reading this! I do have a question though – why is using “flat paint” so important? I have seen this mentioned on several different websites, but without any explanation as to why. Would the “satin” finish of a Sherwin Williams paint work? I just want to make sure I get this right the first time!
Hi Stacey,
Flat is recommended because it works best. Satin just does not leave the same finish, and doesn’t quite “look right” on furniture. The further away from flat you go – eggshell, satin, semi-gloss, gloss – the more brush strokes you will see and the shinier the finish will be. You can use something other than flat, but you will have a harder time making the finish look good – especially as a beginner. 🙂 Hope that helps.
Let me see if I got this Sand, Clean it, paint (flat), dry, seal. No additives by needed? Like Plaster or anything else? If not then why buy anything else other than latex. Thank you in advance.
How would I get the colors at Lowes? What is CIL? Painting my hutch & yours is the closest I’ve found to what I want!
Hi there. CIL is a Canadian paint brand, and I don’t believe it’s available at Lowe’s. You would have to ask your local paint place to try to color match the colors I mentioned. Usually they do a fairly good job color matching, but it may not be exact.