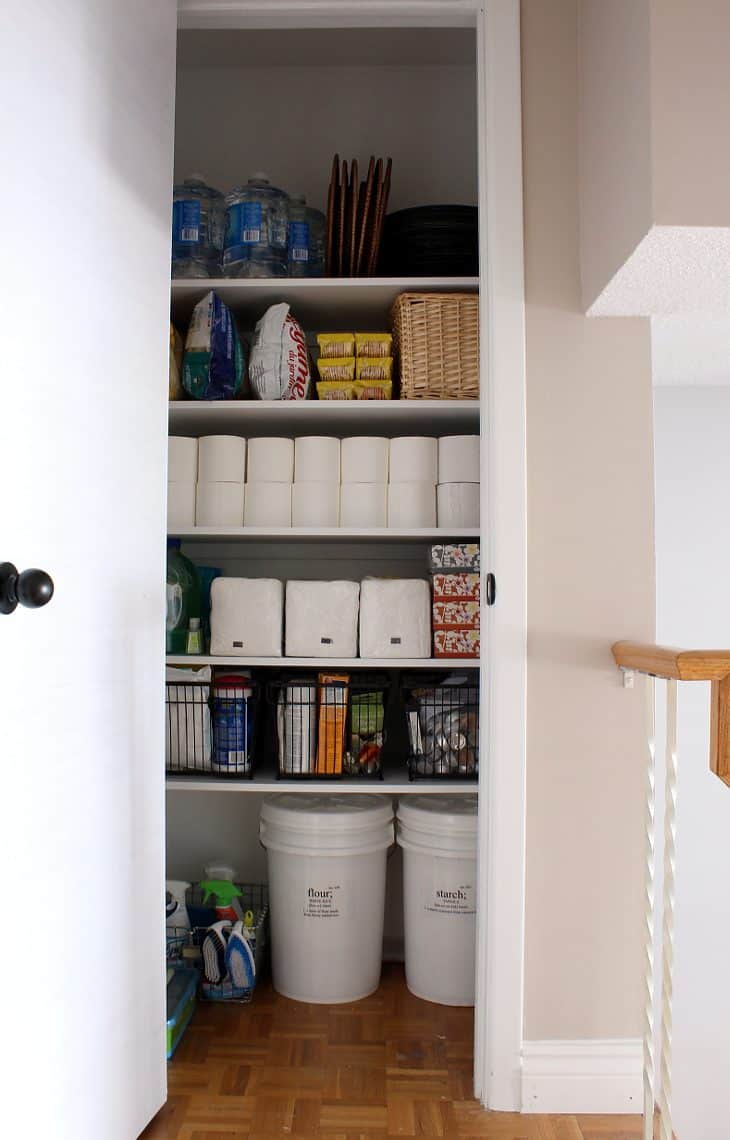
In my family’s last house, there was a closet at the top of the stairs that wasn’t very useful – it had a single shelf and a hanging rod. Since we already had a coat closet and a linen closet, I’m not even sure what the original intention was for this space. If you’ve ever had a closet that wasn’t quite working for your storage needs, like this one, you know how important it is to make it more functional. Adding custom DIY closet shelves is one of the simplest and most effective ways to maximize storage space and get things organized.
In this post, I’ll show you how easy it is to create your own DIY closet shelves. This beginner-friendly project can be completed in just a weekend and will help you transform any underutilized closet into a more efficient and organized space. You’ll love how much extra storage you’ll gain with this simple upgrade!

How to DIY Easy Closet Shelves
Supplies:
- 1″ x 2″ primed mdf *
- melamine shelving *
- #10 2″ flat head wood screws *
- BLACK+DECKER Matrix Combo Kit
- glue or construction adhesive (optional)
- paint and paintbrush (optional)
*Actual amounts will depend on your closet measurements.
Instructions
1. Sand away existing materials
Remove any existing (unusable) shelves or rods. Sand the wall smooth using the Matrix sander attachment.

2. Measure and mark for shelves
Measure and mark where you’d like the shelves to be and how far apart you’d like them on the back and two side walls of the closet. This will vary based on what you’d like to have room to store. We left extra room on the bottom for large pantry pails. You may want to do the same, but for a vacuum or large cases of food. Our other shelves are equally spaced at 10″ apart. Spacing will depend on what you’d like to store in your pantry.

3. Mark to level shelves
Mark each shelf with a level and piece of wood (or just a large level if it will fit into your closet).

4. Find studs
Find and mark the studs along your shelf lines.

5. Mark length for shelving supports
Mark the lengths for each of your shelf supports (back and sides). Then using a square mark a straight line for cutting. Repeat for all supports.


6. Cut shelves
Cut along marked lines on shelf supports using Matrix jigsaw attachment. Repeat for all supports.

7. Mark stud location on shelf supports

8. Pre-drill
Pre-drill all holes for screws on shelf supports using Matrix drill attachment.

9. Attach shelf supports to walls
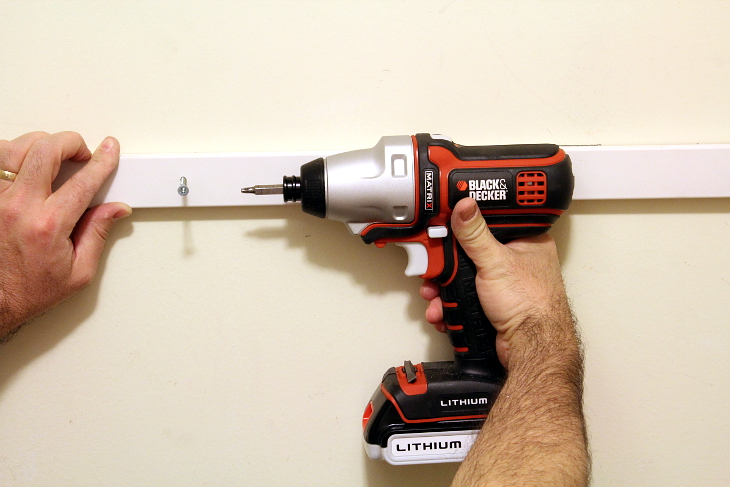
Attach shelf supports to walls (back wall and side walls) using screws and Matrix driver attachment.

10. Paint if needed
At this point, if your closet needs painting, paint the whole thing, including shelf supports.
11. Measure and cut melamine
Measure and cut melamine to size for each shelf using the Matrix jigsaw attachment.

12. Put shelves on supports
Put shelves on supports. Glue or screw into place if desired.

FAQs
Not at all! This project is beginner-friendly, and you don’t need advanced experience with power tools. As long as you’re comfortable using a drill and saw, you should be good to go.
This will depend on what you plan to store, but for general storage, I spaced my shelves 10″ apart. You can adjust the spacing to fit your needs, whether that’s for larger items or smaller, more specific storage.
Absolutely! Melamine is great for a clean, modern look, but you could also use plywood or solid wood if you prefer a different aesthetic.
Definitely! Once your shelves are installed, you can paint them to match the rest of your closet or home décor. Using a durable, high-quality paint will ensure that your shelves look great for years to come.

DIY Closet Shelves
It's so easy to create your own DIY closet shelves. This beginner-friendly project can be completed in just a weekend and will help you transform any underutilized closet into a more efficient and organized space. You’ll love how much extra storage you’ll gain with this simple upgrade!
Materials
- 1″ x 2″ primed mdf *
- melamine shelving *
- #10 2″ flat head wood screws *
- glue or construction adhesive (optional)
- paint and paintbrush (optional)
Tools
- BLACK+DECKER Matrix Combo Kit (or drill, and jigsaw)
Instructions
- Remove any existing (unusable) shelves or rods. Sand the wall smooth using the Matrix sander attachment.
- Measure and mark where you’d like the shelves to be and how far apart you’d like them on the back and two side walls of the closet. This will vary based on what you’d like to have room to store. We left extra room on the bottom for large pantry pails. You may want to do the same, but for a vacuum or large cases of food. Our other shelves are equally spaced at 10″ apart. Spacing will depend on what you’d like to store in your pantry.
- Mark each shelf with a level and piece of wood (or just a large level if it will fit into your closet).
- Find and mark the studs along your shelf lines.
- Mark the lengths for each of your shelf supports (back and sides). Then using a square mark a straight line for cutting. Repeat for all supports.
- Cut along marked lines on shelf supports using Matrix jigsaw attachment. Repeat for all supports.
- Mark stud location on shelf supports.
- Pre-drill all holes for screws on shelf supports using Matrix drill attachment.
- Attach shelf supports to walls (back wall and side walls) using screws and Matrix driver attachment.
- At this point, if your closet needs painting, paint the whole thing, including shelf supports.
- Measure and cut melamine to size for each shelf using the Matrix jigsaw attachment.
- Put shelves on supports. Glue or screw into place if desired.
DIY closet shelves are a fantastic way to create extra storage in your home without spending a lot of money. By following these simple steps, you can easily build your own shelves and completely transform a cluttered or underutilized closet into a functional and organized space. Happy building and organizing!
Have you ever built your own closet shelves? Let me know in the comments!

Want to see more content like this in your Google searches?
This button tells Google that Home Made Lovely is a source you like, so it can show you more of it.