Does anyone else feel like their fridge can go from perfectly tidy to complete chaos in a matter of days? I know I’ve been there—especially during busy weeks or after a big grocery haul. A disorganized fridge used to leave me frustrated and wasting food (and money). But once I found a simple system that worked for my family, everything changed. Let me show you how you can organize your fridge step by step, so it’s functional, tidy, and works for your household.

Before we dive in, if you’re looking for creative ideas to maximize fridge space and keep it looking Pinterest-worthy, don’t miss my post on Fridge Organization Tips: Ideas to Simplify Your Life. It’s full of small tweaks you can try to make your fridge even more efficient and visually appealing.
A 5-Step Guide to Organizing Your Fridge
Step 1: Evaluate Your Refrigerator
Before diving into the nitty-gritty, take a good look at your fridge as it is right now. What’s working well, and what’s driving you nuts?
- Do certain items always end up forgotten in the back?
- Are there foods that go bad too quickly because they’re hard to see or access?
- Are raw meat and ready-to-eat items (like leftovers) too close for comfort, risking cross-contamination?
Grab a notepad or your phone and jot down a few observations. Taking time to evaluate how your fridge is currently functioning will make the rest of the process much smoother.

Step 2: Make a Plan
Now that you know what isn’t working, it’s time to brainstorm how your fridge could work better.
- Start by thinking about your family’s habits: Do you tend to buy lots of fresh produce, or are you all about quick-prep meals?
- What items do you reach for daily? These should be easy to grab.
- Sketch a quick layout (it doesn’t have to be fancy!) of where different items could live.
For example:
- Store frequently used condiments on a lazy Susan.
- Place raw meat on the bottom shelf to contain any leaks.
- Dedicate a drawer to snacks for your kids, so they can grab-and-go without rummaging through the whole fridge.
This plan doesn’t have to be perfect—it’s a starting point you can tweak as you go!
Step 3: Gather Storage Solutions
The right tools can make all the difference in keeping your fridge organized. But before you rush out to buy bins and containers, take a few important steps:
- Measure Your Fridge: Check the dimensions of shelves, drawers, and the space between them. There’s nothing worse than bringing home a beautiful organizer that doesn’t fit!
- Assess Your Needs: Do you often buy in bulk, or do you prefer smaller quantities? If you always have two dozen eggs, a 12-egg holder won’t cut it.
- Start Small: You don’t need to buy every organizing gadget out there. Begin with versatile items like clear bins or stackable containers and see what works.
Pro Tip: Choose clear storage solutions so you can see what you have at a glance. It’ll save you time and reduce food waste.
Step 4: Clean Out Your Fridge
This might not be the most glamorous step, but it’s one of the most rewarding.
- Empty It Completely: Remove every single item from the fridge. If it’s been a while, this is the best way to ensure you’re starting fresh.
- Check Expiration Dates: Toss anything expired, moldy, or questionable. It’s also a good time to take note of items you’re consistently wasting—this might help you adjust your shopping habits.
- Clean Thoroughly: Wipe down shelves, drawers, and walls with warm, soapy water or a non-toxic all-purpose cleaner. For stubborn spots or sticky spills, use a toothbrush or scrub brush.
- Optional Deep Clean: If it’s been ages since the last deep clean, remove shelves and drawers entirely and wash them in the sink. Just be sure everything is completely dry before putting it back.
Pro Tip: Do this step right before your next grocery trip, so there’s less food to move and organize.

Step 5: Set Up Zones
Here’s where the magic happens—putting everything back in a way that’s logical and functional for your family.
- Group Similar Items Together: Store dairy products like milk and cheese on one shelf, condiments on the door, and snacks in a designated bin.
- Use the Right Zones: Remember that some areas of your fridge are colder than others:
- Upper shelves: Great for leftovers and ready-to-eat foods.
- Bottom shelf: Ideal for raw meat to prevent cross-contamination.
- Drawers: Perfect for produce, with one for fruits and another for vegetables.
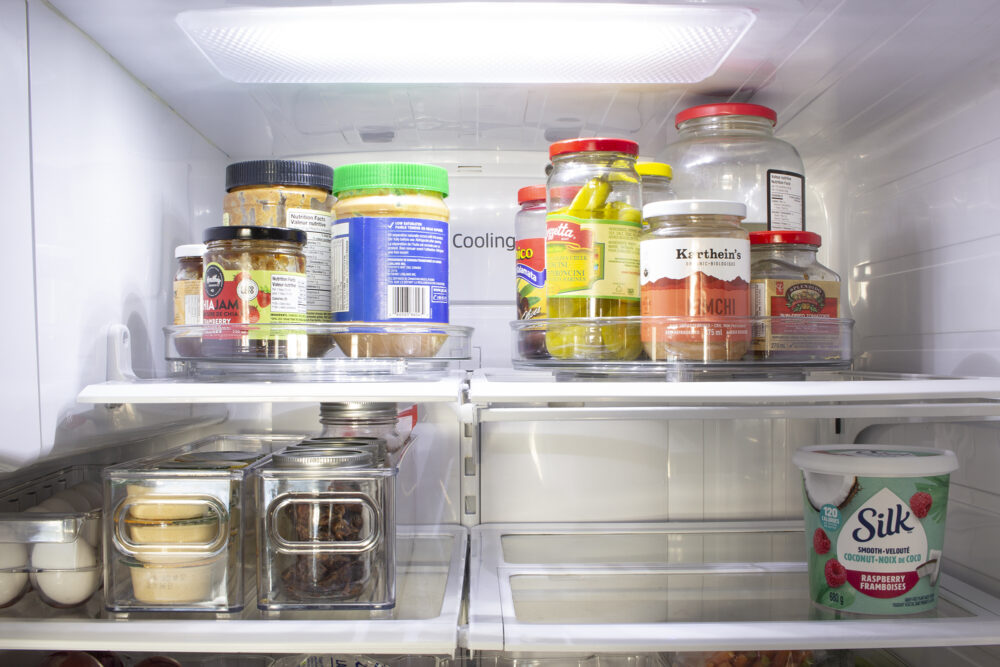
- Corral Small Items: Use bins or lazy Susans for smaller items like dips, cheese sticks, or jars. This prevents them from getting lost in the back.
- Adjust As Needed: After a week or two, evaluate how the zones are working and make tweaks. Flexibility is key to keeping your fridge functional over time.
Pro Tip: Leave space for the items you always buy—whether that’s Dean’s lunch leftovers or extra produce during holidays. A little breathing room keeps things easy to manage.
Wait, Where Are All Your Drinks?
We have a mini fridge that holds all of our drinks, which is why there’s no milk, juice, or anything else in the main fridge.
Juice, milk, creamer, wine, you-name-it goes in the mini fridge over by the coffee bar side of the kitchen.
This allows our guests to help themselves and also frees up space in the big fridge – which comes in handy with five adults’ worth of food in there!

Fridge Organization Video
FAQs
I recommend giving your fridge a deep clean every 1–2 months. A quick weekly wipe-down is helpful for spills or sticky spots.
Keep your fridge at 37°F (3°C) to ensure food stays fresh without freezing. Use a fridge thermometer for accuracy.
Store fresh herbs in a jar of water (like a bouquet) with a loose plastic bag over the top. Keep them in the fridge door for easy access.
Use clear, airtight containers to keep leftovers fresh and visible. Store them on a middle shelf where they’re easy to see and grab.
An organized fridge doesn’t just look pretty—it makes life so much easier. From simplifying meal prep to reducing food waste, a little time spent organizing your fridge can make a big difference. I’d love to hear how your fridge organization goes—share your tips or struggles in the comments below. Let’s tackle the chaos together!
