If you’ve ever looked at your kitchen counters and thought, “Why is there so much stuff?” you’re not alone, I’ve been there! The kitchen is one of the busiest spots in my house, and it’s easy for countertops to get cluttered. But with a few thoughtful steps, I’ve figured out how to transform them into a tidy, functional, and even beautiful space that works for me. And in this post I’m going to show you how you can organize your kitchen counters too!

If you’re looking for a full guide to organizing your entire kitchen, from pantry to cabinets, be sure to check out my post on How to Organize Your Kitchen. It covers everything you need to know to create a kitchen that’s organized and easy to use, no matter how busy life gets. Once you have a clear system throughout the kitchen, it’s much easier to maintain tidy counters, too!
How to Organize Your Kitchen Counters
Step 1: Clear Everything Off
Start by completely clearing off your counters. Yes, everything! Removing every item lets you see the full surface and creates a blank slate for arranging only the things you truly want and need.
This step is also a great opportunity to give your counters a thorough wipe-down—consider it a fresh start.
Step 2: Identify Your Essentials
Next, ask yourself: What do I actually use every day? Identify the items you reach for regularly, like your coffee maker, knife block, or toaster. These essentials should have prime real estate on your counters, but be selective! The less cluttered your counters are, the easier they’ll be to clean and use.
If you have appliances you don’t use daily, like a blender or stand mixer, think about storing them in cabinets or pantry areas. This frees up valuable counter space for the things you do use daily.
Step 3: Define Functional “Zones”
To make the most of your kitchen counters, divide them into “zones” based on the tasks you do most often. Here are some common zones to consider:
- Prep Zone: Designate a space for food prep close to your cutting board and utensils.
- Coffee Station: If you love your morning coffee, create a cozy corner for your coffee maker, mugs, and sugar jar.
- Cooking Zone: Keep essentials like salt, oil, and spices near the stove, so you have what you need while cooking.
These zones make it easier to maintain organization because every item has a “home.” When you’re finished using something, you know exactly where it goes back.
Step 4: Add Functional Storage Solutions
Sometimes, counter clutter happens because we lack a designated spot for things. Small storage solutions can make a big difference here:
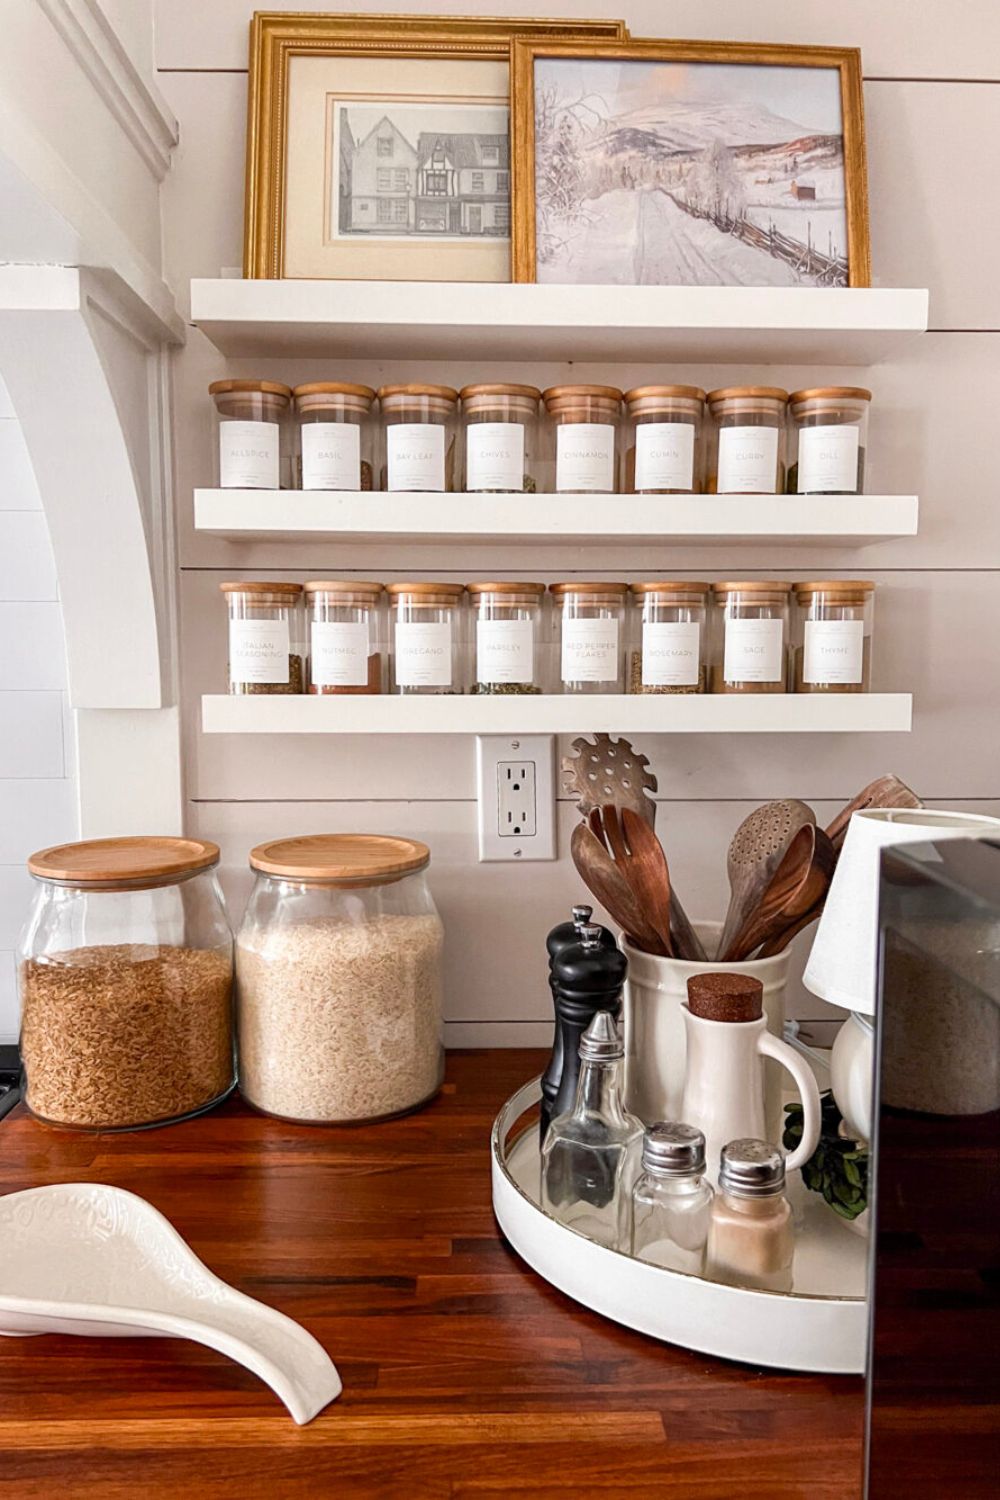
- Trays: Corral items like oils and spices in a tray to make them look intentional and contained.
- Utensil Crocks: Place a crock with frequently used utensils near the stove for easy access.
- Tiered Racks: If you’re short on space, tiered racks let you store items vertically, doubling your counter space.
These additions help keep things visually organized without taking up too much space.
Step 5: Decide What Stays vs. Goes Away
A streamlined countertop often means making choices about what stays on display and what’s stored out of sight. Here’s a simple rule: If it’s not something you use every day (or doesn’t add to the beauty of your kitchen), consider finding it a home in a cabinet or drawer.
For instance, a pretty fruit bowl? Keep it out. That bulky blender you rarely use? It can probably be tucked away until you need it.
Step 6: Maintain Your System with Simple Habits
A well-organized kitchen counter doesn’t need to be a one-time thing. Simple habits, like doing a quick nightly clean-up or putting items back in their “zones” after each use, can keep your counters clear and functional every day.
The goal isn’t a Pinterest-perfect kitchen but a space that serves you and your family without feeling cluttered or chaotic.
FAQs
Keep only frequently used essentials on the counter, such as a coffee maker, a few cooking utensils, or a cutting board if you use it daily. Everything else—like seasonal gadgets or rarely used appliances—is best stored in cabinets or pantry space to keep the counters clear and functional.
Use space-saving solutions, like wall-mounted shelves, magnetic strips for knives, or cabinet organizers to free up counter space. For very small kitchens, consider using stackable containers or hanging pots and pans to maximize vertical space.
Aim for balance by keeping a few functional items on display. For instance, keep cooking oil in a pretty bottle, use a small tray to group similar items, or add a potted plant for a touch of greenery. This keeps counters functional but still visually appealing.
Wrapping Up: A Kitchen That Works for You
Organizing your kitchen counters doesn’t mean hiding every single thing. It’s about creating a practical setup that works for your lifestyle, where everything has its place. By following these steps, you can transform your kitchen counters into a functional, beautiful space that makes daily tasks feel a little easier—and maybe even a little more enjoyable.
How are your kitchen counters looking and fuctioning? Let me know in the comments below!

Want to see more content like this in your Google searches?
This button tells Google that Home Made Lovely is a source you like, so it can show you more of it.
Im looking for just a weekly schedule yo go by for daily cleaning,just to have sn idea!
THANKYOU!!
SUSAN DIEHL
Hi Susan,
May I ask a couple of questions to clarify? What type of schedule? A weekly cleaning schedule? For the whole house? Just the kitchen? Or something else entirely?
Well, It’s the little things in life that mean the most and make up the larger moments in our lives! I Always keen to explore new ideas for my kitchen. This blog is really helpful to me thanks alot for sharing this with us.
Thanks for reading!
I love your shelves. When decluttering I donated away all the dishes that weren’t white so everything matches. Its so much easier, but I haven’t taken those uppers down yet. Removing the doors is a quick test solution. We want to move the cupboards to enlarge a kitchen window. I will test it and thank you.
It’s a good test to see if you can live with seeing the dishes for sure!
Love the feeling of your kitchen in your photos! Looks so collected and charming. Thanks for the ideas and inspiration with several easy tips to implement in our kitchen!
Sonja
Blue Tea Tile
http://www.blueteatile.com
Thank you! I do love our kitchen. 🙂